
2 New host
Overview
In this section you will learn how to set up a new host.
A host in Zabbix is a networked entity (physical, virtual) that you wish to monitor. The definition of what can be a "host" in Zabbix is quite flexible. It can be a physical server, a network switch, a virtual machine or some application.
Adding host
Information about configured hosts in Zabbix is available in Configuration → Hosts. There is already one pre-defined host, called 'Zabbix server', but we want to learn adding another.
To add a new host, click on Create host. This will present us with a
host configuration form.
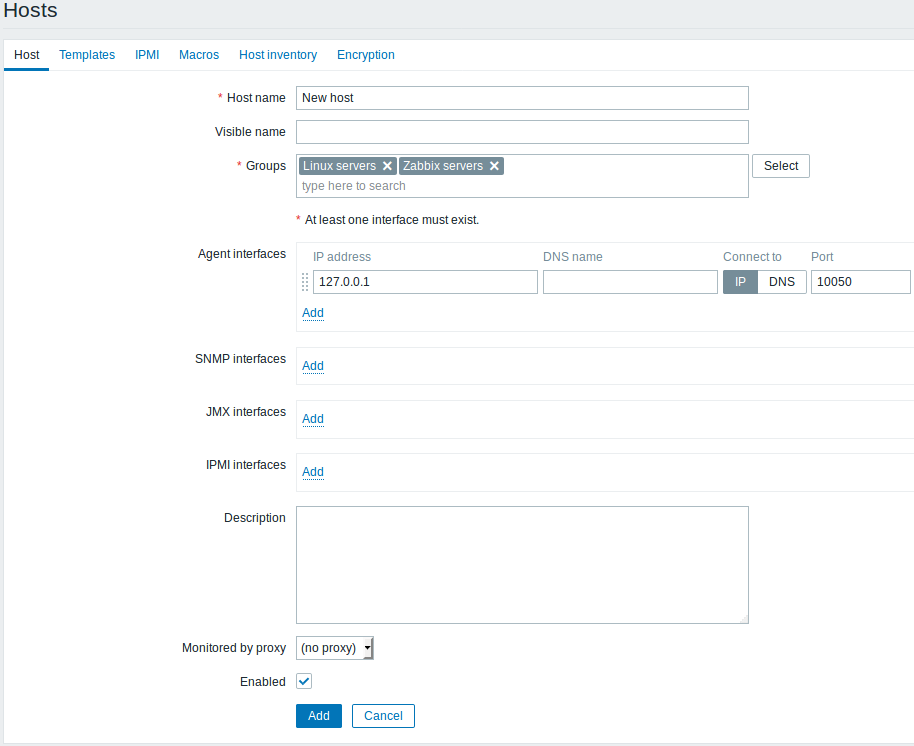
All mandatory input fields are marked with a red asterisk.
The bare minimum to enter here is:
Host name
- Enter a host name. Alphanumerics, spaces, dots, dashes and underscores are allowed.
Groups
- Select one or several existing groups by clicking Select button or enter a non-existing group name to create a new group.
All access permissions are assigned to host groups, not individual hosts. That is why a host must belong to at least one group.
IP address
- Enter the IP address of the host. Note that if this is the Zabbix server IP address, it must be specified in the Zabbix agent configuration file 'Server' directive.
Other options will suit us with their defaults for now.
When done, click Add. Your new host should be visible in the hostlist.
If the ZBX icon in the Availability column is red, there is some error with communication - move your mouse cursor over it to see the error message. If that icon is gray, no status update has happened so far. Check that Zabbix server is running, and try refreshing the page later as well.