
Table of Contents
4 VMware monitoring setup example
Overview
The following example describes how to set up Zabbix for monitoring VMware virtual machines. This involves:
- creating a host that represents your VMware environment;
- creating a low-level discovery rule that discovers virtual machines in your VMware environment;
- creating a host prototype, based on which Zabbix will generate real hosts for virtual machines discovered by the low-level discovery rule.
Prerequisites
This example does not cover the configuration of VMware. It is assumed that VMware is already configured.
Before proceeding, set the StartVMwareCollectors parameter in Zabbix server configuration file to 2 or more (the default value is 0).
Create a host
1. Go to Data collection → Hosts.
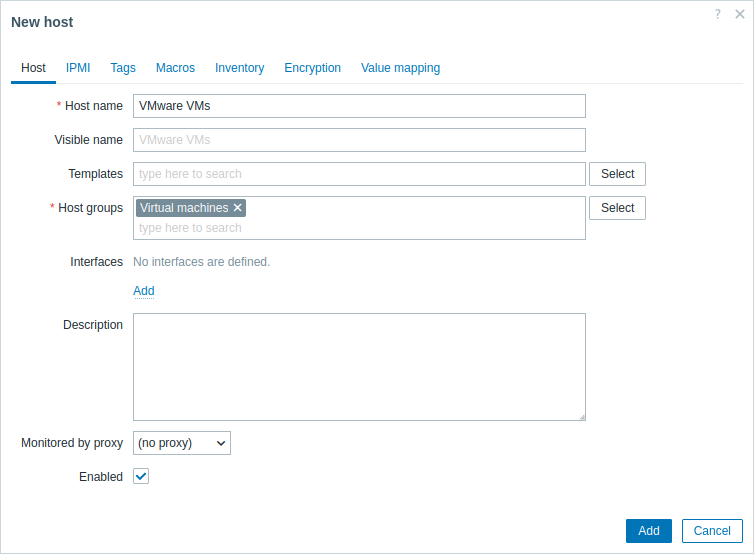
2. Create a host:
- In the Host name field, enter a host name (for example, "VMware VMs").
- In the Host groups field, type or select a host group (for example, "Virtual machines").
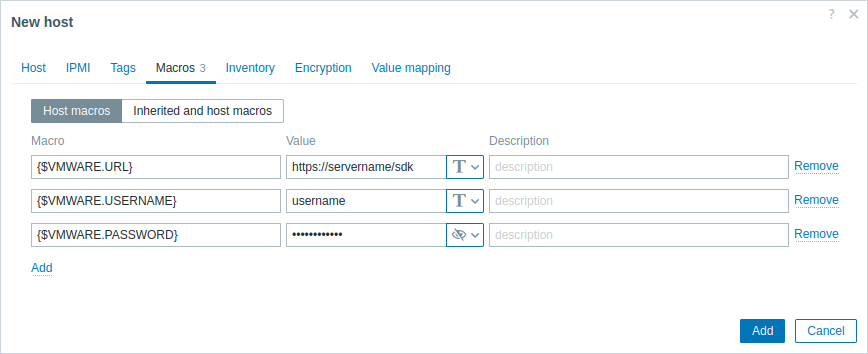
- In the Macros tab, set the following host macros:
- {$VMWARE.URL} - VMware service (ESXi hypervisor) SDK URL (https://servername/sdk)
- {$VMWARE.USERNAME} - VMware service user name
- {$VMWARE.PASSWORD} - VMware service {$VMWARE.USERNAME} user password
3. Click the Add button to create the host. This host will represent your VMware environment.
Create a low-level discovery rule
1. Click Discovery for the created host to go to the list of low-level discovery rules for that host.
2. Create a low-level discovery rule:
- In the Name field, enter a low-level discovery rule name (for example, "Discover VMware VMs").
- In the Type field, select "Simple check".
- In the Key field, enter the built-in item key for discovering VMware virtual machines:
vmware.vm.discovery[{$VMWARE.URL}] - In the User name and Password fields, enter the corresponding macros previously configured on the host.
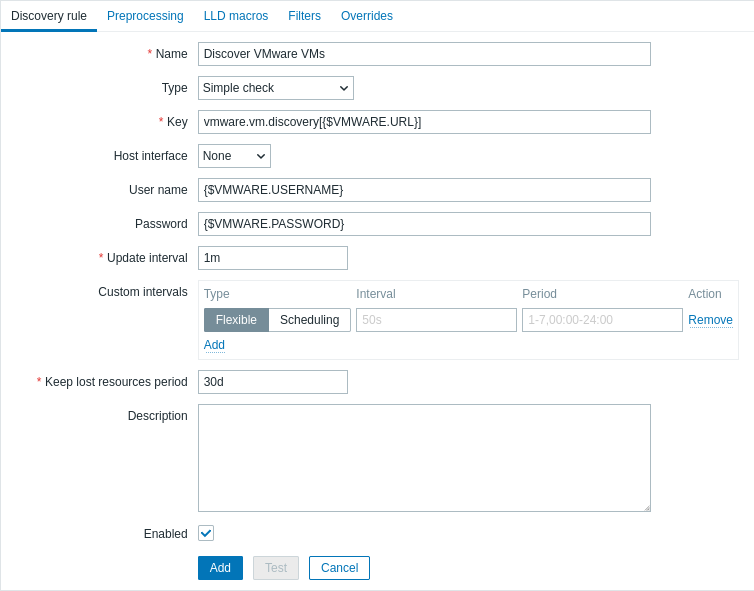
3. Click the Add button to create the low-level discovery rule. This discovery rule will discover virtual machines in your VMware environment.
Create a host prototype
1. In the list of low-level discovery rules, click Host prototypes for the previously created low-level discovery rule.
2. Create a host prototype. Since host prototypes are blueprints for creating hosts through low-level discovery rules, most fields will contain low-level discovery macros. This ensures that the hosts are created with properties based on the content retrieved by the previously created low-level discovery rule.
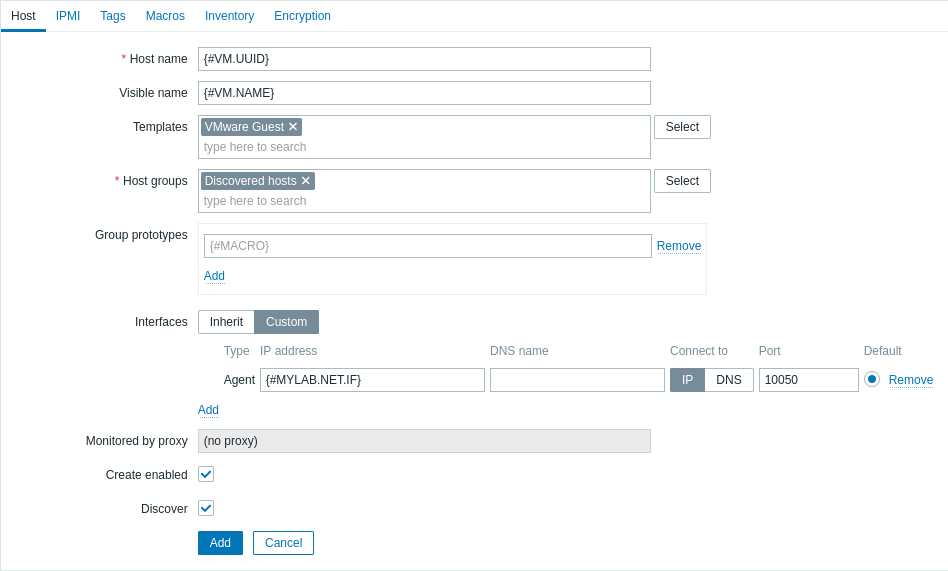
- In the Host name field, enter the macro {#VM.UUID}.
- In the Visible name field, enter the macro {#VM.NAME}.
- In the Templates field, enter or select the "VMware Guest" template. This template contains VMware items and discovery rules for monitoring the power state of a virtual machine, CPU usage, memory usage, network devices, etc.
- In the Host groups field, enter or select a host group (for example, "Discovered hosts").
- In the Interfaces field, add a custom host interface. Then, enter the macro {#VM.DNS} in the DNS name field, or enter the macro {#VM.IP} in the IP address field. Alternatively, if your VMware environment virtual machines have multiple interfaces, proceed to the Advanced host interface configuration section. Configuring a custom host interface is necessary for the correct functioning of the VMware Guest template.
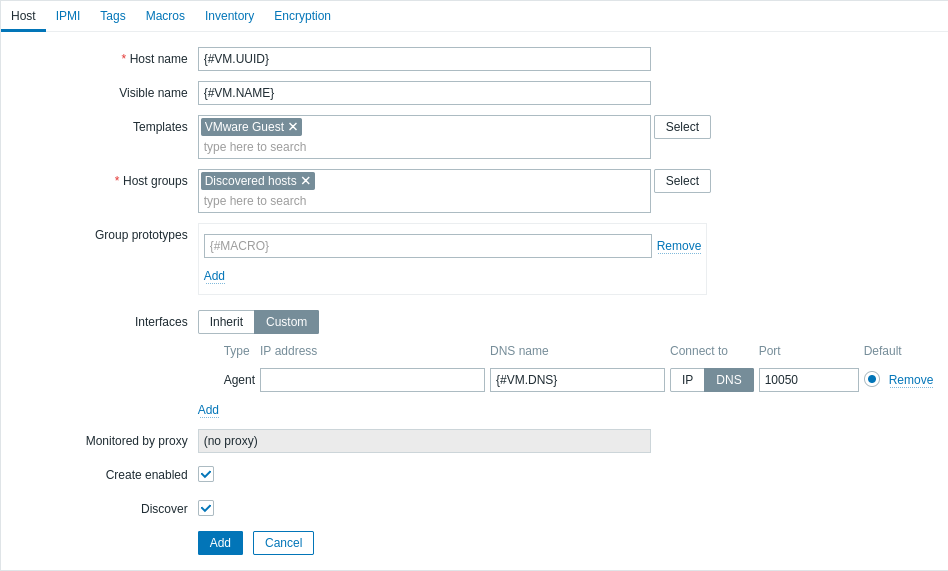
- In the Macros tab, set the {$VMWARE.VM.UUID} macro with the value {#VM.UUID}. This is necessary for the correct functioning of the VMware Guest template that uses this macro as a host-level user macro in item parameters (for example, vmware.vm.net.if.discovery[{$VMWARE.URL}, {$VMWARE.VM.UUID}]).

3. Click the Add button to create the host prototype. This host prototype will be used to create hosts for virtual machines discovered by the previously created low-level discovery rule.
View hosts and metrics
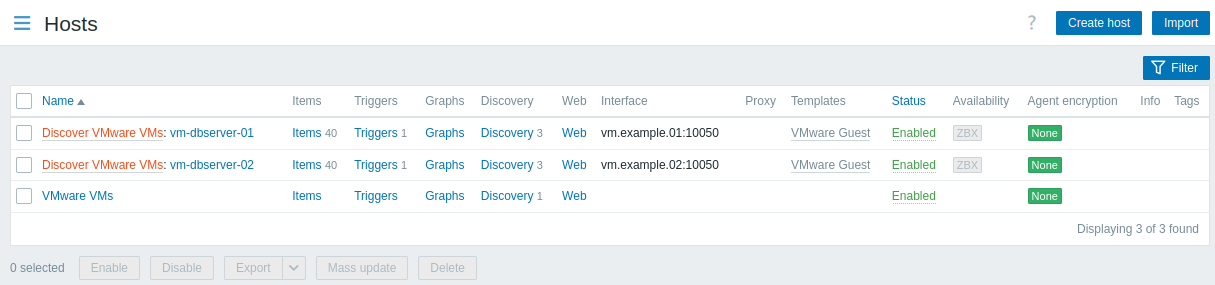
After the host prototype has been created, the low-level discovery rule will create hosts for discovered VMware virtual machines, and Zabbix will start to monitor them. Note that the discovery and creation of hosts can also be executed manually, if necessary.
To view the created hosts, navigate to the Data collection → Hosts menu section.
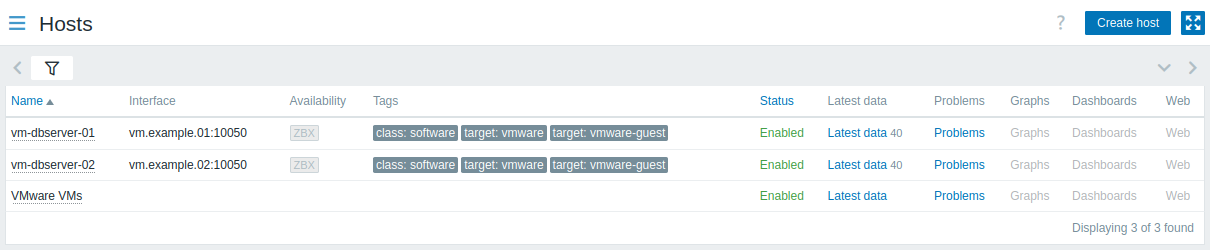
To view collected metrics, navigate to the Monitoring → Hosts menu section and click Latest data for one of the hosts.
Advanced host interface configuration
The vmware.vm.discovery[{$VMWARE.URL}] item key, configured in the Create a low-level discovery rule section, returns network interfaces data in the "net_if" field:
"net_if": [
             {
               "ifname": "5000",
               "ifdesc": "Network adapter 1",
               "ifmac": "00:11:22:33:44:55",
               "ifconnected": true,
               "iftype": "VirtualVmxnet3",
               "ifbackingdevice": "VLAN(myLab)",
               "ifdvswitch_uuid": "",
               "ifdvswitch_portgroup": "",
               "ifdvswitch_port": "",
               "ifip": [
                 "127.0.0.1",
                 "::1"
               ]
             },
             {
               "ifname": "5001",
               "ifdesc": "Network adapter 2",
               "ifmac": "00:11:22:33:44:55",
               "ifconnected": false,
               "iftype": "VirtualVmxnet3",
               "ifbackingdevice": "VLAN(myLab2)",
               "ifdvswitch_uuid": "",
               "ifdvswitch_portgroup": "",
               "ifdvswitch_port": "",
               "ifip": []
             }
           ]
This data can be used to configure a custom host interface.
1. When creating a low-level discovery rule, additionally configure a low-level discovery macro. In the LLD macros tab, create a custom LLD macro with a JSONPath value. For example:
- {#MYLAB.NET.IF} -
$.net_if[?(@.ifbackingdevice=="VLAN(myLab)")].ifip[0].first()

2. When creating a host prototype, add a custom host interface and enter the LLD macro in the DNS name or IP address field.