
14 Scheduled reports
Overview
This section provides information about configuring scheduled reports.
Pre-requisites:
- Zabbix web service must be installed and configured correctly to enable scheduled report generation - see Setting up scheduled reports for instructions.
- A user must have a user role of type Admin or Super admin with the following permissions:
<!-- --> * //Scheduled reports// in the //Access to UI elements// block (to view reports);
* //Manage scheduled reports// in the //Access to actions// block (to create/edit reports).Currently the support of scheduled reports is experimental.
To create a scheduled report in Zabbix frontend, do the following:
- Go to: Reports → Scheduled reports
- Click on Create report in the upper right corner of the screen
- Enter parameters of the report in the form
You can also create a report by opening an existing one, pressing the Clone button, and then saving under a different name.
Configuration
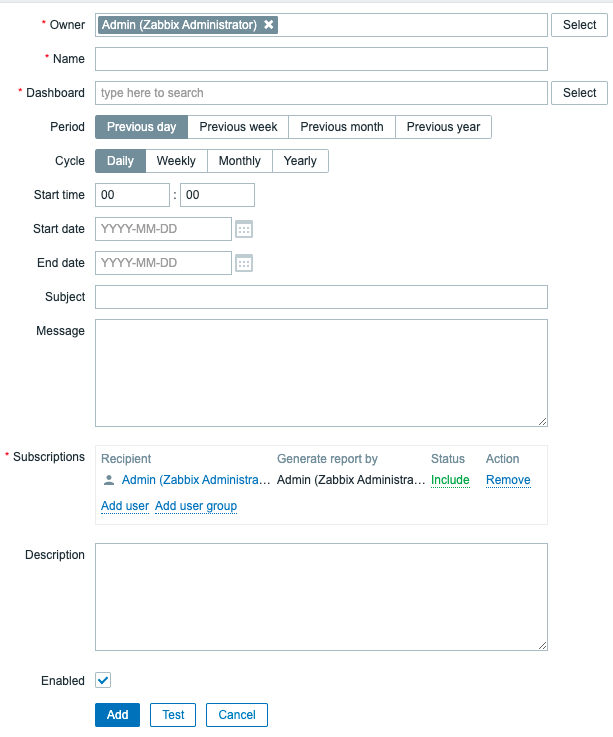
The scheduled reports tab contains general report attributes.
All mandatory input fields are marked with a red asterisk.
| Parameter | Description |
|---|---|
| Owner | User that creates a report. Super admin level users are allowed to change the owner. For Admin level users, this field is read-only. |
| Name | Name of the report; must be unique. |
| Dashboard | Dashboard on which the report is based; only one dashboard can be selected at a time. To select a dashboard, start typing the name - a list of matching dashboards will appear; scroll down to select. Alternatively, you may click on Select next to the field and select a dashboard from the list in a popup window. If a dashboard contains multiple pages, only the first page will be sent as a report. |
| Period | Period for which the report will be prepared. Select one of the available options: Previous day, Previous week, Previous month, Previous year. |
| Cycle | Report generation frequency. The reports can be sent daily, weekly, monthly, or yearly. Weekly mode allows to select days of the week when the report will be sent. |
| Start time | Time of the day in the format hh:mm when the report will be prepared. |
| Repeat on | Days of the week when the report will be sent. This field is available only if Cycle is set to weekly. |
| Start date | The date when regular report generation should be started |
| End date | The date when regular report generation should be stopped. |
| Subject | Subject of the report email. Supports {TIME} macro. |
| Message | Body of the report email. Supports {TIME} macro. |
| Subscriptions | List of report recipients. By default, includes only the report owner. Any Zabbix user with configured email media may be specified as a report recipient. Press Add user or Add user group to add more recipients. Press on the username to edit settings: Generate report by - whether the report should be generated on behalf of the report owner or the recipient. Status - select Include to send the report to user or Exclude to prevent sending the report to this user. At least one user must have Include status. Exclude status can be used to exclude specific users from a user group that is included. Note that users with insufficient permissions***** will see Inaccessible user or Inaccessible user group instead of the actual names in the fields Recipient and Generate report by; the fields Status and Action will be displayed as read-only. |
| Enabled | Report status. Clearing this checkbox will disable the report. |
| Description | An optional description of the report. This description is for internal use and will not be sent to report recipients. |
*Users with insufficient permissions are users who have a role based on the Admin user type and are not members of the user group the recipient or the report owner is a member of.
Form buttons
Buttons at the bottom of the form allow to perform several operations.
 |
Add a report. This button is only available for new reports. |
 |
Update the properties of a report. |
 |
Create another report based on the properties of the current report. |
 |
Test if report configuration is correct by sending a report to the current user. |
 |
Delete the report. |
 |
Cancel the editing of report properties. |
Testing
To test a report, click on the Test button at the bottom of the report configuration form.
Test button is not available, if a report configuration form has been opened from the dashboard action menu.
If the configuration is correct, the test report is sent immediately to the current user. For test reports, subscribers and 'generated by' user settings are ignored.
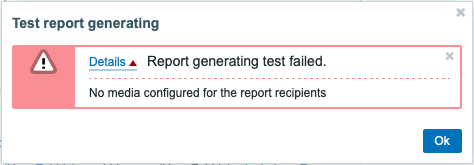
If the configuration is incorrect, an error message is displayed describing the possible cause.
Updating a report
To update an existing report, press on the report name, then make required configuration changes and press Update button.
If an existing report is updated by another user and this user changes the Dashboard, upon pressing the Update button a warning message "Report generated by other users will be changed to the current user" will be displayed.
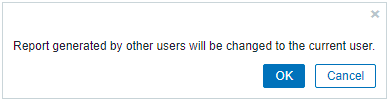
Pressing OK at this step will lead to the following changes:
- Generated by settings will be updated to display the user who edited the report last (unless Generated by is set to the Recipient).
- Users that have been displayed as Inaccessible user or Inaccessible user group will be deleted from the list of report subscribers.
Pressing Cancel will close the popup window and cancel the report update.
Cloning a report
To quickly clone an existing report, press Clone button at the bottom of an existing report configuration form. When cloning a report, created by another user, the current user becomes the owner of the new report.
Report settings will be copied to the new report configuration form with respect to user permissions:
- If the user that clones a report has no permissions to a dashboard, the Dashboard field will be cleared.
- If the user that clones a report has no permissions to some users or user groups in the Subscriptions list, inaccessible recipients will not be cloned.
- Generated by settings will be updated to display the current user (unless Generated by is set to the Recipient).
Change required settings and the report name, then press Add.