
6 New template
Overview
In this section you will learn how to set up a template.
Previously we learned how to set up an item, a trigger and how to get a problem notification for the host.
While all of these steps offer a great deal of flexibility in themselves, it may appear like a lot of steps to take if needed for, say, a thousand hosts. Some automation would be handy.
This is where templates come to help. Templates allow to group useful items, triggers and other entities so that those can be reused again and again by applying to hosts in a single step.
When a template is linked to a host, the host inherits all entities of the template. So, basically a pre-prepared bunch of checks can be applied very quickly.
Adding template
To start working with templates, we must first create one. To do that, in Configuration → Templates click on Create template. This will present us with a template configuration form.
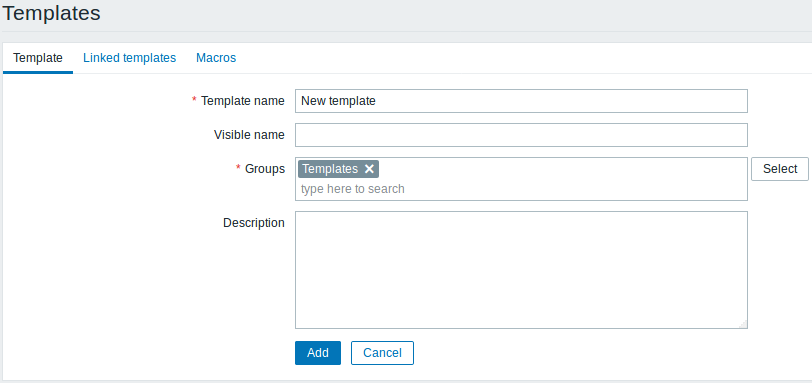
All mandatory input fields are marked with a red asterisk.
The required parameters to enter here are:
Template name
- Enter a template name. Alpha-numericals, spaces and underscores are allowed.
Groups
- Select one or several groups by clicking Select button. The template must belong to a group.
When done, click Add. Your new template should be visible in the list of templates.

As you may see, the template is there, but it holds nothing in it - no items, triggers or other entities.
Adding item to template
To add an item to the template, go to the item list for 'New host'. In Configuration → Hosts click on Items next to 'New host'.
Then:
- mark the checkbox of the 'CPU Load' item in the list
- click on Copy below the list
- select the template to copy item to\
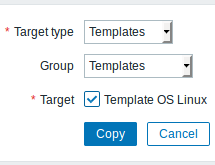
All mandatory input fields are marked with a red asterisk.
- click on Copy
If you now go to Configuration → Templates, 'New template' should have one new item in it.
We will stop at one item only for now, but similarly you can add any other items, triggers or other entities to the template until it's a fairly complete set of entities for given purpose (monitoring OS, monitoring single application).
Linking template to host
With a template ready, it only remains to add it to a host. For that, go to Configuration → Hosts, click on 'New host' to open its property form and go to the Templates tab.
There, click on Select next to Link new templates. In the pop-up window click on the name of template we have created ('New template'). As it appears in the Link new templates field, click on Add. The template should appear in the Linked templates list.
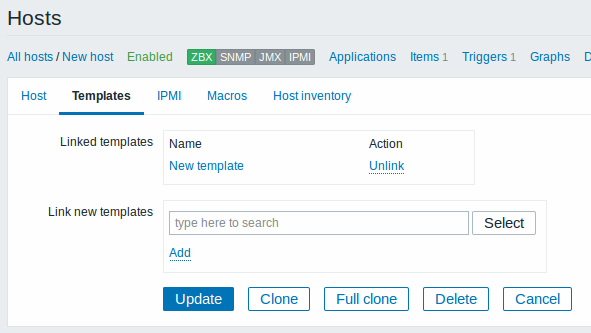
Click Update in the form to save the changes. The template is now added to the host, with all entities that it holds.
As you may have guessed, this way it can be applied to any other host as well. Any changes to the items, triggers and other entities at the template level will propagate to the hosts the template is linked to.
Linking pre-defined templates to hosts
As you may have noticed, Zabbix comes with a set of predefined templates for various OS, devices and applications. To get started with monitoring very quickly, you may link the appropriate one of them to a host, but beware that these templates need to be fine-tuned for your environment. Some checks may not be needed, and polling intervals may be way too frequent.
More information about templates is available.