
Dashboards
Dashboards give you an overview of your monitored environment. You can build and customize them to meet your needs.
The building blocks are widgets: a graph, a map, a list of recent problems, and so on, each designed to display a particular type of information.
Widgets can be organized into multiple dashboard pages. Such pages can be viewed as a slideshow. You can also navigate to any page by clicking its tab.
You can create several dashboards, though only one is shown at a time.
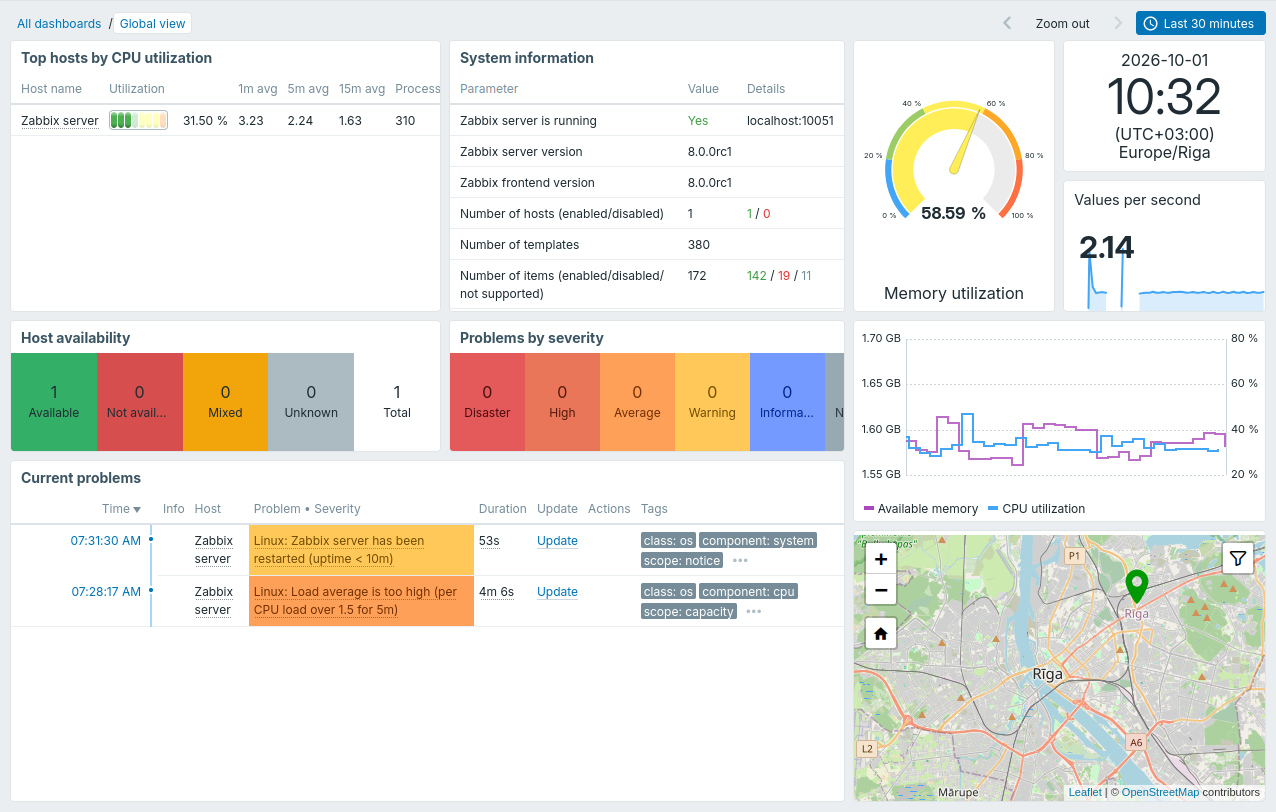
Zabbix comes with some default dashboards. One of them is the Global view dashboard, which shows the health and status of your monitored hosts, including the Zabbix server:
You can find more dashboards in the Dashboards repository.
These dashboards are designed to work with existing Zabbix templates and can be downloaded and imported into your Zabbix environment.
A detailed description of each dashboard, including prerequisites, is available in the dashboard's README file.
Dashboard list
To open the list of dashboards, either:
- Click Dashboards in the menu.
- Click All dashboards while viewing a dashboard to open the dashboard list.
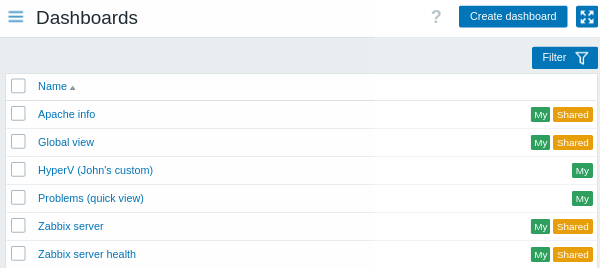
Access to the Dashboards menu depends on the user role and the Dashboard permission under Access to UI elements.
From here, you can:
- Create dashboards.
- Delete dashboards. You can delete a dashboard by selecting its checkbox and clicking the Delete button.
- Import dashboards.
- Export dashboards.
Dashboards have tags indicating their ownership and sharing settings:
- My - the dashboard is owned by you and visible only to you.
- My + Shared - the dashboard is owned by you but is public or shared with specific users or user groups.
- Dashboards without tags are owned by other users but are public or shared with you.
You can filter the list by dashboard name and owner.
View dashboard
Click a dashboard's name in the dashboard list to view the dashboard:
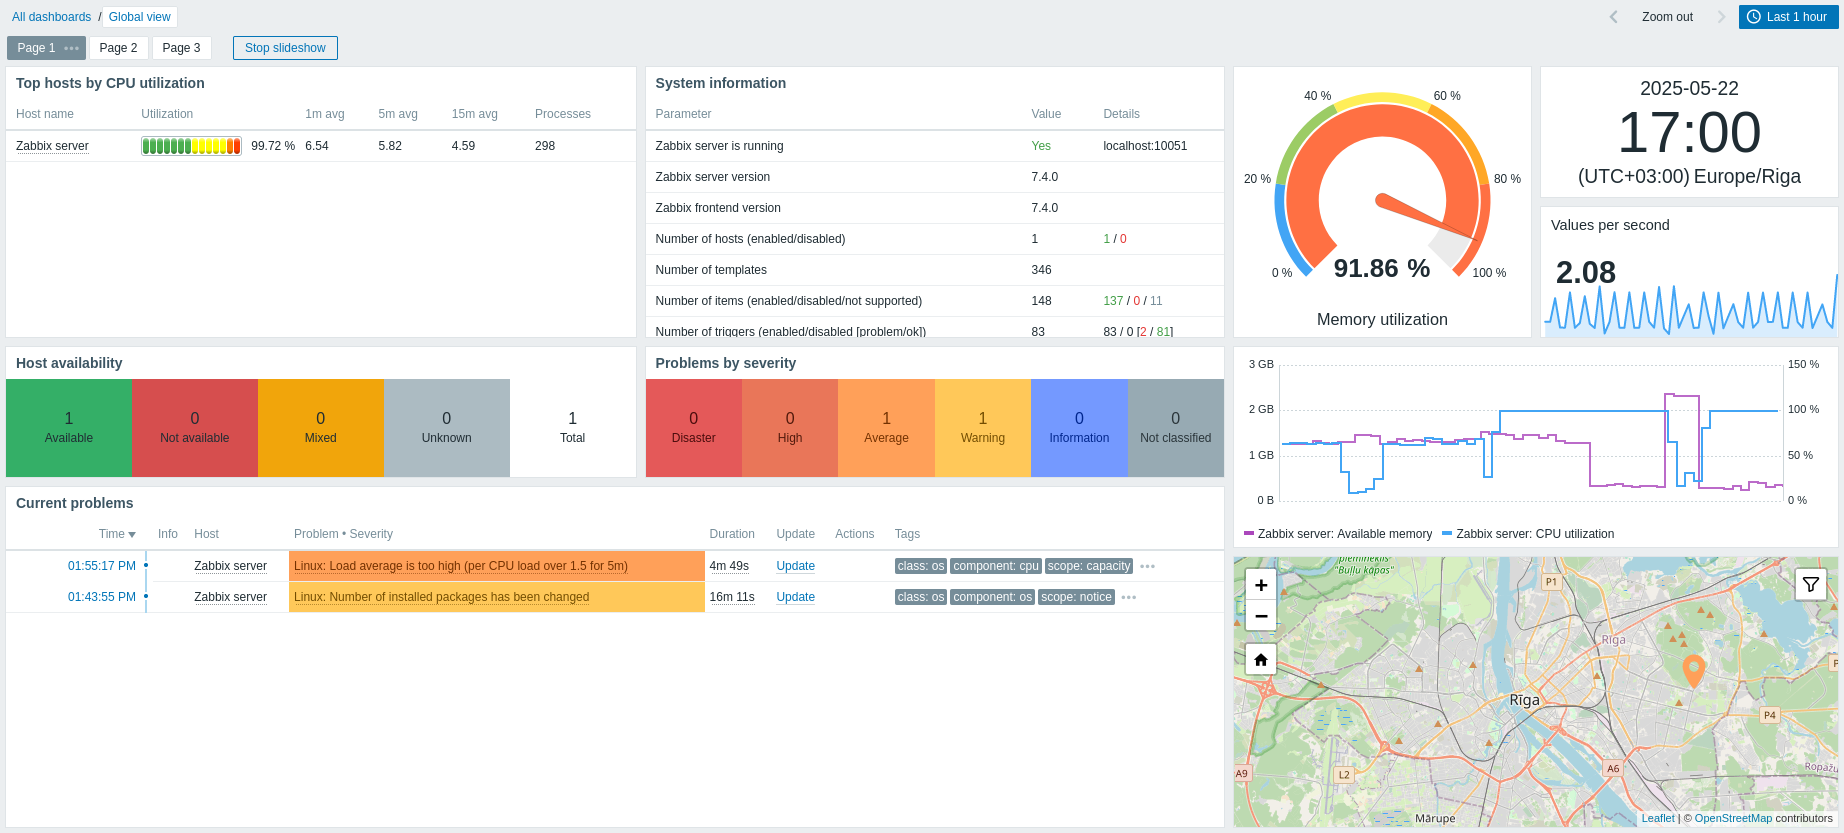
The Zabbix user interface remembers the last opened dashboard for the next session.
The data you can see on a dashboard depends on your access to hosts.
For widgets that show graphs, the time period selector above the widgets sets the time range. It shows the current time range as a label. Click the label to open or close the selector.
From here, you can manage dashboards as follows:
- Edit the dashboard.
- Perform the following actions from the dashboard Actions menu
 :
:
- Sharing - edit the sharing settings for the dashboard.
- Create new - create a new dashboard.
- Clone - create a new dashboard by cloning the current one. You can edit the dashboard properties before saving.
- Delete - delete the dashboard.
- Export - export the dashboard.
- Create new report - create a scheduled report. This option is disabled if you do not have permission to manage scheduled reports.
- View related reports - view a list of existing reports for the current dashboard. This option is disabled if there are no related reports or you do not have permission to manage scheduled reports.
- Switch to kiosk mode.
- Start or stop the dashboard slideshow.
In dashboard view mode, the following options are available for widgets:
- Edit the widget.
- Perform the following actions from the widget Actions menu
 :
:
- Copy - copy the widget.
- Download image - download the widget as a PNG image. This option is available for widgets that support this feature (see individual widget pages).
- Refresh interval - select the frequency of refreshing the widget contents.
For dashboards with multiple pages, the following actions are available in the page Actions menu  in dashboard view mode:
- Copy - copy the page.
- Properties - customize the page properties, including the name and the slideshow interval.
Slideshow
If the Start slideshow checkbox is selected in the dashboard properties, the slideshow starts automatically when the dashboard has more than one page. Otherwise, you can start the slideshow by clicking the Start slideshow button.

The pages change according to the intervals specified in the dashboard and individual page properties. If the Slideshow interval property is defined for an individual page, the interval specified for that page is applied. Otherwise, the dashboard's Default slideshow interval is applied.
To stop the slideshow, click Stop slideshow.
In kiosk mode, use the following buttons:
 to start the slideshow;
 to stop the slideshow;
 to navigate to the previous page;
 to navigate to the next page.
Share dashboard
Dashboards can be public or private.
Public dashboards are visible to all users. Private dashboards are visible only to their owners and to the users or user groups they are shared with.
To change the sharing settings of a dashboard, click Sharing in the dashboard Actions menu while viewing the dashboard:
| Parameter | Description |
|---|---|
| Type | Select the dashboard type: Private - the dashboard is visible only to selected user groups and users. Public - the dashboard is visible to all users. |
| List of user group shares | Select the user groups that can access the dashboard. You can grant read-only or read-write access. |
| List of user shares | Select the users that can access the dashboard. You can grant read-only or read-write access. |
See Permissions to dashboards to find out how sharing options limit the actions available to users.
Create dashboard
You can create a dashboard in two ways:
- In the dashboard list, click the Create dashboard button.
- In the dashboard view mode, click Create new in the dashboard Actions menu.
Then, specify the dashboard properties:
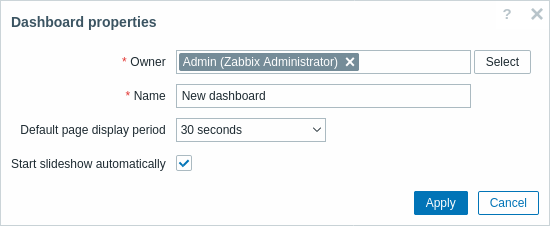
| Parameter | Description |
|---|---|
| Owner | Select the user that will own the dashboard. |
| Name | Enter the dashboard name. |
| Default slideshow interval | Select how long each dashboard page is displayed before the slideshow moves to the next page. |
| Start slideshow | Mark this checkbox to start the slideshow automatically once the dashboard has more than one page. |
Then, click Apply. The new dashboard opens in edit mode:
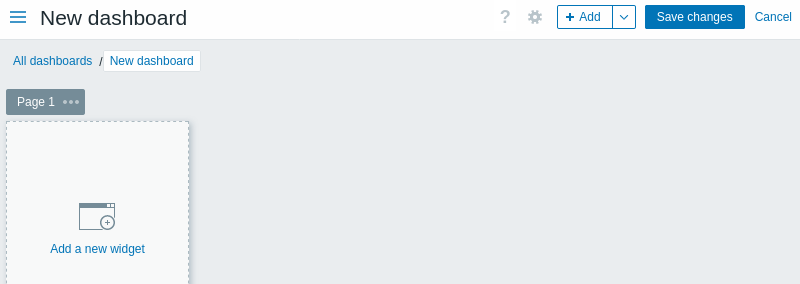
From here, you can add dashboard widgets and pages.
Note that the minimum width of a dashboard is 1200 pixels; in narrower windows, a horizontal scrollbar appears. A wider dashboard always fills the browser window; its widgets cannot extend beyond the window edges.
Click the Save changes button to save the dashboard, or Cancel to return to the previous screen.
Add widgets
In dashboard edit mode, you can add widgets can be added in two ways:
-
Click the Add button. Alternatively, click the drop-down arrow on the Add button and select Add widget.
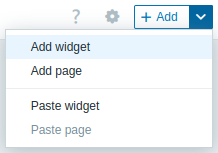
The widget placeholder is added at its default size to the first available empty space on the dashboard, with the widget configuration form open.
-
Move the mouse pointer over an empty area of the dashboard. Then click the widget placeholder to open the widget configuration form. Alternatively, click and drag the placeholder to resize it, then release to open the widget configuration form; if a widget is copied to the clipboard, you will first be prompted to choose Add widget or Paste widget.
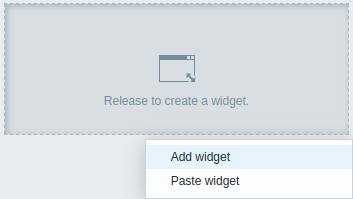
Then, follow these steps:
- In the widget configuration form, select the widget type.
- Configure widget parameters.
- Click Add to add the widget to the dashboard.
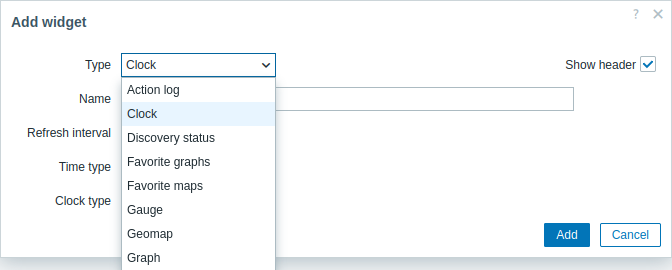
The widget is added at its default size or resized to fit the available space. You can resize and reposition widgets as described in the Edit widgets section.
You can also copy and paste widgets to create new widgets with the same configuration, either within the same dashboard or between dashboards opened in different browser tabs.
Copy/paste widgets
To copy and paste a widget:
- In the widget Actions menu , select Copy.
- In dashboard edit mode, click the drop-down arrow on the Add button and select Paste widget. Alternatively, click an empty area in the dashboard and select Paste widget.
You can also paste a copied widget over an existing one using the Paste option in its Actions menu.
Add pages
To add a new page to a dashboard:
- In dashboard edit mode, click the drop-down arrow on the Add button and select Add page.
-
Fill in the page properties:
- Name - enter the name of the page. If you leave the name empty, the page is added with a Page N name, where 'N' is the incremental page number.
- Slideshow interval - select how long the page is displayed before the slideshow moves to the next page.
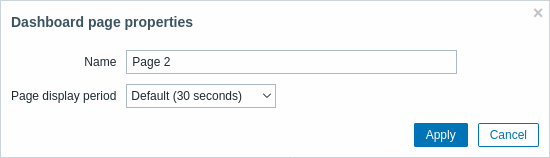
- Click Apply.
A new tab (e.g., Page 2) is added for the new page.
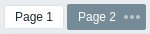
You can also copy and paste pages to create new pages with the same properties, either within the same dashboard or between dashboards opened in different tabs.
Copy/paste pages
To copy and paste a page:
- In the page Actions menu , select Copy.
- In dashboard edit mode, click the drop-down arrow on the Add button and select Paste page.
Edit dashboard
To edit a dashboard, click the Edit dashboard button in the upper-right corner.
Alternatively, click the Edit button  for a widget.
The dashboard opens in edit mode.
for a widget.
The dashboard opens in edit mode.
From here, you can manage dashboards as follows:
- Edit the dashboard properties by clicking the gear button
 .
. - Edit dashboard widgets.
- Access the following dashboard actions by clicking the drop-down arrow on the Add button:
- Add widget - add a widget to the dashboard.
- Add page - add a page to the dashboard.
- Paste widget - paste a copied widget. This option is grayed out if no widget has been copied. Only one widget can be copied at a time.
- Paste page - paste a copied page. This option is grayed out if no page has been copied. Only one page can be copied at a time.
After editing the dashboard, click the Save changes button to save the dashboard, or Cancel to return to the previous screen.
Edit widgets
A widget can be edited in dashboard edit mode by clicking its Edit button .
Alternatively, when viewing a dashboard, you can hover over a widget and click the Edit button.
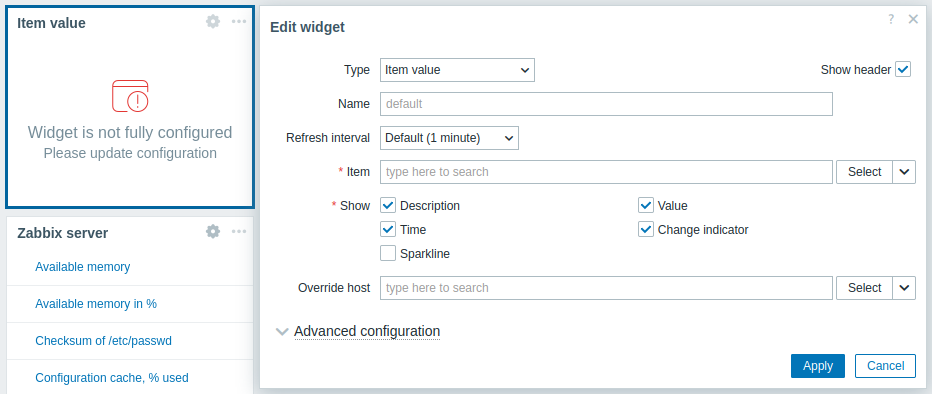
While a widget is being edited, it is highlighted, and changes are previewed in real time.
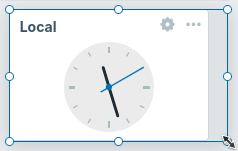
You can reposition the widget and its configuration form by dragging their title bars and resize the widget by dragging its resize handles.
The following actions are available from the widget Actions menu when editing a widget:
- Copy - copy the widget.
- Paste - paste a copied widget over this widget. This option is grayed out if no widget has been copied.
- Delete - delete the widget.
If mandatory widget parameters are not configured, the widget enters the Widget is not fully configured state.
After editing, click Apply in the widget configuration form, then Save changes in the upper-right corner of the dashboard to apply your changes.
Edit pages
Pages can be edited in dashboard edit mode.
The pages can be reordered by dragging and dropping the page tabs. Reordering does not rename pages, except for pages with automatically assigned names (Page N), which are renumbered.
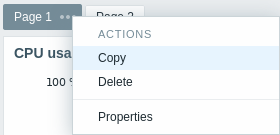
The following actions are available from the page Actions menu when editing a page:
- Copy - copy the page.
- Delete - delete the page.
- Properties - customize the page properties.
Permissions to dashboards
Permissions to dashboards for regular users and users of the Admin type are limited as described below, provided that access to dashboards and the Create and edit dashboards option are enabled for their assigned user role:
- They can see and clone a public dashboard even when no users or user groups are added to the dashboard's sharing preferences.
- They can see and clone a private dashboard if they have at least Read rights to it, as specified in the sharing preferences.
- They can edit and delete a dashboard only if they have Read-write rights to it, as specified in the sharing preferences.
- They cannot change the dashboard owner.