
This template is for Zabbix version: 7.4
Source: https://git.zabbix.com/projects/ZBX/repos/zabbix/browse/templates/media/servicenow?at=release/7.4

ServiceNow webhook
Overview
This guide describes how to integrate Zabbix 7.4 installation with ServiceNow using the Zabbix webhook feature. This guide provides instructions on setting up a media type, a user and an action in Zabbix.
Please note that recovery and update operations and ServiceNow's custom fields are supported only for trigger-based events.
Requirements
Zabbix version: 7.4 and higher.
Parameters
After importing the webhook, you can configure it using webhook parameters.
Configurable parameters
The configurable parameters are intended to be changed according to the webhook setup as well as the user's preferences and environment.
| Name |
Value |
Description |
| servicenow_password |
<PLACE PASSWORD HERE> |
Servicenow user password. |
| servicenow_url |
<PLACE URL HERE> |
Servicenow URL. |
| servicenow_user |
<PLACE USERNAME HERE> |
Service now user. |
| tls_verify |
{$HTTP.TLS.VERIFY:"ServiceNow"} |
TLS certificate verification for HTTP requests: "none" - disabled, "peer" - verify the certificate chain and expiration, "full" - full verification. Any other value enables full verification. To override the setting for this media type only, define the global macro with the context "ServiceNow", e.g. {$HTTP.TLS.VERIFY:"ServiceNow"}. |
| urgency_for_average |
2 |
Average urgency. |
| urgency_for_disaster |
1 |
Disaster urgency. |
| urgency_for_high |
2 |
High urgency. |
| urgency_for_information |
3 |
Information urgency. |
| urgency_for_not_classified |
3 |
Not classified urgency. |
| urgency_for_warning |
3 |
Warning urgency. |
Internal parameters
Internal parameters are reserved for predefined macros that are not meant to be changed.
| Name |
Value |
Description |
| alert_message |
{ALERT.MESSAGE} |
'Default message' value from action configuration. |
| alert_subject |
{ALERT.SUBJECT} |
'Default subject' value from action configuration. |
| event_nseverity |
{EVENT.NSEVERITY} |
Numeric value of the event severity. Possible values: 0 - Not classified, 1 - Information, 2 - Warning, 3 - Average, 4 - High, 5 - Disaster. |
| event_recovery_value |
{EVENT.RECOVERY.VALUE} |
Numeric value of the recovery event. |
| event_source |
{EVENT.SOURCE} |
Numeric value of the event source. Possible values: 0 - Trigger, 1 - Discovery, 2 - Autoregistration, 3 - Internal, 4 - Service. |
| event_update_status |
{EVENT.UPDATE.STATUS} |
Numeric value of the problem update status. Possible values: 0 - Webhook was called because of problem/recovery event, 1 - Update operation. |
| event_value |
{EVENT.VALUE} |
Numeric value of the event that triggered an action (1 for problem, 0 for recovering). |
| servicenow_sys_id |
{EVENT.TAGS.__zbx_servicenow_sys_id} |
|
Please be aware that each webhook supports an HTTP proxy. To use this feature, add a new media type parameter with the name http_proxy and set its value to the proxy URL.
Service setup
1. First, create a service user for creating incidents.
2. Assign to the newly created user the following roles:
- rest_api_explorer
- sn_incident_write
Zabbix configuration
1. Before setting up a ServiceNow Webhook, it is recommended to set up a global macro "{$ZABBIX.URL}" containing a URL to the Zabbix frontend.
As an example, this macro can be used to populate ServiceNow's custom field with a URL to event info or graph.

2. In the "Administration -> Media types" section, import the media_servicenow.yaml
3. Open the newly added ServiceNow media type and replace all <PLACEHOLDERS> with your values.
The following parameters are required:
servicenow_user - login of the ServiceNow user created earlier
servicenow_password - user's password
servicenow_url - the full URL of your ServiceNow instance (https://<INSTANCE>.service-now.com/)
To export information into a ServiceNow custom field, add a parameter with the custom field ID as a key (if you need help finding custom field ID, see this page in ServiceNow community).

Notes:
- ServiceNow instance must be in the same timezone as your Zabbix server.
- For fields with "Date/time" type, parameter values must be separated via space (example: "{EVENT.DATE} {EVENT.TIME}"). See the ServiceNow documentation for details about the date and time format.
- Values of the parameters with date only will be converted from Zabbix format "yyyy.MM.dd" to "yyyy-MM-dd" for compatibility with the ServiceNow's API. These parameters must contain only macros that return the date (e.g. {EVENT.DATE} or {EVENT.RECOVERY.DATE}).
- If you don't want to duplicate information in a description field and the custom fields, modify the message templates for Problem, Problem recovery and Problem update types in the Message templates tab.
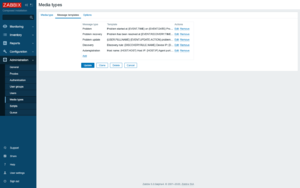
4. Create a Zabbix user and add Media with the ServiceNow media type.
Though the Send to field is not used in the ServiceNow webhook, it cannot be left empty. To comply with frontend requirements, enter any symbol in the field.
Make sure this user has access to all hosts for which you would like problem notifications to be converted into ServiceNow tasks.
For more information see Zabbix and ServiceNow documentations.
Feedback
Please report any issues with the media type at https://support.zabbix.com.
You can also provide feedback, discuss the media type, or ask for help at ZABBIX forums.
This template is for Zabbix version: 7.2
Source: https://git.zabbix.com/projects/ZBX/repos/zabbix/browse/templates/media/servicenow?at=release/7.2
ServiceNow webhook
This guide describes how to integrate Zabbix 7.0 installation with ServiceNow using the Zabbix webhook feature. This guide provides instructions on setting up a media type, a user and an action in Zabbix.
Please note that recovery and update operations and ServiceNow's custom fields are supported only for trigger-based events.
Setting up ServiceNow
1. First, create a service user for creating incidents.
2. Assign to the newly created user the following roles:
- rest_api_explorer
- sn_incident_write
Setting up webhook in Zabbix
1. Before setting up a ServiceNow Webhook, it is recommended to set up a global macro "{$ZABBIX.URL}" containing a URL to the Zabbix frontend.
As an example, this macro can be used to populate ServiceNow's custom field with a URL to event info or graph.

2. In the "Administration -> Media types" section, import the media_servicenow.yaml
3. Open the newly added ServiceNow media type and replace all <PLACEHOLDERS> with your values.
The following parameters are required:
servicenow_user - login of the ServiceNow user created earlier
servicenow_password - user's password
To export information into a ServiceNow custom field, add a parameter with the custom field ID as a key (if you need help finding custom field ID, see this page in ServiceNow community).

Notes:
- ServiceNow instance must be in the same timezone as your Zabbix server.
- For fields with "Date/time" type, parameter values must be separated via space (example: "{EVENT.DATE} {EVENT.TIME}"). See the ServiceNow documentation for details about the date and time format.
- Values of the parameters with date only will be converted from Zabbix format "yyyy.MM.dd" to "yyyy-MM-dd" for compatibility with the ServiceNow's API. These parameters must contain only macros that return the date (e.g. {EVENT.DATE} or {EVENT.RECOVERY.DATE}).
- If you don't want to duplicate information in a description field and the custom fields, modify the message templates for Problem, Problem recovery and Problem update types in the Message templates tab.

4. Create a Zabbix user and add Media with the ServiceNow media type.
The Send to field must contain the full URL of your ServiceNow instance (https://<INSTANCE>.service-now.com/).
Make sure this user has access to all hosts for which you would like problem notifications to be converted into ServiceNow tasks.
For more information see Zabbix and ServiceNow documentations.
Supported Versions
Zabbix 7.0
This template is for Zabbix version: 7.0
Source: https://git.zabbix.com/projects/ZBX/repos/zabbix/browse/templates/media/servicenow?at=release/7.0

ServiceNow webhook
Overview
This guide describes how to integrate Zabbix 7.0 installation with ServiceNow using the Zabbix webhook feature. This guide provides instructions on setting up a media type, a user and an action in Zabbix.
Please note that recovery and update operations and ServiceNow's custom fields are supported only for trigger-based events.
Requirements
Zabbix version: 7.0 and higher.
Parameters
After importing the webhook, you can configure it using webhook parameters.
Configurable parameters
The configurable parameters are intended to be changed according to the webhook setup as well as the user's preferences and environment.
| Name |
Value |
Description |
| servicenow_password |
<PLACE PASSWORD HERE> |
Servicenow user password. |
| servicenow_url |
<PLACE URL HERE> |
Servicenow URL. |
| servicenow_user |
<PLACE USERNAME HERE> |
Service now user. |
| tls_verify |
{$HTTP.TLS.VERIFY:"ServiceNow"} |
TLS certificate verification for HTTP requests: "none" - disabled, "peer" - verify the certificate chain and expiration, "full" - full verification. Any other value enables full verification. To override the setting for this media type only, define the global macro with the context "ServiceNow", e.g. {$HTTP.TLS.VERIFY:"ServiceNow"}. |
| urgency_for_average |
2 |
Average urgency. |
| urgency_for_disaster |
1 |
Disaster urgency. |
| urgency_for_high |
2 |
High urgency. |
| urgency_for_information |
3 |
Information urgency. |
| urgency_for_not_classified |
3 |
Not classified urgency. |
| urgency_for_warning |
3 |
Warning urgency. |
Internal parameters
Internal parameters are reserved for predefined macros that are not meant to be changed.
| Name |
Value |
Description |
| alert_message |
{ALERT.MESSAGE} |
'Default message' value from action configuration. |
| alert_subject |
{ALERT.SUBJECT} |
'Default subject' value from action configuration. |
| event_nseverity |
{EVENT.NSEVERITY} |
Numeric value of the event severity. Possible values: 0 - Not classified, 1 - Information, 2 - Warning, 3 - Average, 4 - High, 5 - Disaster. |
| event_recovery_value |
{EVENT.RECOVERY.VALUE} |
Numeric value of the recovery event. |
| event_source |
{EVENT.SOURCE} |
Numeric value of the event source. Possible values: 0 - Trigger, 1 - Discovery, 2 - Autoregistration, 3 - Internal, 4 - Service. |
| event_update_status |
{EVENT.UPDATE.STATUS} |
Numeric value of the problem update status. Possible values: 0 - Webhook was called because of problem/recovery event, 1 - Update operation. |
| event_value |
{EVENT.VALUE} |
Numeric value of the event that triggered an action (1 for problem, 0 for recovering). |
| servicenow_sys_id |
{EVENT.TAGS.__zbx_servicenow_sys_id} |
|
Please be aware that each webhook supports an HTTP proxy. To use this feature, add a new media type parameter with the name http_proxy and set its value to the proxy URL.
Service setup
1. First, create a service user for creating incidents.
2. Assign to the newly created user the following roles:
- rest_api_explorer
- sn_incident_write
Zabbix configuration
1. Before setting up a ServiceNow Webhook, it is recommended to set up a global macro "{$ZABBIX.URL}" containing a URL to the Zabbix frontend.
As an example, this macro can be used to populate ServiceNow's custom field with a URL to event info or graph.

2. In the "Administration -> Media types" section, import the media_servicenow.yaml
3. Open the newly added ServiceNow media type and replace all <PLACEHOLDERS> with your values.
The following parameters are required:
servicenow_user - login of the ServiceNow user created earlier
servicenow_password - user's password
servicenow_url - the full URL of your ServiceNow instance (https://<INSTANCE>.service-now.com/)
To export information into a ServiceNow custom field, add a parameter with the custom field ID as a key (if you need help finding custom field ID, see this page in ServiceNow community).

Notes:
- ServiceNow instance must be in the same timezone as your Zabbix server.
- For fields with "Date/time" type, parameter values must be separated via space (example: "{EVENT.DATE} {EVENT.TIME}"). See the ServiceNow documentation for details about the date and time format.
- Values of the parameters with date only will be converted from Zabbix format "yyyy.MM.dd" to "yyyy-MM-dd" for compatibility with the ServiceNow's API. These parameters must contain only macros that return the date (e.g. {EVENT.DATE} or {EVENT.RECOVERY.DATE}).
- If you don't want to duplicate information in a description field and the custom fields, modify the message templates for Problem, Problem recovery and Problem update types in the Message templates tab.

4. Create a Zabbix user and add Media with the ServiceNow media type.
Though the Send to field is not used in the ServiceNow webhook, it cannot be left empty. To comply with frontend requirements, enter any symbol in the field.
Make sure this user has access to all hosts for which you would like problem notifications to be converted into ServiceNow tasks.
For more information see Zabbix and ServiceNow documentations.
Feedback
Please report any issues with the media type at https://support.zabbix.com.
You can also provide feedback, discuss the media type, or ask for help at ZABBIX forums.
This template is for Zabbix version: 6.4
Source: https://git.zabbix.com/projects/ZBX/repos/zabbix/browse/templates/media/servicenow?at=release/6.4
ServiceNow webhook
This guide describes how to integrate Zabbix 6.2 installation with ServiceNow using the Zabbix webhook feature. This guide provides instructions on setting up a media type, a user and an action in Zabbix.
Please note that recovery and update operations and ServiceNow's custom fields are supported only for trigger-based events.
Setting up ServiceNow
1. First, create a service user for creating incidents.
2. Assign to the newly created user the following roles:
- rest_api_explorer
- sn_incident_write
Setting up webhook in Zabbix
1. Before setting up a ServiceNow Webhook, it is recommended to set up a global macro "{$ZABBIX.URL}" containing a URL to the Zabbix frontend.
As an example, this macro can be used to populate ServiceNow's custom field with a URL to event info or graph.

2. In the "Administration -> Media types" section, import the media_servicenow.yaml
3. Open the newly added ServiceNow media type and replace all <PLACEHOLDERS> with your values.
The following parameters are required:
servicenow_user - login of the ServiceNow user created earlier
servicenow_password - user's password
To export information into a ServiceNow custom field, add a parameter with the custom field ID as a key (if you need help finding custom field ID, see this page in ServiceNow community).

Notes:
- ServiceNow instance must be in the same timezone as your Zabbix server.
- For fields with "Date/time" type, parameter values must be separated via space (example: "{EVENT.DATE} {EVENT.TIME}"). See the ServiceNow documentation for details about the date and time format.
- Values of the parameters with date only will be converted from Zabbix format "yyyy.MM.dd" to "yyyy-MM-dd" for compatibility with the ServiceNow's API. These parameters must contain only macros that return the date (e.g. {EVENT.DATE} or {EVENT.RECOVERY.DATE}).
- If you don't want to duplicate information in a description field and the custom fields, modify the message templates for Problem, Problem recovery and Problem update types in the Message templates tab.

4. Create a Zabbix user and add Media with the ServiceNow media type.
The Send to field must contain the full URL of your ServiceNow instance (https://<INSTANCE>.service-now.com/).
Make sure this user has access to all hosts for which you would like problem notifications to be converted into ServiceNow tasks.
For more information see Zabbix and ServiceNow documentations.
Supported Versions
Zabbix 6.2
This template is for Zabbix version: 6.2
Source: https://git.zabbix.com/projects/ZBX/repos/zabbix/browse/templates/media/servicenow?at=release/6.2
ServiceNow webhook
This guide describes how to integrate Zabbix 6.2 installation with ServiceNow using the Zabbix webhook feature. This guide provides instructions on setting up a media type, a user and an action in Zabbix.
Please note that recovery and update operations and ServiceNow's custom fields are supported only for trigger-based events.
Setting up ServiceNow
1. First, create a service user for creating incidents.
2. Assign to the newly created user the following roles:
- rest_api_explorer
- sn_incident_write
Setting up webhook in Zabbix
1. Before setting up a ServiceNow Webhook, it is recommended to set up a global macro "{$ZABBIX.URL}" containing a URL to the Zabbix frontend.
As an example, this macro can be used to populate ServiceNow's custom field with a URL to event info or graph.

2. In the "Administration -> Media types" section, import the media_servicenow.yaml
3. Open the newly added ServiceNow media type and replace all <PLACEHOLDERS> with your values.
The following parameters are required:
servicenow_user - login of the ServiceNow user created earlier
servicenow_password - user's password
To export information into a ServiceNow custom field, add a parameter with the custom field ID as a key (if you need help finding custom field ID, see this page in ServiceNow community).

Notes:
- ServiceNow instance must be in the same timezone as your Zabbix server.
- For fields with "Date/time" type, parameter values must be separated via space (example: "{EVENT.DATE} {EVENT.TIME}"). See the ServiceNow documentation for details about the date and time format.
- Values of the parameters with date only will be converted from Zabbix format "yyyy.MM.dd" to "yyyy-MM-dd" for compatibility with the ServiceNow's API. These parameters must contain only macros that return the date (e.g. {EVENT.DATE} or {EVENT.RECOVERY.DATE}).
- If you don't want to duplicate information in a description field and the custom fields, modify the message templates for Problem, Problem recovery and Problem update types in the Message templates tab.

4. Create a Zabbix user and add Media with the ServiceNow media type.
The Send to field must contain the full URL of your ServiceNow instance (https://<INSTANCE>.service-now.com/).
Make sure this user has access to all hosts for which you would like problem notifications to be converted into ServiceNow tasks.
For more information see Zabbix and ServiceNow documentations.
Supported Versions
Zabbix 6.2
This template is for Zabbix version: 6.0
Source: https://git.zabbix.com/projects/ZBX/repos/zabbix/browse/templates/media/servicenow?at=release/6.0
ServiceNow webhook
This guide describes how to integrate Zabbix 5.0 installation with ServiceNow using the Zabbix webhook feature. This guide provides instructions on setting up a media type, a user and an action in Zabbix.
Please note that recovery and update operations and ServiceNow's custom fields are supported only for trigger-based events.
Setting up ServiceNow
1. First, create a service user for creating incidents.
2. Assign to the newly created user the following roles:
- rest_api_explorer
- sn_incident_write
Setting up webhook in Zabbix
1. Before setting up a ServiceNow Webhook, it is recommended to set up a global macro "{$ZABBIX.URL}" containing a URL to the Zabbix frontend.
As an example, this macro can be used to populate ServiceNow's custom field with a URL to event info or graph.

2. In the "Administration -> Media types" section, import the media_servicenow.yaml
3. Open the newly added ServiceNow media type and replace all <PLACEHOLDERS> with your values.
The following parameters are required:
servicenow_user - login of the ServiceNow user created earlier
servicenow_password - user's password
servicenow_url - the full URL of your ServiceNow instance (https://<INSTANCE>.service-now.com/)
To export information into a ServiceNow custom field, add a parameter with the custom field ID as a key (if you need help finding custom field ID, see this page in ServiceNow community).

Notes:
- ServiceNow instance must be in the same timezone as your Zabbix server.
- For fields with "Date/time" type, parameter values must be separated via space (example: "{EVENT.DATE} {EVENT.TIME}"). See the ServiceNow documentation for details about the date and time format.
- Values of the parameters with date only will be converted from Zabbix format "yyyy.MM.dd" to "yyyy-MM-dd" for compatibility with the ServiceNow's API. These parameters must contain only macros that return the date (e.g. {EVENT.DATE} or {EVENT.RECOVERY.DATE}).
- If you don't want to duplicate information in a description field and the custom fields, modify the message templates for Problem, Problem recovery and Problem update types in the Message templates tab.

4. Create a Zabbix user and add Media with the ServiceNow media type.
Though the Send to field is not used in the ServiceNow webhook, it cannot be left empty. To comply with frontend requirements, enter any symbol in the field.
Make sure this user has access to all hosts for which you would like problem notifications to be converted into ServiceNow tasks.
For more information see Zabbix and ServiceNow documentations.
Supported Versions
Zabbix 5.0
This template is for Zabbix version: 5.4
Source: https://git.zabbix.com/projects/ZBX/repos/zabbix/browse/templates/media/servicenow?at=release/5.4
ServiceNow webhook
This guide describes how to integrate Zabbix 5.0 installation with ServiceNow using the Zabbix webhook feature. This guide provides instructions on setting up a media type, a user and an action in Zabbix.
Please note that recovery and update operations and ServiceNow's custom fields are supported only for trigger-based events.
Setting up ServiceNow
1. First, create a service user for creating incidents.
2. Assign to the newly created user the following roles:
- rest_api_explorer
- sn_incident_write
Setting up webhook in Zabbix
1. Before setting up a ServiceNow Webhook, it is recommended to set up a global macro "{$ZABBIX.URL}" containing a URL to the Zabbix frontend.
As an example, this macro can be used to populate ServiceNow's custom field with a URL to event info or graph.

2. In the "Administration -> Media types" section, import the media_servicenow.yaml
3. Open the newly added ServiceNow media type and replace all <PLACEHOLDERS> with your values.
The following parameters are required:
servicenow_user - login of the ServiceNow user created earlier
servicenow_password - user's password
To export information into a ServiceNow custom field, add a parameter with the custom field ID as a key (if you need help finding custom field ID, see this page in ServiceNow community).

Notes:
- ServiceNow instance must be in the same timezone as your Zabbix server.
- For fields with "Date/time" type, parameter values must be separated via space (example: "{EVENT.DATE} {EVENT.TIME}"). See the ServiceNow documentation for details about the date and time format.
- Values of the parameters with date only will be converted from Zabbix format "yyyy.MM.dd" to "yyyy-MM-dd" for compatibility with the ServiceNow's API. These parameters must contain only macros that return the date (e.g. {EVENT.DATE} or {EVENT.RECOVERY.DATE}).
- If you don't want to duplicate information in a description field and the custom fields, modify the message templates for Problem, Problem recovery and Problem update types in the Message templates tab.

4. Create a Zabbix user and add Media with the ServiceNow media type.
The Send to field must contain the full URL of your ServiceNow instance (https://<INSTANCE>.service-now.com/).
Make sure this user has access to all hosts for which you would like problem notifications to be converted into ServiceNow tasks.
For more information see Zabbix and ServiceNow documentations.
Supported Versions
Zabbix 5.0
This template is for Zabbix version: 5.0
Source: https://git.zabbix.com/projects/ZBX/repos/zabbix/browse/templates/media/servicenow?at=release/5.0
ServiceNow webhook
This guide describes how to integrate Zabbix 5.0 installation with ServiceNow using the Zabbix webhook feature. This guide provides instructions on setting up a media type, a user and an action in Zabbix.
Please note that recovery and update operations and ServiceNow's custom fields are supported only for trigger-based events.
Setting up ServiceNow
1. First, create a service user for creating incidents.
2. Assign to the newly created user the following roles:
- rest_api_explorer
- sn_incident_write
Setting up webhook in Zabbix
1. Before setting up a ServiceNow Webhook, it is recommended to set up a global macro "{$ZABBIX.URL}" containing a URL to the Zabbix frontend.
As an example, this macro can be used to populate ServiceNow's custom field with a URL to event info or graph.

2. In the "Administration -> Media types" section, import the media_servicenow.xml
3. Open the newly added ServiceNow media type and replace all <PLACEHOLDERS> with your values.
The following parameters are required:
servicenow_user - login of the ServiceNow user created earlier
servicenow_password - user's password
To export information into a ServiceNow custom field, add a parameter with the custom field ID as a key (if you need help finding custom field ID, see this page in ServiceNow community).

Notes:
- ServiceNow instance must be in the same timezone as your Zabbix server.
- For fields with "Date/time" type, parameter values must be separated via space (example: "{EVENT.DATE} {EVENT.TIME}"). See the ServiceNow documentation for details about the date and time format.
- Values of the parameters with date only will be converted from Zabbix format "yyyy.MM.dd" to "yyyy-MM-dd" for compatibility with the ServiceNow's API. These parameters must contain only macros that return the date (e.g. {EVENT.DATE} or {EVENT.RECOVERY.DATE}).
- If you don't want to duplicate information in a description field and the custom fields, modify the message templates for Problem, Problem recovery and Problem update types in the Message templates tab.

4. Create a Zabbix user and add Media with the ServiceNow media type.
The Send to field must contain the full URL of your ServiceNow instance (https://<INSTANCE>.service-now.com/).
Make sure this user has access to all hosts for which you would like problem notifications to be converted into ServiceNow tasks.
For more information see Zabbix and ServiceNow documentations.
Supported Versions
Zabbix 5.0