This template is for Zabbix version: 7.4
Source: https://git.zabbix.com/projects/ZBX/repos/zabbix/browse/templates/media/servicenow?at=release/7.4
ServiceNow webhook
This guide describes how to integrate Zabbix 7.4 installation with ServiceNow using the Zabbix webhook feature. This guide provides instructions on setting up a media type, a user and an action in Zabbix.
Please note that recovery and update operations and ServiceNow's custom fields are supported only for trigger-based events.
Setting up ServiceNow
1. First, create a service user for creating incidents.
2. Assign to the newly created user the following roles:
- rest_api_explorer
- sn_incident_write
Setting up webhook in Zabbix
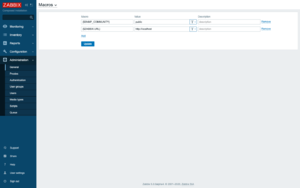
1. Before setting up a ServiceNow Webhook, it is recommended to set up a global macro "{$ZABBIX.URL}" containing a URL to the Zabbix frontend.
As an example, this macro can be used to populate ServiceNow's custom field with a URL to event info or graph.
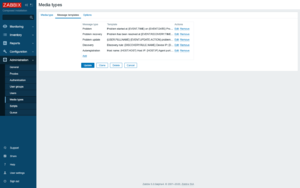
2. In the "Administration -> Media types" section, import the media_servicenow.yaml
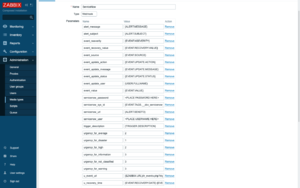
3. Open the newly added ServiceNow media type and replace all <PLACEHOLDERS> with your values.
The following parameters are required:
servicenow_user - login of the ServiceNow user created earlier
servicenow_password - user's password
To export information into a ServiceNow custom field, add a parameter with the custom field ID as a key (if you need help finding custom field ID, see this page in ServiceNow community).
Notes:
- ServiceNow instance must be in the same timezone as your Zabbix server.
- For fields with "Date/time" type, parameter values must be separated via space (example: "{EVENT.DATE} {EVENT.TIME}"). See the ServiceNow documentation for details about the date and time format.
- Values of the parameters with date only will be converted from Zabbix format "yyyy.MM.dd" to "yyyy-MM-dd" for compatibility with the ServiceNow's API. These parameters must contain only macros that return the date (e.g. {EVENT.DATE} or {EVENT.RECOVERY.DATE}).
- If you don't want to duplicate information in a description field and the custom fields, modify the message templates for Problem, Problem recovery and Problem update types in the Message templates tab.
4. Create a Zabbix user and add Media with the ServiceNow media type.
The Send to field must contain the full URL of your ServiceNow instance (https://<INSTANCE>.service-now.com/).
Make sure this user has access to all hosts for which you would like problem notifications to be converted into ServiceNow tasks.
For more information see Zabbix and ServiceNow documentations.
Supported Versions
Zabbix 7.4
This template is for Zabbix version: 7.2
Source: https://git.zabbix.com/projects/ZBX/repos/zabbix/browse/templates/media/servicenow?at=release/7.2
ServiceNow webhook
This guide describes how to integrate Zabbix 7.0 installation with ServiceNow using the Zabbix webhook feature. This guide provides instructions on setting up a media type, a user and an action in Zabbix.
Please note that recovery and update operations and ServiceNow's custom fields are supported only for trigger-based events.
Setting up ServiceNow
1. First, create a service user for creating incidents.
2. Assign to the newly created user the following roles:
- rest_api_explorer
- sn_incident_write
Setting up webhook in Zabbix
1. Before setting up a ServiceNow Webhook, it is recommended to set up a global macro "{$ZABBIX.URL}" containing a URL to the Zabbix frontend.
As an example, this macro can be used to populate ServiceNow's custom field with a URL to event info or graph.
2. In the "Administration -> Media types" section, import the media_servicenow.yaml
3. Open the newly added ServiceNow media type and replace all <PLACEHOLDERS> with your values.
The following parameters are required:
servicenow_user - login of the ServiceNow user created earlier
servicenow_password - user's password
To export information into a ServiceNow custom field, add a parameter with the custom field ID as a key (if you need help finding custom field ID, see this page in ServiceNow community).
Notes:
- ServiceNow instance must be in the same timezone as your Zabbix server.
- For fields with "Date/time" type, parameter values must be separated via space (example: "{EVENT.DATE} {EVENT.TIME}"). See the ServiceNow documentation for details about the date and time format.
- Values of the parameters with date only will be converted from Zabbix format "yyyy.MM.dd" to "yyyy-MM-dd" for compatibility with the ServiceNow's API. These parameters must contain only macros that return the date (e.g. {EVENT.DATE} or {EVENT.RECOVERY.DATE}).
- If you don't want to duplicate information in a description field and the custom fields, modify the message templates for Problem, Problem recovery and Problem update types in the Message templates tab.
4. Create a Zabbix user and add Media with the ServiceNow media type.
The Send to field must contain the full URL of your ServiceNow instance (https://<INSTANCE>.service-now.com/).
Make sure this user has access to all hosts for which you would like problem notifications to be converted into ServiceNow tasks.
For more information see Zabbix and ServiceNow documentations.
Supported Versions
Zabbix 7.0
This template is for Zabbix version: 7.0
Source: https://git.zabbix.com/projects/ZBX/repos/zabbix/browse/templates/media/servicenow?at=release/7.0
ServiceNow webhook
This guide describes how to integrate Zabbix 7.0 installation with ServiceNow using the Zabbix webhook feature. This guide provides instructions on setting up a media type, a user and an action in Zabbix.
Please note that recovery and update operations and ServiceNow's custom fields are supported only for trigger-based events.
Setting up ServiceNow
1. First, create a service user for creating incidents.
2. Assign to the newly created user the following roles:
- rest_api_explorer
- sn_incident_write
Setting up webhook in Zabbix
1. Before setting up a ServiceNow Webhook, it is recommended to set up a global macro "{$ZABBIX.URL}" containing a URL to the Zabbix frontend.
As an example, this macro can be used to populate ServiceNow's custom field with a URL to event info or graph.
2. In the "Administration -> Media types" section, import the media_servicenow.yaml
3. Open the newly added ServiceNow media type and replace all <PLACEHOLDERS> with your values.
The following parameters are required:
servicenow_user - login of the ServiceNow user created earlier
servicenow_password - user's password
To export information into a ServiceNow custom field, add a parameter with the custom field ID as a key (if you need help finding custom field ID, see this page in ServiceNow community).
Notes:
- ServiceNow instance must be in the same timezone as your Zabbix server.
- For fields with "Date/time" type, parameter values must be separated via space (example: "{EVENT.DATE} {EVENT.TIME}"). See the ServiceNow documentation for details about the date and time format.
- Values of the parameters with date only will be converted from Zabbix format "yyyy.MM.dd" to "yyyy-MM-dd" for compatibility with the ServiceNow's API. These parameters must contain only macros that return the date (e.g. {EVENT.DATE} or {EVENT.RECOVERY.DATE}).
- If you don't want to duplicate information in a description field and the custom fields, modify the message templates for Problem, Problem recovery and Problem update types in the Message templates tab.
4. Create a Zabbix user and add Media with the ServiceNow media type.
The Send to field must contain the full URL of your ServiceNow instance (https://<INSTANCE>.service-now.com/).
Make sure this user has access to all hosts for which you would like problem notifications to be converted into ServiceNow tasks.
For more information see Zabbix and ServiceNow documentations.
Supported Versions
Zabbix 7.0
This template is for Zabbix version: 6.4
Source: https://git.zabbix.com/projects/ZBX/repos/zabbix/browse/templates/media/servicenow?at=release/6.4
ServiceNow webhook
This guide describes how to integrate Zabbix 6.2 installation with ServiceNow using the Zabbix webhook feature. This guide provides instructions on setting up a media type, a user and an action in Zabbix.
Please note that recovery and update operations and ServiceNow's custom fields are supported only for trigger-based events.
Setting up ServiceNow
1. First, create a service user for creating incidents.
2. Assign to the newly created user the following roles:
- rest_api_explorer
- sn_incident_write
Setting up webhook in Zabbix
1. Before setting up a ServiceNow Webhook, it is recommended to set up a global macro "{$ZABBIX.URL}" containing a URL to the Zabbix frontend.
As an example, this macro can be used to populate ServiceNow's custom field with a URL to event info or graph.
2. In the "Administration -> Media types" section, import the media_servicenow.yaml
3. Open the newly added ServiceNow media type and replace all <PLACEHOLDERS> with your values.
The following parameters are required:
servicenow_user - login of the ServiceNow user created earlier
servicenow_password - user's password
To export information into a ServiceNow custom field, add a parameter with the custom field ID as a key (if you need help finding custom field ID, see this page in ServiceNow community).
Notes:
- ServiceNow instance must be in the same timezone as your Zabbix server.
- For fields with "Date/time" type, parameter values must be separated via space (example: "{EVENT.DATE} {EVENT.TIME}"). See the ServiceNow documentation for details about the date and time format.
- Values of the parameters with date only will be converted from Zabbix format "yyyy.MM.dd" to "yyyy-MM-dd" for compatibility with the ServiceNow's API. These parameters must contain only macros that return the date (e.g. {EVENT.DATE} or {EVENT.RECOVERY.DATE}).
- If you don't want to duplicate information in a description field and the custom fields, modify the message templates for Problem, Problem recovery and Problem update types in the Message templates tab.
4. Create a Zabbix user and add Media with the ServiceNow media type.
The Send to field must contain the full URL of your ServiceNow instance (https://<INSTANCE>.service-now.com/).
Make sure this user has access to all hosts for which you would like problem notifications to be converted into ServiceNow tasks.
For more information see Zabbix and ServiceNow documentations.
Supported Versions
Zabbix 6.2
This template is for Zabbix version: 6.2
Source: https://git.zabbix.com/projects/ZBX/repos/zabbix/browse/templates/media/servicenow?at=release/6.2
ServiceNow webhook
This guide describes how to integrate Zabbix 6.2 installation with ServiceNow using the Zabbix webhook feature. This guide provides instructions on setting up a media type, a user and an action in Zabbix.
Please note that recovery and update operations and ServiceNow's custom fields are supported only for trigger-based events.
Setting up ServiceNow
1. First, create a service user for creating incidents.
2. Assign to the newly created user the following roles:
- rest_api_explorer
- sn_incident_write
Setting up webhook in Zabbix
1. Before setting up a ServiceNow Webhook, it is recommended to set up a global macro "{$ZABBIX.URL}" containing a URL to the Zabbix frontend.
As an example, this macro can be used to populate ServiceNow's custom field with a URL to event info or graph.
2. In the "Administration -> Media types" section, import the media_servicenow.yaml
3. Open the newly added ServiceNow media type and replace all <PLACEHOLDERS> with your values.
The following parameters are required:
servicenow_user - login of the ServiceNow user created earlier
servicenow_password - user's password
To export information into a ServiceNow custom field, add a parameter with the custom field ID as a key (if you need help finding custom field ID, see this page in ServiceNow community).
Notes:
- ServiceNow instance must be in the same timezone as your Zabbix server.
- For fields with "Date/time" type, parameter values must be separated via space (example: "{EVENT.DATE} {EVENT.TIME}"). See the ServiceNow documentation for details about the date and time format.
- Values of the parameters with date only will be converted from Zabbix format "yyyy.MM.dd" to "yyyy-MM-dd" for compatibility with the ServiceNow's API. These parameters must contain only macros that return the date (e.g. {EVENT.DATE} or {EVENT.RECOVERY.DATE}).
- If you don't want to duplicate information in a description field and the custom fields, modify the message templates for Problem, Problem recovery and Problem update types in the Message templates tab.
4. Create a Zabbix user and add Media with the ServiceNow media type.
The Send to field must contain the full URL of your ServiceNow instance (https://<INSTANCE>.service-now.com/).
Make sure this user has access to all hosts for which you would like problem notifications to be converted into ServiceNow tasks.
For more information see Zabbix and ServiceNow documentations.
Supported Versions
Zabbix 6.2
This template is for Zabbix version: 6.0
Source: https://git.zabbix.com/projects/ZBX/repos/zabbix/browse/templates/media/servicenow?at=release/6.0
ServiceNow webhook
This guide describes how to integrate Zabbix 5.0 installation with ServiceNow using the Zabbix webhook feature. This guide provides instructions on setting up a media type, a user and an action in Zabbix.
Please note that recovery and update operations and ServiceNow's custom fields are supported only for trigger-based events.
Setting up ServiceNow
1. First, create a service user for creating incidents.
2. Assign to the newly created user the following roles:
- rest_api_explorer
- sn_incident_write
Setting up webhook in Zabbix
1. Before setting up a ServiceNow Webhook, it is recommended to set up a global macro "{$ZABBIX.URL}" containing a URL to the Zabbix frontend.
As an example, this macro can be used to populate ServiceNow's custom field with a URL to event info or graph.
2. In the "Administration -> Media types" section, import the media_servicenow.yaml
3. Open the newly added ServiceNow media type and replace all <PLACEHOLDERS> with your values.
The following parameters are required:
servicenow_user - login of the ServiceNow user created earlier
servicenow_password - user's password
To export information into a ServiceNow custom field, add a parameter with the custom field ID as a key (if you need help finding custom field ID, see this page in ServiceNow community).
Notes:
- ServiceNow instance must be in the same timezone as your Zabbix server.
- For fields with "Date/time" type, parameter values must be separated via space (example: "{EVENT.DATE} {EVENT.TIME}"). See the ServiceNow documentation for details about the date and time format.
- Values of the parameters with date only will be converted from Zabbix format "yyyy.MM.dd" to "yyyy-MM-dd" for compatibility with the ServiceNow's API. These parameters must contain only macros that return the date (e.g. {EVENT.DATE} or {EVENT.RECOVERY.DATE}).
- If you don't want to duplicate information in a description field and the custom fields, modify the message templates for Problem, Problem recovery and Problem update types in the Message templates tab.
4. Create a Zabbix user and add Media with the ServiceNow media type.
The Send to field must contain the full URL of your ServiceNow instance (https://<INSTANCE>.service-now.com/).
Make sure this user has access to all hosts for which you would like problem notifications to be converted into ServiceNow tasks.
For more information see Zabbix and ServiceNow documentations.
Supported Versions
Zabbix 5.0
This template is for Zabbix version: 5.4
Source: https://git.zabbix.com/projects/ZBX/repos/zabbix/browse/templates/media/servicenow?at=release/5.4
ServiceNow webhook
This guide describes how to integrate Zabbix 5.0 installation with ServiceNow using the Zabbix webhook feature. This guide provides instructions on setting up a media type, a user and an action in Zabbix.
Please note that recovery and update operations and ServiceNow's custom fields are supported only for trigger-based events.
Setting up ServiceNow
1. First, create a service user for creating incidents.
2. Assign to the newly created user the following roles:
- rest_api_explorer
- sn_incident_write
Setting up webhook in Zabbix
1. Before setting up a ServiceNow Webhook, it is recommended to set up a global macro "{$ZABBIX.URL}" containing a URL to the Zabbix frontend.
As an example, this macro can be used to populate ServiceNow's custom field with a URL to event info or graph.
2. In the "Administration -> Media types" section, import the media_servicenow.yaml
3. Open the newly added ServiceNow media type and replace all <PLACEHOLDERS> with your values.
The following parameters are required:
servicenow_user - login of the ServiceNow user created earlier
servicenow_password - user's password
To export information into a ServiceNow custom field, add a parameter with the custom field ID as a key (if you need help finding custom field ID, see this page in ServiceNow community).
Notes:
- ServiceNow instance must be in the same timezone as your Zabbix server.
- For fields with "Date/time" type, parameter values must be separated via space (example: "{EVENT.DATE} {EVENT.TIME}"). See the ServiceNow documentation for details about the date and time format.
- Values of the parameters with date only will be converted from Zabbix format "yyyy.MM.dd" to "yyyy-MM-dd" for compatibility with the ServiceNow's API. These parameters must contain only macros that return the date (e.g. {EVENT.DATE} or {EVENT.RECOVERY.DATE}).
- If you don't want to duplicate information in a description field and the custom fields, modify the message templates for Problem, Problem recovery and Problem update types in the Message templates tab.
4. Create a Zabbix user and add Media with the ServiceNow media type.
The Send to field must contain the full URL of your ServiceNow instance (https://<INSTANCE>.service-now.com/).
Make sure this user has access to all hosts for which you would like problem notifications to be converted into ServiceNow tasks.
For more information see Zabbix and ServiceNow documentations.
Supported Versions
Zabbix 5.0
This template is for Zabbix version: 5.0
Source: https://git.zabbix.com/projects/ZBX/repos/zabbix/browse/templates/media/servicenow?at=release/5.0
ServiceNow webhook
This guide describes how to integrate Zabbix 5.0 installation with ServiceNow using the Zabbix webhook feature. This guide provides instructions on setting up a media type, a user and an action in Zabbix.
Please note that recovery and update operations and ServiceNow's custom fields are supported only for trigger-based events.
Setting up ServiceNow
1. First, create a service user for creating incidents.
2. Assign to the newly created user the following roles:
- rest_api_explorer
- sn_incident_write
Setting up webhook in Zabbix
1. Before setting up a ServiceNow Webhook, it is recommended to set up a global macro "{$ZABBIX.URL}" containing a URL to the Zabbix frontend.
As an example, this macro can be used to populate ServiceNow's custom field with a URL to event info or graph.
2. In the "Administration -> Media types" section, import the media_servicenow.xml
3. Open the newly added ServiceNow media type and replace all <PLACEHOLDERS> with your values.
The following parameters are required:
servicenow_user - login of the ServiceNow user created earlier
servicenow_password - user's password
To export information into a ServiceNow custom field, add a parameter with the custom field ID as a key (if you need help finding custom field ID, see this page in ServiceNow community).
Notes:
- ServiceNow instance must be in the same timezone as your Zabbix server.
- For fields with "Date/time" type, parameter values must be separated via space (example: "{EVENT.DATE} {EVENT.TIME}"). See the ServiceNow documentation for details about the date and time format.
- Values of the parameters with date only will be converted from Zabbix format "yyyy.MM.dd" to "yyyy-MM-dd" for compatibility with the ServiceNow's API. These parameters must contain only macros that return the date (e.g. {EVENT.DATE} or {EVENT.RECOVERY.DATE}).
- If you don't want to duplicate information in a description field and the custom fields, modify the message templates for Problem, Problem recovery and Problem update types in the Message templates tab.
4. Create a Zabbix user and add Media with the ServiceNow media type.
The Send to field must contain the full URL of your ServiceNow instance (https://<INSTANCE>.service-now.com/).
Make sure this user has access to all hosts for which you would like problem notifications to be converted into ServiceNow tasks.
For more information see Zabbix and ServiceNow documentations.
Supported Versions
Zabbix 5.0


