
11 Microsoft Entra IDを使用したSAMLの設定
概要
このセクションでは、SAML 2.0 認証を使用して Microsoft Entra ID(旧称 Microsoft Azure Active Directory)から Zabbix へのシングルサインオンとユーザープロビジョニングを構成するためのガイドラインを示します。
Microsoft Entra IDの設定
Creating application
1. Log into your account at Microsoft Azure. For testing purposes, you may create a free trial account in Microsoft Azure.
2. From the main menu (see top left of the screen) select Azure Active Directory.
3. Select Enterprise applications -> Add new application -> Create your own application.
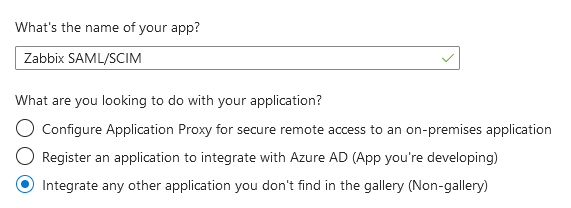
4. Add the name of your app and select the Integrate any other application... option. After that, click on Create.
Setting up single sign-on
1. In your application page, go to Set up single sign on and click on Get started. Then select SAML.
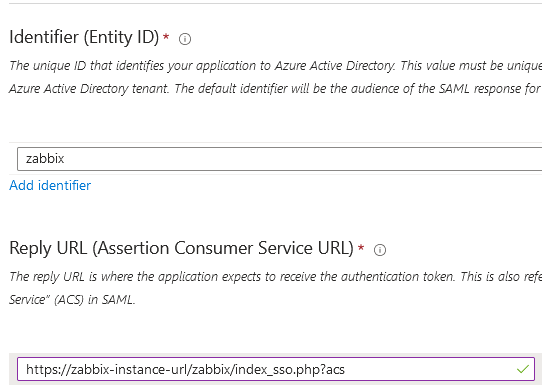
2. Edit Basic SAML Configuration:
- In Identifier (Entity ID) set a unique name to identify your app to Azure Active Directory, for example,
zabbix; - In Reply URL (Assertion Consumer Service URL) set the Zabbix single sign-on endpoint:
https://<zabbix-instance-url>/zabbix/index_sso.php?acs:
Note that this field requires "https". To make that work with Zabbix, it is necessary to add to conf/zabbix.conf.php the following line:
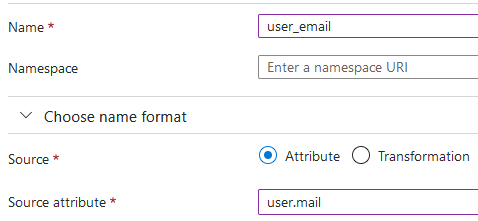
$SSO['SETTINGS'] = ['use_proxy_headers' => true];3. Edit Attributes & Claims. You must add all attributes that you want to pass to Zabbix (user_name, user_lastname, user_email, user_mobile, groups).
The attribute names are arbitrary. Different attribute names may be used, however, it is required that they match the respective field value in Zabbix SAML settings.
- Click on Add new claim to add an attribute:
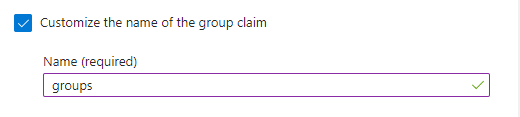
- Click on Add a group claim to add an attribute for passing groups to Zabbix:
4. In SAML Certificates download the certificate provided by Azure and place it into conf/certs of the Zabbix frontend installation.
Set 644 permissions to it by running:
chmod 644 azure.cerMake sure that conf/zabbix.conf.php contains the line:
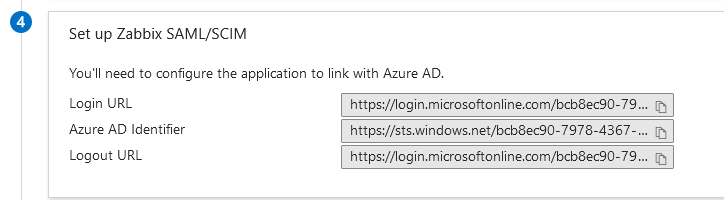
$SSO['IDP_CERT'] = 'conf/certs/azure.cer';5. Use the values from Set up <your app name> in Azure to configure Zabbix SAML authentication (see next section):
Zabbix configuration
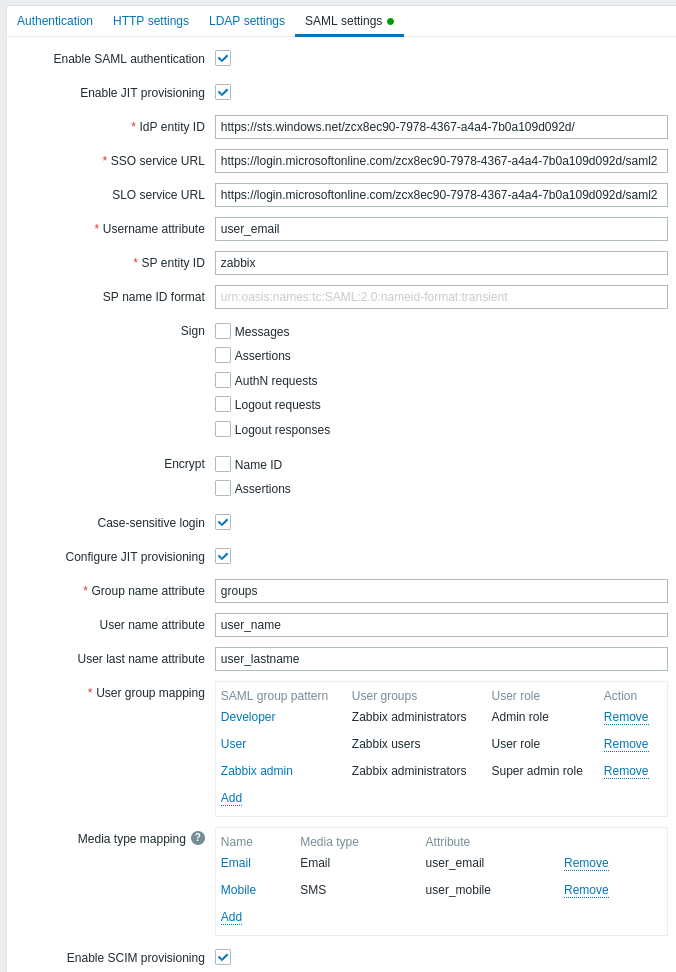
1. In Zabbix, go to the SAML settings and fill the configuration options based on the Azure configuration:
| Zabbix field | Setup field in Azure | Sample value |
|---|---|---|
| IdP entity ID | Azure AD identifier | |
| SSO service URL | Login URL | |
| SLO service URL | Logout URL | |
| Username attribute | Custom attribute (claim) | user_email |
| Group name attribute | Custom attribute (claim) | groups |
| User name attribute | Custom attribute (claim) | user_name |
| User last name attribute | Custom attribute (claim) | user_lastname |
It is also required to configure user group mapping. Media mapping is optional.
Click on Update to save these settings.
SCIM ユーザーのプロビジョニング
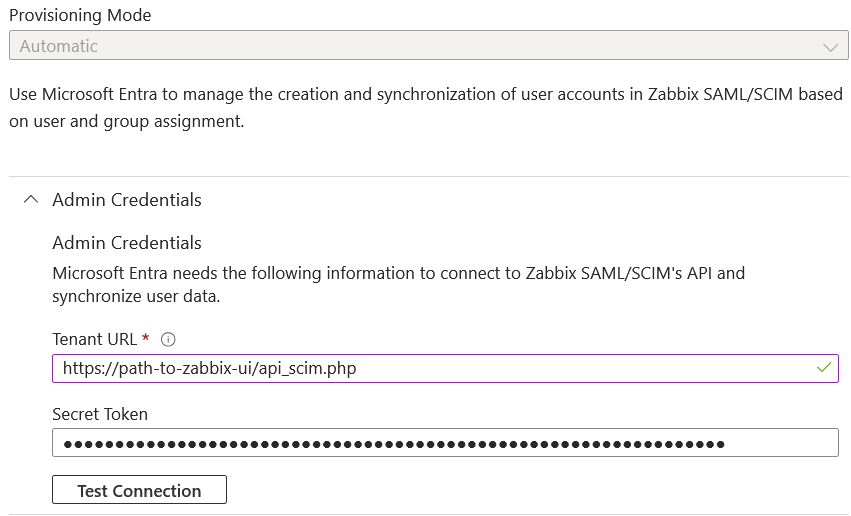
1. Entra ID アプリケーションページのメインメニューから プロビジョニングページを開きます。開始をクリックし、自動プロビジョニングモードを選択します。
- テナント URL に、以下の値を設定します:
https://<path-to-zabbix-ui>/api_scim.php - シークレット トークンに、スーパー管理者権限を持つ Zabbix API トークンを入力します。
- 接続テストをクリックし、接続が確立されているかどうかを確認します。
2. SCIM で Zabbix に渡すすべての属性を追加します。マッピング をクリックし、Microsoft Entra ID ユーザーのプロビジョニング をクリックします。
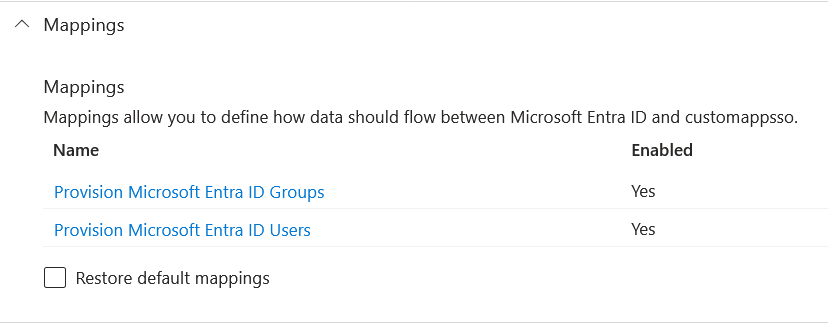
属性マッピングリストの下部で、詳細オプションを表示 を有効にし、customappsso の属性リストを編集 をクリックします。
属性リストの下部に、'文字列' 型で独自の属性を追加します。
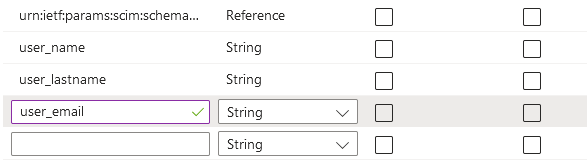
リストを保存します。
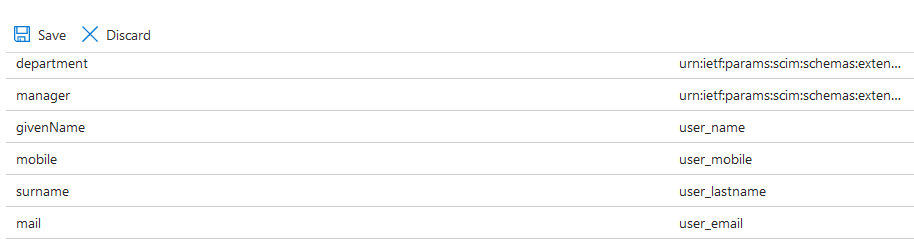
3. これで、追加した属性のマッピングを追加できます。属性マッピングリストの下部にある 新しいマッピングの追加 をクリックし、以下のようにマッピングを作成します。
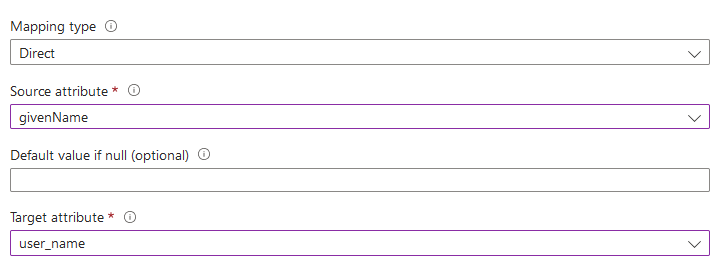
すべてのマッピングを追加したら、マッピングリストを保存します。
4. Zabbixへのユーザープロビジョニングの前提条件として、Entra IDでユーザーとグループが設定されている必要があります。
これを行うには、Microsoft Entra管理センター にアクセスし、ユーザー ページと グループ ページでユーザー/グループを追加します。
5. Entra ID でユーザーとグループを作成したら、アプリケーションの ユーザーとグループ メニューに移動して、アプリに追加できます。
6. アプリの プロビジョニング メニューに移動し、プロビジョニングを開始 をクリックして、ユーザーを Zabbix にプロビジョニングします。
Entra ID のユーザー PATCH リクエストは、メディアの変更をサポートしていないことに注意してください。
認証リクエストの署名
Entra ID を構成して、署名された認証リクエストの 署名を検証 することができます。
これを実行するには、公開鍵と秘密鍵を作成します。
openssl req -x509 -newkey rsa:4096 -keyout /usr/share/zabbix/conf/certs/request-sign.key -out /usr/share/zabbix/conf/certs/request-sign.pem -sha256 -days 1825 -nodes権限を割り当てます。
chown apache /usr/share/zabbix/conf/certs/request-sign.key
chmod 400 /usr/share/zabbix/conf/certs/request-sign.key
Zabbix フロントエンドの設定に以下のコードを追加します。
$SSO['SP_KEY'] = 'conf/certs/request-sign.key';
$SSO['SP_CERT'] = 'conf/certs/request-sign.crt';
トラブルシューティング
ユーザーがSAML経由でZabbixにログインしようとした際に、既にMicrosoft Edgeプロファイルでログインしている場合、Microsoft Edgeブラウザで認証の問題が発生することがあります。この問題の兆候として、ユーザーはMicrosoft Edgeをプライベートモードで使用してZabbixにログインできる可能性があります。
この場合、認証の問題を回避するには、Zabbixフロントエンド設定ファイル(zabbix.conf.php)でrequestedAuthnContextを"false"に設定する必要があるかもしれません。
$SSO['SETTINGS'] = [
    'security' => [
        'requestedAuthnContext' => false
    ]
];