
1 Пријава и конфигурисање корисника
Преглед
У овом одељку ћете научити како да се пријавите и подесите корисника система у Zabbix-у.
Пријављивање
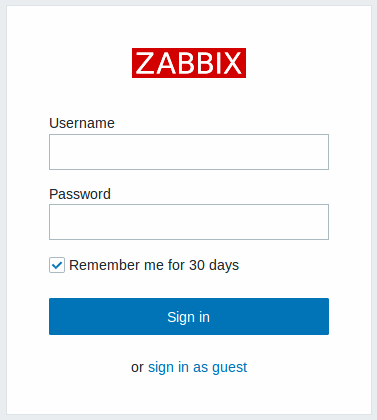
Ово је Zabbix екран добродошлице. Унесите корисничко име Admin са лозинкom zabbix да бисте се пријавили као Zabbix супер корисник. Приступ до свих делова менија ће бити одобрени.
Из безбедносних разлога, топло се препоручује да промените подразумевану лозинку за Админ налог одмах након првог пријављивања.
Трајно пријављивање
Да бисте остали пријављени до 30 дана, изаберите Запамти 30 дана пре него што кликнете на Пријави се.
Запамти 30 дана омогућено:
- Ваша сесија остаје активна 30 дана.
- Аутоматско одјављивање се поништава, држећи вас пријављеним док се период не заврши.
- Бићете аутоматски пријављени при будућим посетама у року од 30 дана без поновног уноса акредитива.
Запамти 30 дана онемогућено:
- Свако претходно омогућено аутоматско пријављивање се брише.
- Сесија ће истећи у складу са конфигурисаним интервалом Аутоматског одјављивања.
Заштита од напада грубе силе
У случају пет узастопних неуспешних покушаја пријаве, Zabbix интерфејс ће паузирајте 30 секунди да бисте спречили грубу силу и речник напада.
IP адреса неуспелог покушаја пријаве биће приказана након а успешног пријављивања.
Додавање корисника
Да бисте видели информације о корисницима, идите на Корисници > Корисници у вертикалном менију бочне траке.

Да бисте додали новог корисника, изаберите Креирај корисника у горњем десном углу.
У обрасцу за новог корисника, обавезно додајте свог корисника у једну од постојећих корисничких група, на пример 'Zabbix администратори'.
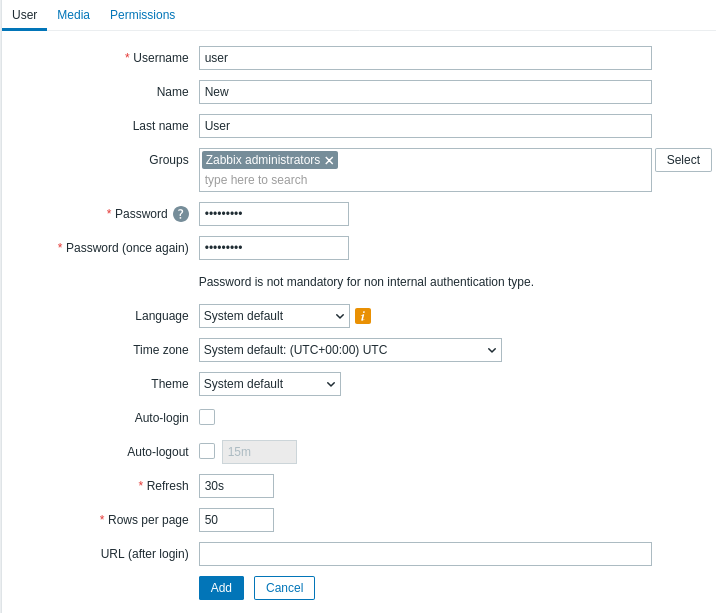
Сва обавезна поља за унос су означена црвеном звездицом. За детаље о пољима за унос на овом обрасцу за конфигурацију, погледајте страницу Подешавања корисника.
Подразумевано, нови корисници немају дефинисане медије (методе испоруке обавештења). Да бисте их креирали, идите на картицу 'Медији' и кликните на Додај.

У искачућем прозору унесите имејл адресу корисника.
Можете навести временски период када ће медијум бити активан (погледајте страницу Спецификација временског периода за опис формата). Подразумевано, медијум је увек активан. Такође можете прилагодити нивое озбиљности окидача за које ће медијум бити активан, али их све оставите омогућене за сада.
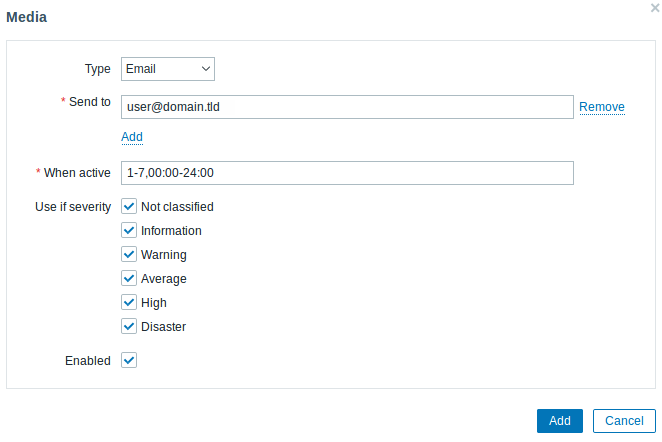
Кликните на Додај да бисте сачували медијум, а затим идите на картицу Дозволе.
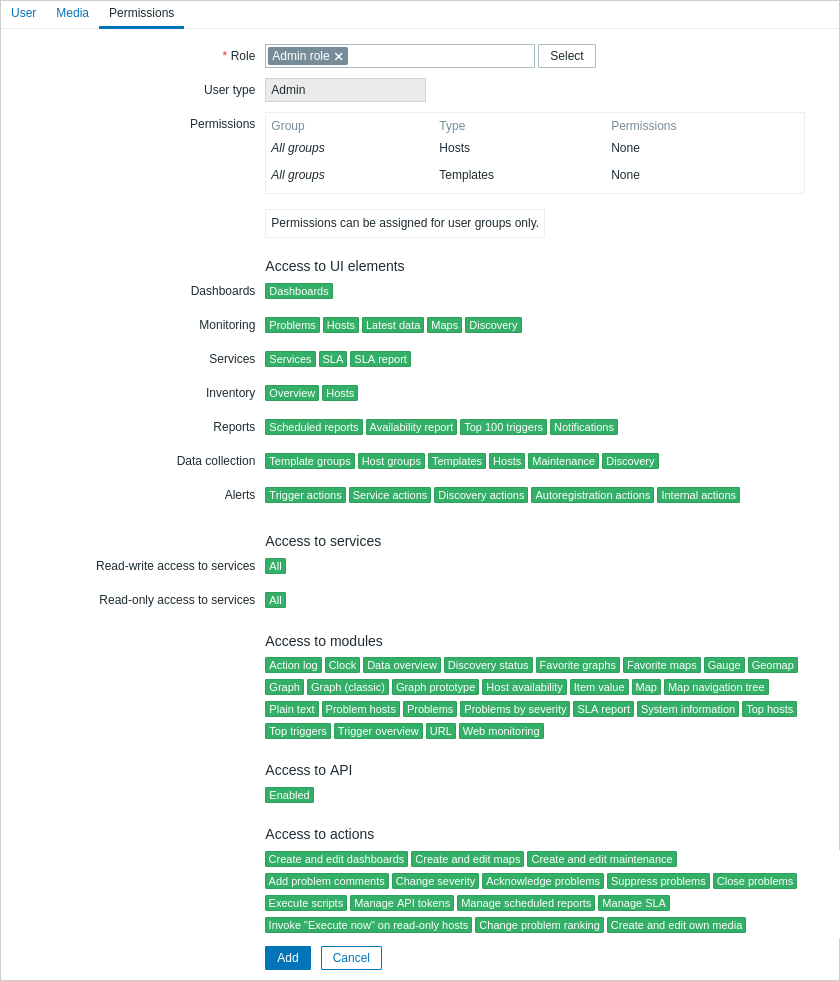
Картица Дозволе има обавезно поље Улога. Улога одређује које елементе фронтенда корисник може да види и које радње му је дозвољено да извршава. Притисните Изабери и изаберите једну од улога са листе. На пример, изаберите Администраторска улога да бисте омогућили приступ свим одељцима Zabbix кориснички интерфејс, осим Администрације. Касније можете изменити дозволе или креирати више корисничких улога. Након избора улоге, дозволе ће се појавити на истој картици:
Кликните на Додај у обрасцу за својства корисника да бисте сачували корисника. Нови корисник се појављује на листи корисника.

Додавање дозвола
Подразумевано, нови корисник нема дозволе за приступ домаћинима и шаблонима. Да бисте доделили
корисничка права, кликните на групу корисника у колони Групе (у
овом случају - 'Zabbix администратори'). У обрасцу Корисничке групе својства, идите
на картицу Дозволе домаћина да бисте доделили дозволе групама домаћина.
Кликните на  да би се приказало поље за избор групе домаћина:

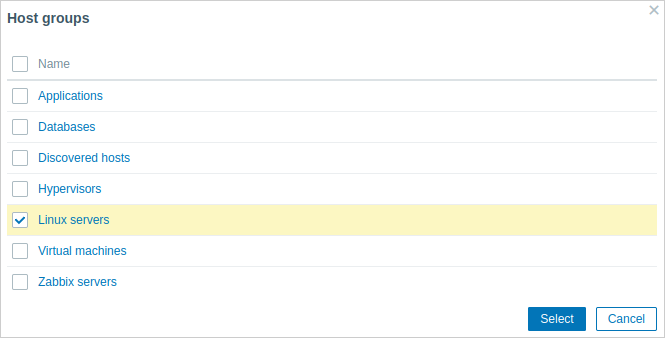
Затим кликните на Изабери поред поља да бисте видели листу група домаћина. Овај корисник ће имати приступ само за читање групи Linux сервери, па означите одговарајуће поље за потврду на листи и кликните на Изабери да бисте потврдили свој избор.
Кликните на дугме Читај да бисте подесили ниво дозвола, а затим на Ажурирај да бисте сачували измене направљене у конфигурацији корисничке групе.
Да бисте доделили дозволе шаблонима, потребно је да пређете на картицу Дозволе шаблона и наведете групе шаблона. Кораци су идентични додељивању дозвола групама домаћина. Преглед шаблона је доступан у одељку Нови шаблон овог брзог покретања.
У Zabbix-у, права приступа домаћина и шаблонима додељују се корисничким групама, а не појединачним корисницима.
Готово! Можете покушати да се пријавите користећи акредитиве новог корисника.