
2 Items
Overview
The item list for a template can be accessed from Configuration → Templates and then clicking on Items for the respective template.
The item list for a host can be accessed from Configuration → Hosts and then clicking on Items for the respective host.
A list of existing items is displayed.

Displayed data:
| Column | Description |
|---|---|
| Wizard | The wizard icon is a link to a wizard for creating a trigger based on the item. |
| Name | Name of the item, mostly displayed as a blue link except for items created from item prototypes. Clicking on the item name link opens the item configuration form. If the host item belongs to a template, the template name is displayed before the item name, as a grey link. Clicking on the template link will open the item list on the template level. If the item has been created from an item prototype, its name is preceded by the low level discovery rule name, in orange. Clicking on the discovery rule name will open the item prototype list. |
| Triggers | Moving the mouse over Triggers will display an info box displaying the triggers associated with the item. The number of the triggers is displayed in grey. |
| Key | Item key is displayed. |
| Interval | Frequency of the check is displayed. |
| History | How many days item data history will be kept is displayed. |
| Trends | How many days item trends history will be kept is displayed. |
| Type | Item type is displayed (Zabbix agent, SNMP agent, simple check, etc). |
| Applications | Item applications are displayed. |
| Status | Item status is displayed - Enabled, Disabled or Not supported. By clicking on the status you can change it - from Enabled to Disabled (and back); from Not supported to Disabled (and back). |
| Info | If everything is fine, no icon is displayed in this column. If there are errors, a red square icon with a cross is displayed. Move the mouse over the icon and you will see a tooltip with the error description. |
To configure a new item, click on the Create item button in the top right-hand corner.
Mass editing options
Buttons below the list offer some mass-editing options:
- Enable - change item status to Enabled
- Disable - change item status to Disabled
- Clear history - delete history and trend data for items
- Copy - copy the items to other hosts or templates
- Mass update - update several properties for a number of items at once
- Delete - delete the items
To use these options, mark the checkboxes before the respective items, then click on the required button.
Filter
As the list may contain very many items, it may be needed to filter out the ones you really need.
The Filter link is available above the list. If you click on it, a filter becomes available where you can filter items by several properties.
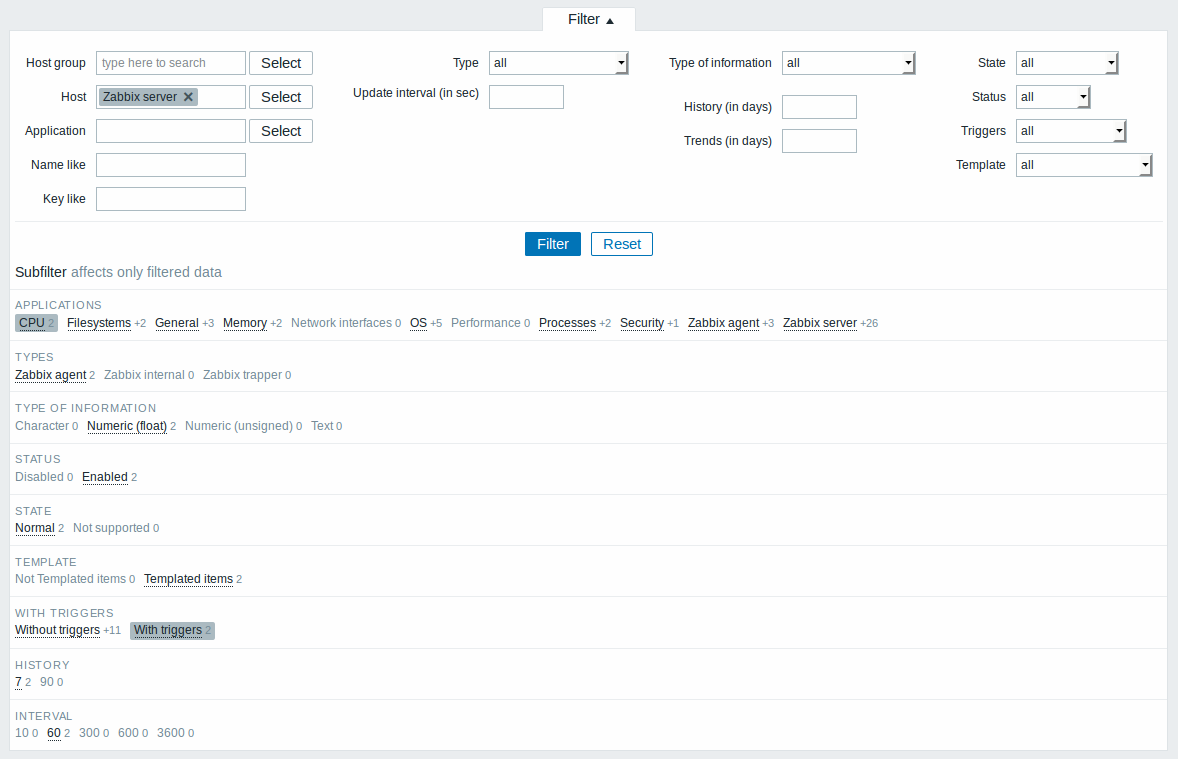
The Subfilter below the filter offers further filtering options (for the data already filtered). You can select groups of items with a common parameter value. If you click on a group it gets highlighted and only the items with this parameter value remain in the list.