3 发现SNMP OIDs
概述
在这个部分,我们将会在交换机上展示discoverySNMP。
键值
和文件系统和网络接口发现不同,此监控项无需有"snmp.discovery" 密钥 - 监控项类型的SNMP agent就足够了。
从Zabbix server/proxy 2.0开始支持发现SNMP OIDs。
根据以下操作来设置发现规则:
- 前往: 配置 → 模板
- 点击相应模板中的发现

- 点击屏幕右上角的 创建发现规则
- 填写发现规则表单,如下面的屏幕截图所示
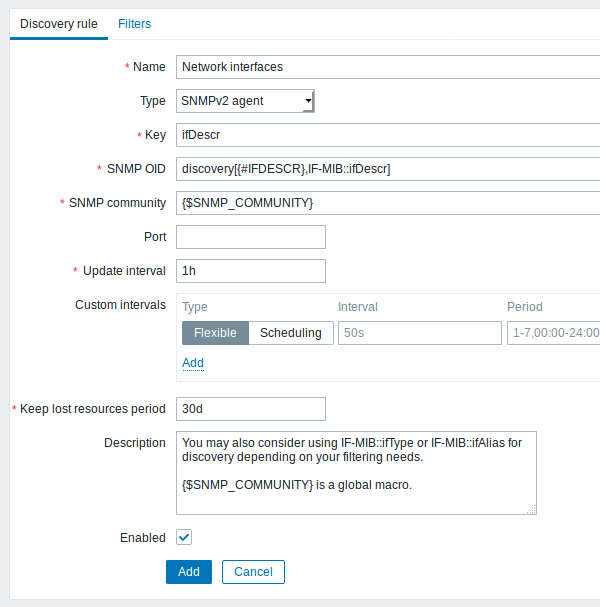
所有必填输入字段都标有红色星号。
要发现的OID在SNMP OID字段中以以下格式定义:
discovery[{#MACRO1}, oid1, {#MACRO2}, oid2, …,]
其中 {#MACRO1}, {#MACRO2} … 是有效的LLD宏名称, oid1, oid2... 是能够为这些宏生成有意义值的OID。 包含已发现OID索引的内置宏 {#SNMPINDEX}将应用于已发现的实体。发现的实体按{#SNMPINDEX}宏的值分组。
为了理解我们的意思,让我们在我们的交换机上展示一些snmpwalks:
$ snmpwalk -v 2c -c public 192.168.1.1 IF-MIB::ifDescr
IF-MIB::ifDescr.1 = STRING: WAN
IF-MIB::ifDescr.2 = STRING: LAN1
IF-MIB::ifDescr.3 = STRING: LAN2

$ snmpwalk -v 2c -c public 192.168.1.1 IF-MIB::ifPhysAddress
IF-MIB::ifPhysAddress.1 = STRING: 8:0:27:90:7a:75
IF-MIB::ifPhysAddress.2 = STRING: 8:0:27:90:7a:76
IF-MIB::ifPhysAddress.3 = STRING: 8:0:27:2b:af:9e
然后设置SNMP OID到:
discovery[{#IFDESCR}, ifDescr, {#IFPHYSADDRESS}, ifPhysAddress]
现在,此规则将发现将{#IFDESCR} 宏设置为 WAN, LAN1 and LAN2, {#IFPHYSADDRESS} 宏设置为 8:0:27:90:7a:75, 8:0:27:90:7a:76, 和 8:0:27:2b:af:9e, {#SNMPINDEX} 宏设置为发现的OID索引 1, 2 and 3:
{
    "data": [
        {
            "{#SNMPINDEX}": "1",
            "{#IFDESCR}": "WAN",
            "{#IFPHYSADDRESS}": "8:0:27:90:7a:75"
        },
        {
            "{#SNMPINDEX}": "2",
            "{#IFDESCR}": "LAN1",
            "{#IFPHYSADDRESS}": "8:0:27:90:7a:76"
        },
        {
            "{#SNMPINDEX}": "3",
            "{#IFDESCR}": "LAN2",
            "{#IFPHYSADDRESS}": "8:0:27:2b:af:9e"
        }
    ]
}
如果一个实体没有一个具体的OID,则该实体将省略相应的宏。例如我们有以下数据:
ifDescr.1 "Interface #1"
ifDescr.2 "Interface #2"
ifDescr.4 "Interface #4"

ifAlias.1 "eth0"
ifAlias.2 "eth1"
ifAlias.3 "eth2"
ifAlias.5 "eth4"然后在在SNMP发现discovery[{#IFDESCR}, ifDescr, {#IFALIAS}, ifAlias]
将会反馈以下结构:
{
    "data": [
        {
            "{#SNMPINDEX}": 1,
            "{#IFDESCR}": "Interface #1",
            "{#IFALIAS}": "eth0"
        },
        {
            "{#SNMPINDEX}": 2,
            "{#IFDESCR}": "Interface #2",
            "{#IFALIAS}": "eth1"
        },
        {
            "{#SNMPINDEX}": 3,
            "{#IFALIAS}": "eth2"
        },
        {
            "{#SNMPINDEX}": 4,
            "{#IFDESCR}": "Interface #4"
        },
        {
            "{#SNMPINDEX}": 5,
            "{#IFALIAS}": "eth4"
        }
    ]
}
监控项原型
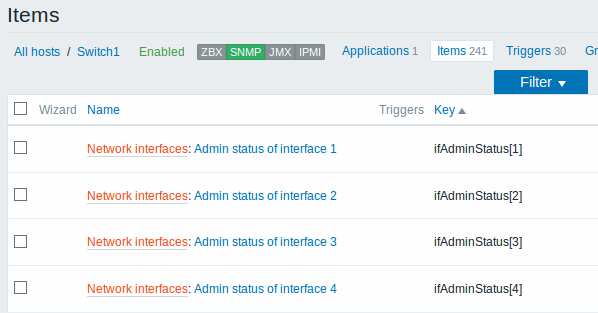
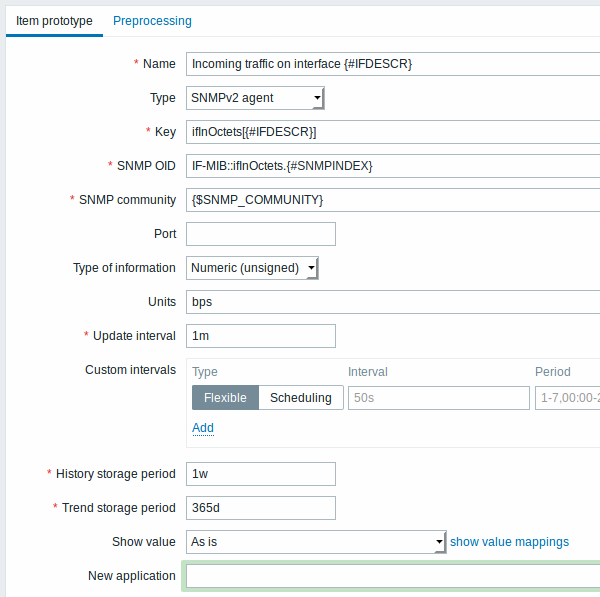
以下截屏说明了我们如何在监控项原型中使用这些宏:
重复一下,根据需求数量创建监控项原型:

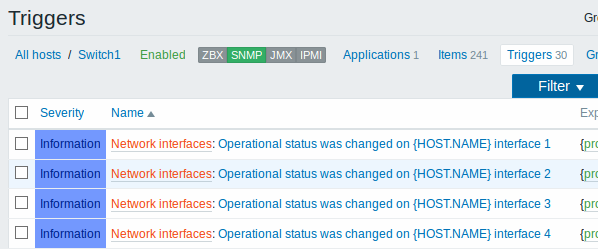
触发器原型
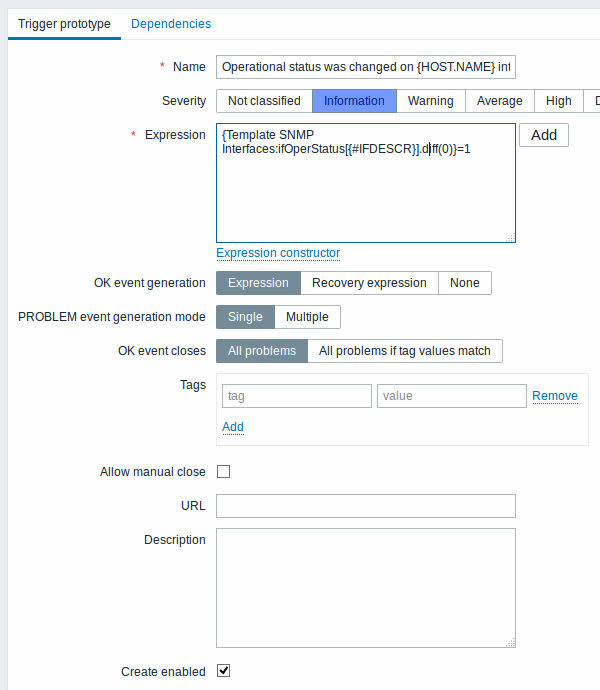
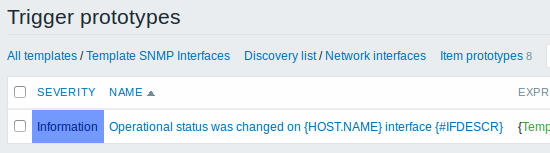
以下截屏说明了我们如何在触发器原型中使用这些宏:
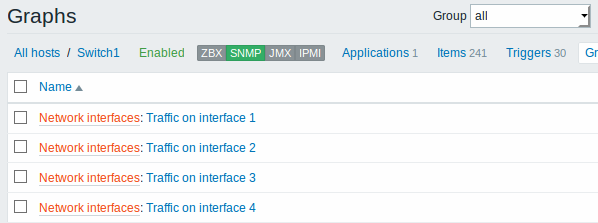
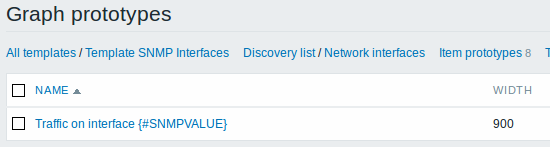
图表原型
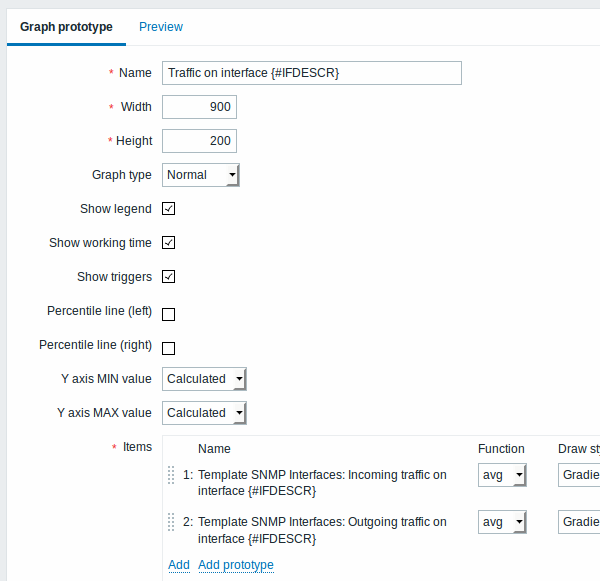
以下截屏说明了我们如何在图表原型中使用这些宏:
我们发现规则的总结:
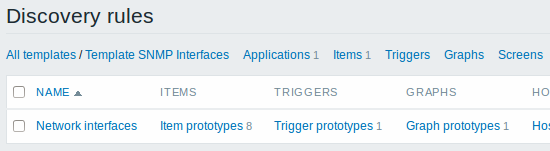
发现实体
当server运行时,它会基于SNMP发现规则的反馈的价值,创建真实的监控项,触发器和图表。在主机配置中,它们的前缀是橙色链接,指向它们来自的发现规则。