
12 Настройка SAML с Microsoft Entra ID
Обзор
В этом разделе приведены рекомендации по настройке единого входа и инициализации пользователей в Zabbix из Microsoft Entra ID (ранее Microsoft Azure Active Directory) с использованием аутентификации SAML 2.0.
Настройка Microsoft Entra ID
Создание приложения
1. Войдите в центр администрирования Microsoft Entra на странице Microsoft Entra ID. Для тестирования вы можете создать бесплатную пробную учетную запись в Microsoft Entra ID.
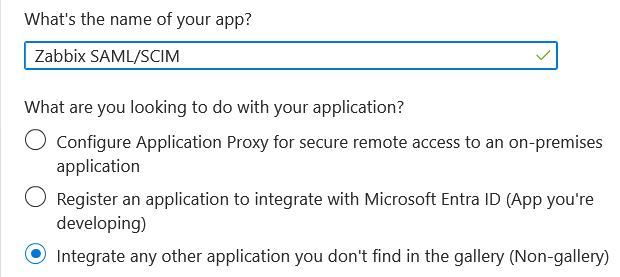
2. В центре администрирования Microsoft Entra выберите Applications -> Enterprise applications -> New application -> Create your own application.
3. Укажите имя вашего приложения и выберите параметр Integrate any other application.... После этого нажмите Create.
Настройка единого входа
1. На странице вашего приложения перейдите в раздел Set up single sign on и нажмите Get started. Затем выберите SAML.
2. Отредактируйте Basic SAML Configuration:
- В Identifier (Entity ID) задайте уникальное имя, чтобы идентифицировать ваше приложение в Microsoft Entra ID, например,
zabbix; - В Reply URL (Assertion Consumer Service URL) укажите конечную точку единого входа Zabbix:
https://<path-to-zabbix-ui>/index_sso.php?acs:
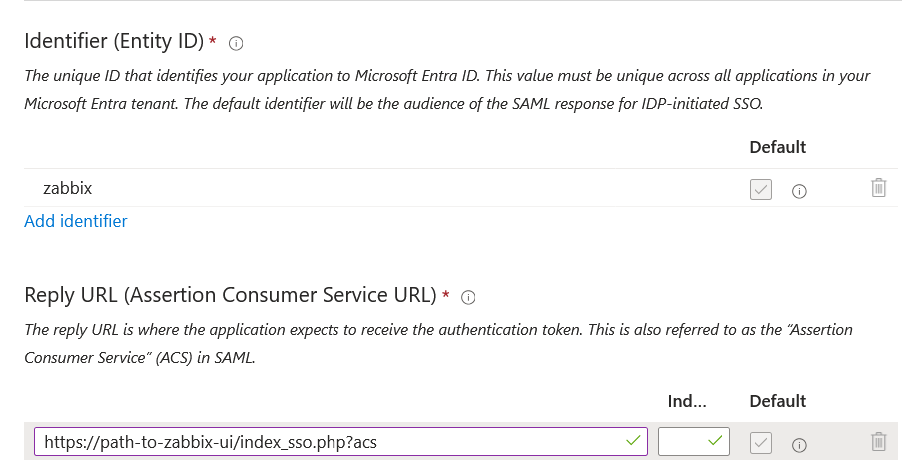
Обратите внимание, что требуется "https". Чтобы это работало с Zabbix, необходимо добавить в conf/zabbix.conf.php следующую строку:
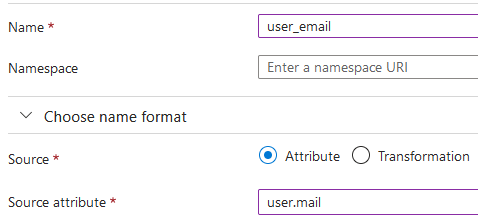
$SSO['SETTINGS'] = ['use_proxy_headers' => true];3. Отредактируйте Attributes & Claims. Необходимо добавить все атрибуты, которые вы хотите передать в Zabbix (user_name, user_lastname, user_email, user_mobile, groups).
Имена атрибутов произвольны. Можно использовать разные имена атрибутов, однако они должны соответствовать значению соответствующего поля в настройках Zabbix SAML.
- Нажмите Add new claim, чтобы добавить атрибут:
- Нажмите Add a group claim, чтобы добавить атрибут для передачи групп в Zabbix:
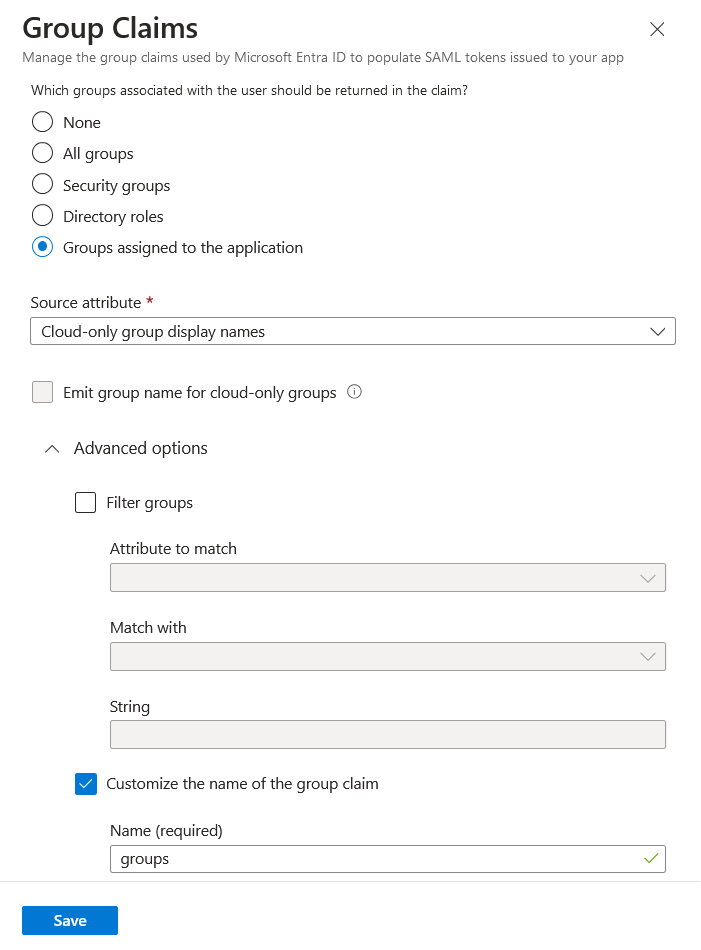
Важно, чтобы в этом claim в Zabbix передавались имена групп, а не идентификаторы групп, через выбранный Source attribute. В противном случае JIT-подготовка пользователей не будет работать корректно.
4. В SAML Certificates скачайте сертификат Base64, предоставленный Entra ID, и поместите его в conf/certs установки веб-интерфейса Zabbix (расположение может отличаться в зависимости от ОС/способа установки Zabbix из исходных кодов).
Установите для него права 644, выполнив:
chmod 644 entra.cerУбедитесь, что в conf/zabbix.conf.php есть строка:
$SSO['IDP_CERT'] = 'conf/certs/entra.cer';5. Используйте значения из Set up <your app name> в Entra ID для настройки аутентификации Zabbix SAML (см. следующий раздел):

Конфигурация Zabbix
1. В Zabbix перейдите в настройки SAML и заполните параметры конфигурации на основе конфигурации Entra ID:
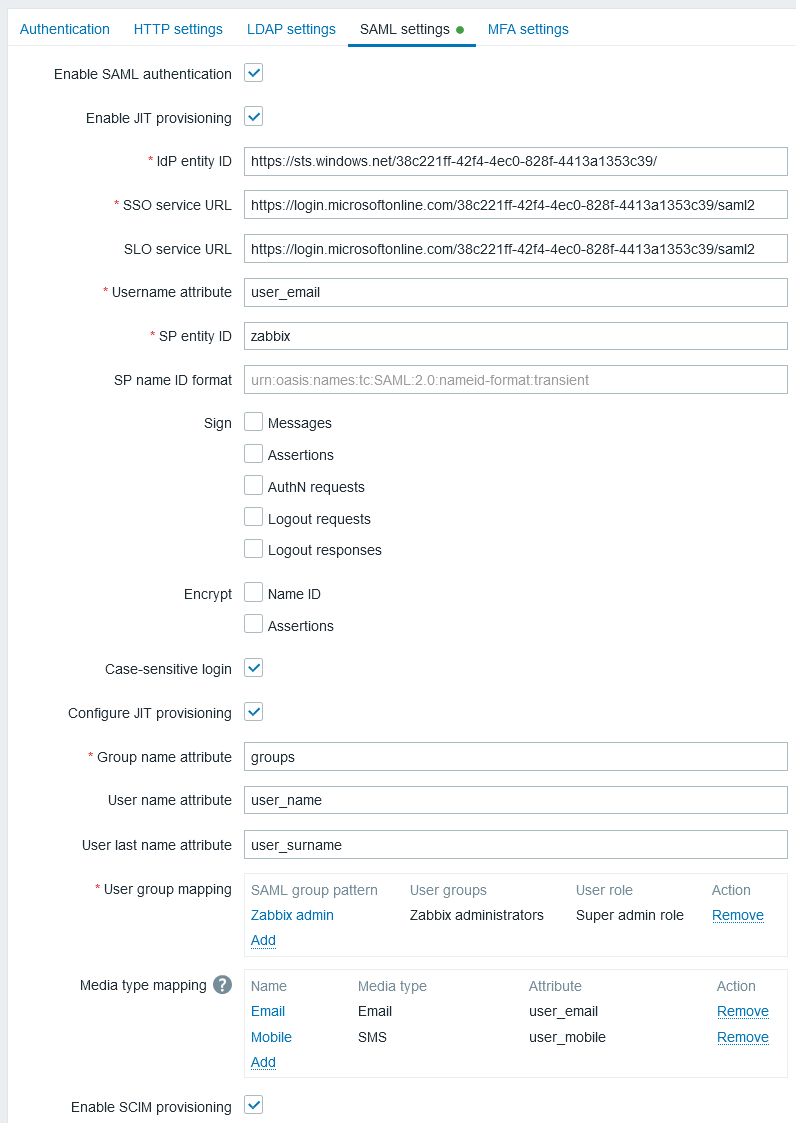
| Поле Zabbix | Поле настройки в Entra ID | Пример значения |
|---|---|---|
| IdP entity ID | Microsoft Entra identifier | |
| SSO service URL | Login URL | |
| SLO service URL | Logout URL | |
| SP entity ID | Identifier (Entity ID) | |
| Username attribute | Custom attribute (claim) | user_email |
| Group name attribute | Custom attribute (claim) | groups |
| User name attribute | Custom attribute (claim) | user_name |
| User last name attribute | Custom attribute (claim) | user_lastname |
Также требуется настроить сопоставление групп пользователей. Сопоставление медиа является необязательным.
Нажмите Update, чтобы сохранить эти настройки.
SCIM-подготовка пользователей
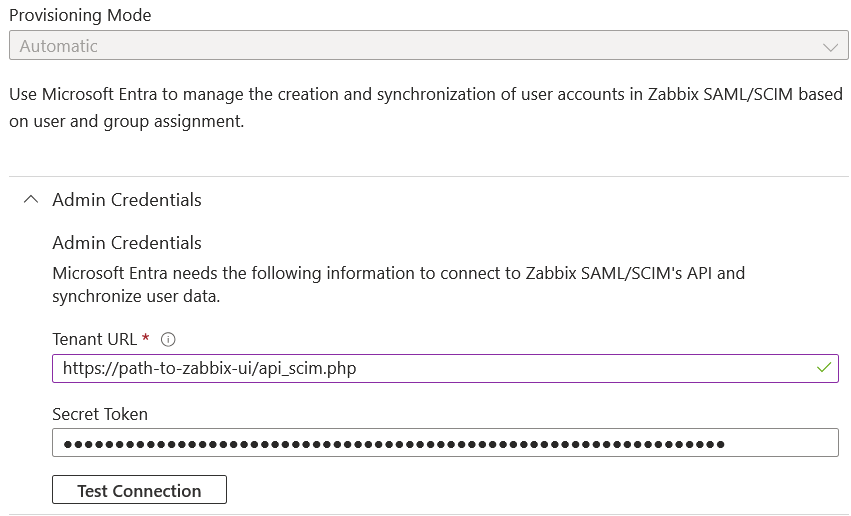
1. На странице приложения Entra ID в главном меню откройте страницу Provisioning. Нажмите Get started и затем выберите режим Automatic provisioning:
- В Tenant URL укажите следующее значение:
https://<path-to-zabbix-ui>/api_scim.php - В Secret token введите токен API Zabbix с правами Super admin.
- Нажмите Test connection, чтобы проверить, установлено ли соединение.
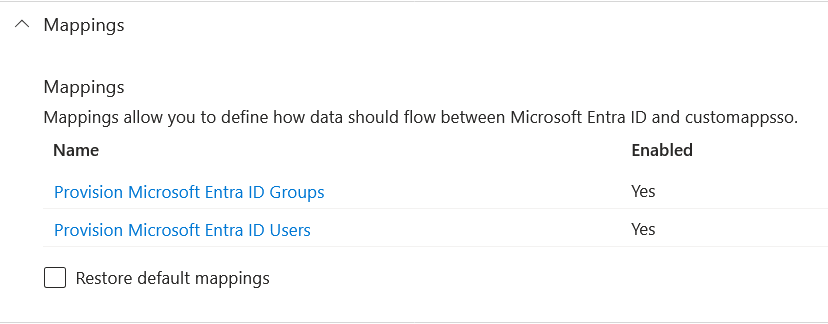
2. Теперь вы можете добавить все атрибуты, которые будут передаваться через SCIM в Zabbix. Для этого нажмите Mappings, а затем Provision Microsoft Entra ID Users.
Внизу списка Attribute Mapping включите Show advanced options, а затем нажмите Edit attribute list for customappsso.
Внизу списка атрибутов добавьте собственные атрибуты с типом 'String':

Сохраните список.
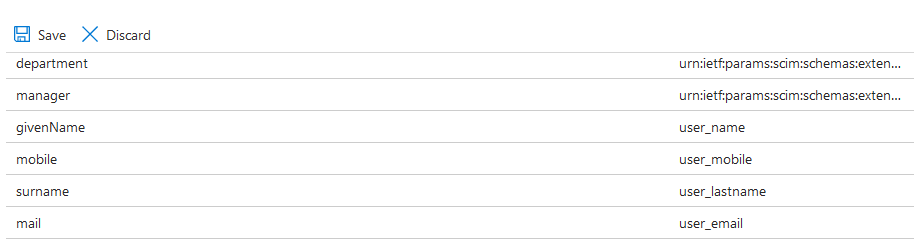
3. Теперь вы можете добавить сопоставления для добавленных атрибутов. Внизу списка Attribute Mapping нажмите Add New Mapping и создайте сопоставления, как показано ниже:
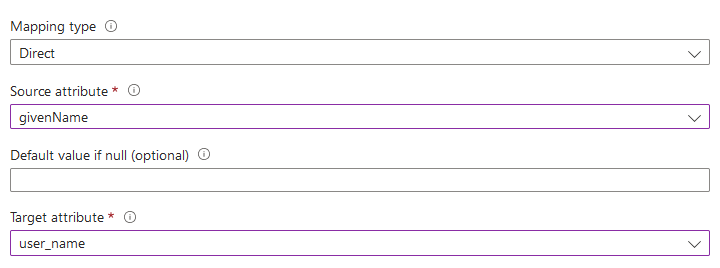
После добавления всех сопоставлений сохраните список сопоставлений.
4. В качестве предварительного условия для подготовки пользователей в Zabbix у вас должны быть настроены пользователи и группы в Entra ID.
Для этого перейдите в Microsoft Entra admin center, а затем добавьте пользователей/группы на соответствующих страницах Users и Groups.
5. После того как пользователи и группы будут созданы в Entra ID, вы можете перейти в меню Users and groups вашего приложения и добавить их в приложение.
6. Перейдите в меню Provisioning вашего приложения и нажмите Start provisioning, чтобы выполнить подготовку пользователей в Zabbix.
Обратите внимание, что запрос PATCH Users в Entra ID не поддерживает изменения в media.
Подписание запросов на аутентификацию
Entra ID можно настроить для проверки подписи подписанных запросов на аутентификацию.
Чтобы это заработало, создайте открытый и закрытый ключи:
openssl req -x509 -newkey rsa:4096 -keyout /usr/share/zabbix/conf/certs/request-sign.key -out /usr/share/zabbix/conf/certs/request-sign.pem -sha256 -days 1825 -nodesНазначьте права доступа:
chown apache /usr/share/zabbix/conf/certs/request-sign.key
chmod 400 /usr/share/zabbix/conf/certs/request-sign.key
Обновите конфигурацию веб-интерфейса Zabbix, добавив:
$SSO['SP_KEY'] = 'conf/certs/request-sign.key';
$SSO['SP_CERT'] = 'conf/certs/request-sign.crt';
Устранение неполадок
Проблемы с аутентификацией могут возникать в браузерах MicroSoft Edge, когда пользователь, пытающийся войти в Zabbix через SAML, уже вошёл в систему с профилем MicroSoft Edge. Признаком такой проблемы может быть возможность входа в Zabbix через MicroSoft Edge в приватном режиме.
Чтобы избежать проблем с аутентификацией в этом случае, может потребоваться установить requestedAuthnContext в значение «false» в файле конфигурации веб-интерфейса Zabbix (zabbix.conf.php).
$SSO['SETTINGS'] = [
    'security' => [
        'requestedAuthnContext' => false
    ]
];