
创建模块(教程)
这是一个分步教程,展示了如何创建一个简单的 Zabbix 前端模块。 您可以将此模块的所有文件下载为 ZIP 存档:MyAddress.zip。
您将构建的内容
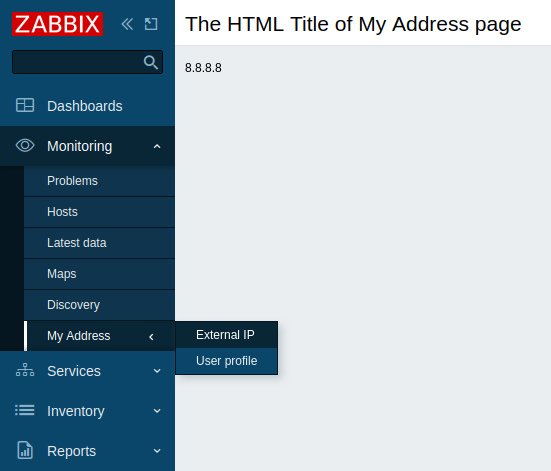
在本教程中,您将首先构建一个前端模块,为菜单新增一个 My Address 菜单部分, 然后将其转换为一个更高级的前端模块,该模块会向 https://api.seeip.org 发起 HTTP 请求, 并在新创建的 My Address 菜单部分中的新页面上显示响应内容——您计算机的 IP 地址。 完成后的模块如下所示:
第一部分 - 新建菜单部分
向 Zabbix 前端添加一个空白模块
-
在 Zabbix 前端安装目录的 modules 目录中创建一个 MyAddress 目录(例如,zabbix/ui/modules)。
-
创建一个 manifest.json 文件,并填写基本的模块元数据(请参见支持的参数说明)。
ui/modules/MyAddress/manifest.json
{
    "manifest_version": 2.0,
    "id": "my-address",
    "name": "My IP Address",
    "version": "1.0",
    "namespace": "MyAddress",
    "description": "My External IP Address."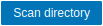
}- 在 Zabbix 前端中,进入 Administration → General → Modules 部分,然后点击 Scan directory 按钮。
- 在列表中找到新模块 My IP Address,然后点击 "Disabled" 超链接,将模块状态从 "Disabled" 更改为 "Enabled"(如果列表中没有该模块,请参见故障排除部分)。

该模块现在已在前端中注册。不过,它目前还不可见,因为你仍然需要定义模块功能。 当你向模块目录中添加内容后,只需刷新页面,就会立即在 Zabbix 前端中看到这些更改。
创建菜单部分
- 在 MyAddress 目录中创建一个 Module.php 文件。
此文件实现一个新的 Module 类,该类继承默认的 CModule 类。
Module 类会将一个新的 My Address 菜单部分插入到主菜单中。
setAction() 方法指定点击该菜单部分时要执行的动作。
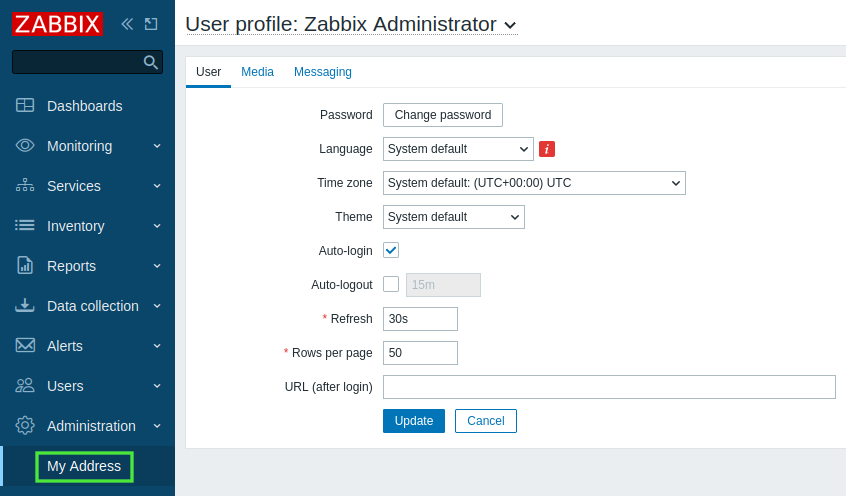
首先,你可以使用预定义动作 userprofile.edit,它会打开 User profile 页面。
在本教程的 第 III 部分 中,你将学习如何创建自定义动作。
ui/modules/MyAddress/Module.php
<?php

namespace Modules\MyAddress;

use Zabbix\Core\CModule,
    APP,
    CMenuItem;

class Module extends CModule {

    public function init(): void {
        APP::Component()->get('menu.main')
            ->add((new CMenuItem(_('My Address')))
            ->setAction('userprofile.edit'));
    }
}
你可以将 'userprofile.edit' 替换为其他动作,例如 'charts.view'(打开自定义图形)、'problems.view'(打开 监控 → 问题),或 'report.status'(打开 系统信息 报告)。
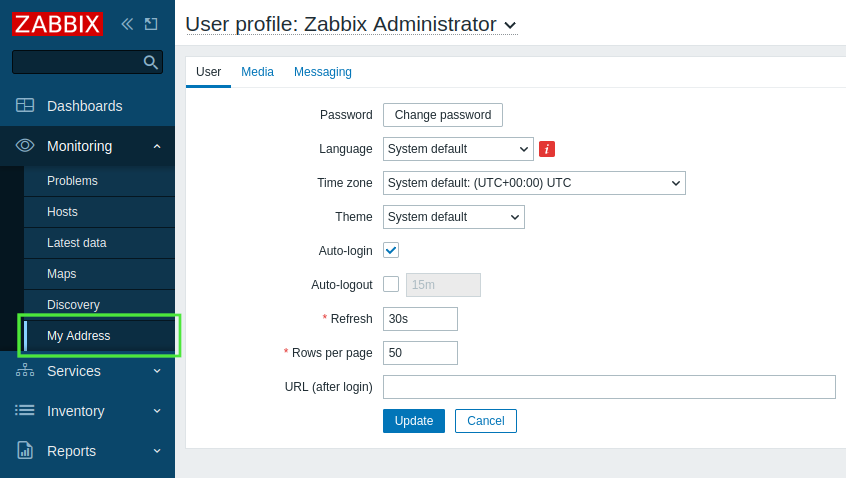
- 刷新 Zabbix 前端。现在在 Zabbix 主菜单底部会出现一个新的 My Address 部分。
点击 My Address 可打开 User profile 页面。
第二部分 - 调整菜单位置
在此部分中,您将把 我的地址 菜单部分移动到 监控 部分,然后向其添加嵌套菜单。 因此,用户将能够从 监控 → 我的地址 菜单部分访问两个子菜单页面。
- 打开并编辑 Module.php 文件。
ui/modules/MyAddress/Module.php
<?php

命名空间 Modules\MyAddress;

使用 Zabbix\Core\CModule,
APP,
CMenuItem;

class Module extends CModule {

public function init(): void {
APP::Component()->get('menu.main')
->findOrAdd(_('Monitoring'))
->getSubmenu()
->insertAfter(_('Discovery'),
(new CMenuItem(_('My Address')))->setAction('userprofile.edit')
);
}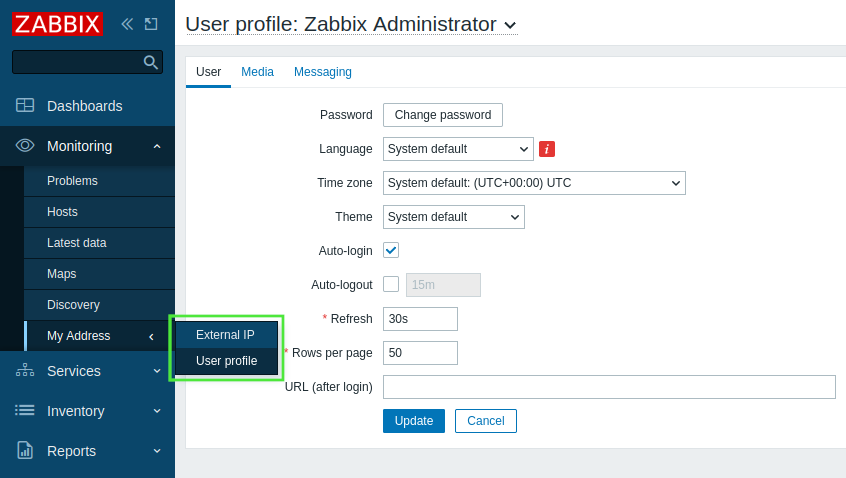
}- 刷新 Zabbix 前端。展开 Monitoring 菜单部分,并观察 My address 部分现在位于 Discovery 部分下方。
- 要将嵌套页面添加到 我的地址 菜单部分,请再次打开并编辑 Module.php 文件。
此步骤将创建两个子部分:
- 外部 IP 执行新的“my.address”操作,该操作将在后续步骤中定义;
- 用户配置文件 执行预定义的“userprofile.edit”操作以打开 用户配置文件 页面。
请注意,对于嵌套菜单,除了前面步骤中使用的类之外,您还需要使用 CMenu 类。
ui/modules/MyAddress/Module.php
<?php

命名空间 Modules\MyAddress;

使用 Zabbix\Core\CModule,
APP,
CMenu,
CMenuItem;

class Module 扩展 CModule {

public function init(): void {
APP::Component()->get('menu.main')
->findOrAdd(_('Monitoring'))
->getSubmenu()
->insertAfter(_('Discovery'),
(new CMenuItem(_('My Address')))->setSubMenu(
new CMenu([
(new CMenuItem(_('External IP')))->setAction('my.address'),
(new CMenuItem(_('User profile')))->setAction('userprofile.edit')
])
)
);
}
}- 刷新 Zabbix 前端。请注意,我的地址菜单部分现在包含一个三级菜单,其中包含两个页面 - 外部 IP和用户配置文件。
第 III 部分 - 模块 action
一个 action 由两个文件实现 - actions/MyAddress.php 和 views/my.address.php。 actions/MyAddress.php 文件负责业务逻辑的实现,而 views/my.address.php 文件负责视图。
-
在 MyAddress 目录中创建一个 actions 目录。
-
在 actions 目录中创建一个 MyAddress.php 文件。
action 逻辑将在 MyAddress 类中定义。 这个 action 类将实现四个函数:init()、checkInput()、checkPermissions() 和 doAction()。 当请求该 action 时,Zabbix 前端会调用 doAction() 函数。 此函数负责模块的业务逻辑。
数据必须组织为关联数组。 该数组可以是多维的,并且可以包含视图所期望的任何数据。
ui/modules/MyAddress/actions/MyAddress.php
<?php

namespace Modules\MyAddress\Actions;

use CController,
    CControllerResponseData;

class MyAddress extends CController {

    public function init(): void {
        $this->disableCsrfValidation();
    }

    protected function checkInput(): bool {
        return true;
    }

    protected function checkPermissions(): bool {
        return true;
    }

    protected function doAction(): void {
        $data = ['my-ip' => file_get_contents("https://api.seeip.org")];
        $response = new CControllerResponseData($data);
        $this->setResponse($response);
    }
}-
在 MyAddress 目录中创建一个新的 views 目录。
-
在 views 目录中创建一个 my.address.php 文件,并定义模块视图。
请注意,变量 $data 在视图中可直接使用,无需专门定义。
框架会自动将关联数组传递给视图。
ui/modules/MyAddress/views/my.address.php
<?php

(new CHtmlPage())
    ->setTitle(_('The HTML Title of My Address Page'))
    ->addItem(new CDiv($data['my-ip']))
->show();- 必须在 manifest.json 文件中注册该模块 action。打开 manifest.json 并添加一个新的
actions对象,其中包含:
- action 键,action 名称需使用小写字母 (a-z) 并以点分隔单词(例如,
my.address); my.address对象的class键对应 action 类名(MyAddress);my.address对象的view键对应 action 视图名(my.address)。
ui/modules/MyAddress/manifest.json
{
    "manifest_version": 2.0,
    "id": "my-address",
    "name": "My IP Address",
    "version": "1.0",
    "namespace": "MyAddress",
    "description": "My External IP Address.",
    "actions": {
        "my.address": {
            "class": "MyAddress",
            "view": "my.address"
        }
    }
}- 刷新 Zabbix 前端。点击 My address → External IP 查看你电脑的 IP 地址。