
1 从 MSI 安装 Windows agent
概述
Zabbix agent 可使用 32 位或 64 位 MSI 安装包在 Windows 上安装,可从下载页面获取。
MSI 安装的最低操作系统要求如下:
- 对于 Zabbix agent: Windows XP(64 位)或 Windows Server 2003
- 对于 Zabbix agent 2: Windows 10(32 位)或 Windows Server 2016
32 位安装包不能安装在 64 位系统上。
安装包包括:
- TLS 支持(TLS 配置为可选)
- Zabbix get 和 Zabbix sender 工具(可与 Zabbix agent/agent 2 一起安装,也可单独安装)
Zabbix agent 2 安装包不包含可加载插件(MongoDB、PostgreSQL、MSSQL),需要单独下载并安装。
尽管使用 MSI 安装包进行安装已得到完全支持,但建议至少安装 Microsoft .NET Framework 2,以确保正确的错误处理。
建议使用安装程序提供的默认安装位置。 在缺少必要权限的情况下使用自定义位置,可能会影响安装的安全性。
通过安装向导安装
以下安装步骤同时适用于 Zabbix agent 和 Zabbix agent 2。
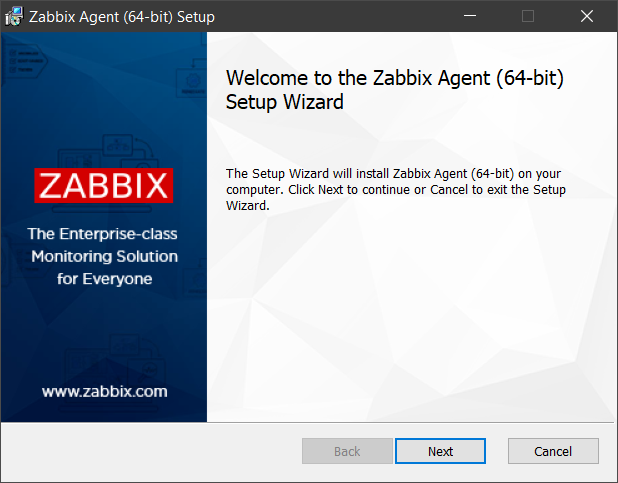
1. 双击下载的 MSI 文件以开始安装:
2. 接受最终用户许可协议:

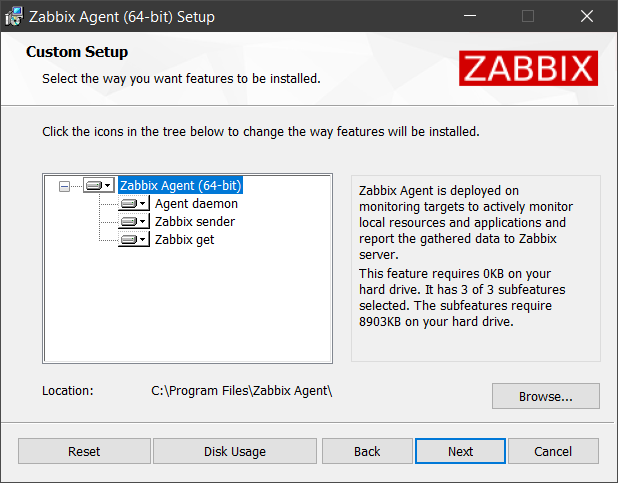
3. 选择要安装的 Zabbix 组件(Agent daemon、Zabbix sender、Zabbix get):
建议使用安装程序提供的默认安装位置。 如果使用自定义位置且没有必要的权限,可能会危及安装的安全性。
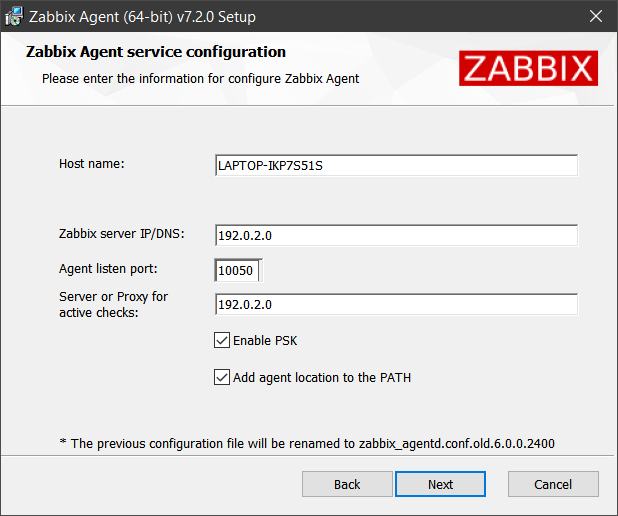
4. 配置以下参数。 其值将写入 Zabbix agent 配置文件中:
| Parameter | Description |
|---|---|
| 主机名 | 安装 Zabbix agent 的机器的主机名。设置 Hostname 参数。 |
| Zabbix 服务器 IP/DNS | 以逗号分隔的 IP 地址列表,可选使用 CIDR 表示法,或 Zabbix 服务器或 Zabbix proxy 的 DNS 名称。此参数为必填。设置 Server 参数。 |
| Agent 监听端口 | agent 将在此端口上监听来自服务器的连接。设置 ListenPort 参数。 |
| 用于主动检查的服务器或 proxy | 用于获取 主动检查 的 Zabbix 服务器/proxy 地址或集群配置。服务器/proxy 地址为 IP 地址或 DNS 名称,并可选带有以冒号分隔的端口。设置 ServerActive 参数。 |
| 启用 PSK | 勾选此复选框以启用 使用预共享密钥 的 TLS 支持。将 TLSConnect 和 TLSAccept 参数设置为 psk。 |
| 将 agent 位置添加到 PATH | 勾选此复选框可将 Zabbix agent 的安装位置添加到系统 PATH 变量。 |
如果检测到现有的 Zabbix agent,将显示其配置文件中的参数值。 此外,现有配置文件将在安装过程中重命名,并创建一个新的配置文件。
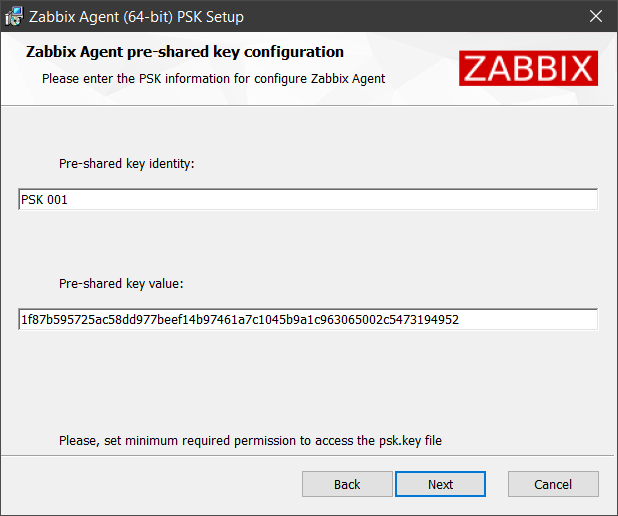
5. 如果在上一步中勾选了 启用 PSK 复选框,请配置 PSK 参数。 这些参数也将写入 Zabbix agent 配置文件中:
| Parameter | Description |
|---|---|
| 预共享密钥标识 | 预共享密钥标识字符串。设置 TLSPSKIdentity 参数。 |
| 预共享密钥值 | 预共享密钥字符串值。创建包含密钥的 psk.key 文件,并将 TLSPSKFile 参数设置为密钥所在位置(默认:C:\Program Files\Zabbix Agent\psk.key)。建议通过调整文件的安全设置来限制对预共享密钥文件的访问,使只有 Zabbix agent(或运行该 agent 的用户)可以读取它。 |
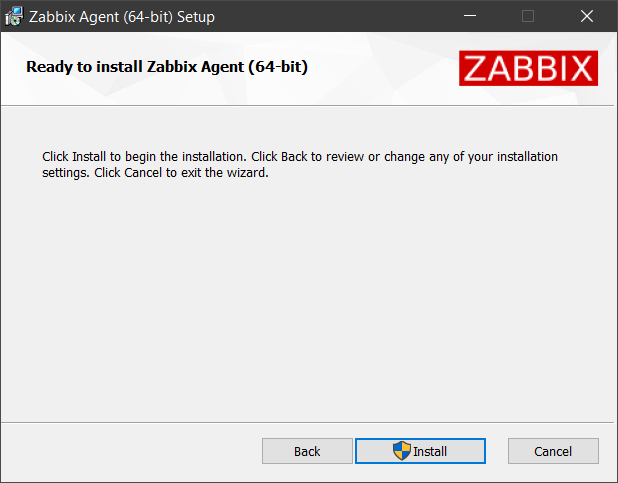
6. 单击 Install 开始安装。
所有选定的 Zabbix 组件以及 Zabbix agent 配置文件都将安装到您指定的位置(默认:C:\Program Files\Zabbix Agent)。
Zabbix agent 2 也是如此,但其 内置插件 的额外配置文件将安装到 zabbix_agent2.d\plugins.d 子文件夹中。
此外,zabbix_agentd.exe(或 zabbix_agent2.exe)将作为 Windows 服务进行设置,并采用延迟自动启动(在 Windows Vista/Server 2008 之前的 Windows 版本上则为自动启动)。
如果安装期间正在运行其他版本的 Zabbix agent,系统会提示您选择关闭该应用并尝试重新启动,或者保持其打开;若选择后者,则需要重启系统。
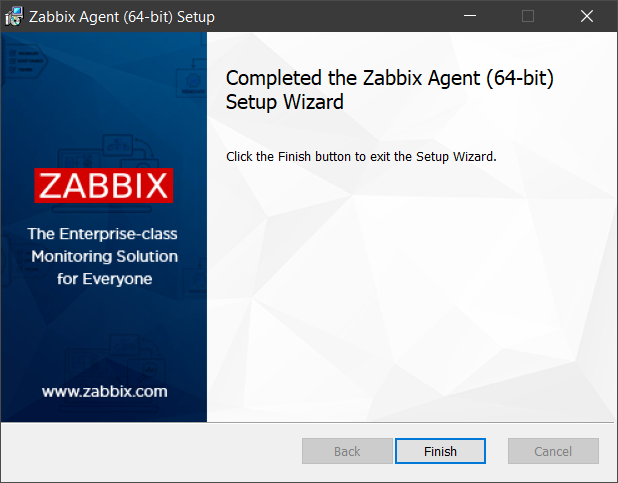
7. 单击 Finish 按钮退出安装向导。
从命令行安装
可以通过使用 msiexec 运行 MSI 安装程序,从命令行安装 Zabbix agent。例如:
msiexec.exe /l*v "C:\package.log" /i "C:\zabbix_agent-7.4.0-windows-amd64-openssl.msi" /qn+ SERVER=192.0.2.1此方法支持无人值守安装,并可使用参数进行自定义配置。
支持的参数
Zabbix agent MSI 安装包支持以下适用于 Zabbix agent 和 Zabbix agent 2 的参数。
Zabbix agent/agent2 参数会在安装过程中写入配置文件中。 单击参数名称可查看其详细说明和配置示例,参见 Zabbix agent (Windows) 页面。 对于 Zabbix agent 2,请参见 Zabbix agent 2 (Windows) 页面。
| Parameter | Description |
|---|---|
| ADDDEFAULT | 要按默认配置安装的以逗号分隔的组件列表。更多信息,请参见 ADDDEFAULT property。 可用值: AgentProgram、GetProgram、SenderProgram、ALL示例: ADDDEFAULT=AgentProgram,GetProgram |
| ADDLOCAL | 要本地安装的以逗号分隔的组件列表。更多信息,请参见 ADDLOCAL property。 可用值: AgentProgram、GetProgram、SenderProgram、ALL示例: ADDLOCAL=AgentProgram,SenderProgram |
| ALLOWDENYKEY | 用于 限制 Zabbix agent 检查 的以分号分隔的 AllowKey 或 DenyKey 参数列表。如有必要,请使用反斜杠转义分隔符(\;)。在 agent 配置文件中设置 AllowKey 和 DenyKey 参数。示例: ALLOWDENYKEY="AllowKey=system.run[more C:\Windows\System32\drivers\etc\hosts\\; echo 'File read complete'];DenyKey=system.run[*]" |
| CONF | Zabbix agent 的 模板配置文件 的完整路径名。安装过程中,此文件将成为 agent 配置文件。该文件至少必须包含 Server 和 LogFile 参数。 示例: CONF="C:\full\path\to\example.conf" |
| DONOTSTART | 使用 DONOTSTART=1 可阻止 MSI 安装程序启动 Zabbix agent 服务。自 Zabbix 7.4.6 起在 MSI 安装包中支持。 |
| ENABLEPATH | 使用 ENABLEPATH=1 可将 Zabbix agent 所在位置添加到系统 PATH 变量。 |
| ENABLEPERSISTENTBUFFER | 仅适用于 Zabbix agent 2。启用对主动监控项使用本地持久化存储。 |
| HOSTINTERFACE | 定义主机接口的可选参数。 |
| HOSTMETADATA | 定义主机元数据的可选参数。 |
| HOSTMETADATAITEM | 定义用于获取主机元数据的监控项的可选参数。 |
| HOSTNAME | 定义主机名的可选参数。 |
| HOSTNAMEITEM | 定义用于获取主机名的监控项的可选参数。 自 Zabbix 7.4.6 起在 MSI 安装包中支持。 |
| INCLUDE | 要包含到 Zabbix agent 配置文件中的以分号分隔的单个文件或目录中所有文件的列表。 |
| INSTALLFOLDER | Zabbix 组件和 Zabbix agent 配置文件将安装到的文件夹完整路径名。对于 Zabbix agent 2,内置插件 的附加配置文件将安装到 zabbix_agent2.d\plugins.d 子文件夹中。示例: INSTALLFOLDER="C:\Program Files\Zabbix Agent" |
| LISTENIP | agent 应监听的以逗号分隔的 IP 地址列表。 |
| LISTENPORT | agent 将在此端口上监听来自服务器的连接。 |
| LOGFILE | Zabbix agent 日志文件的名称。 |
| LOGTYPE | 日志输出类型。 |
| NONMSICONFNAME | Zabbix agent 的 自定义配置文件 的完整路径名。安装过程中,此文件中存在的任何有效 agent 配置参数(仅限本表所列参数)都会写入新创建的 agent 配置文件中。该文件至少必须包含 Server 参数。 示例: NONMSICONFNAME="C:\full\path\to\example.conf" |
| PERSISTENTBUFFERFILE | 仅适用于 Zabbix agent 2。Zabbix agent 2 应在其中保存 SQLite 数据库的文件。 |
| PERSISTENTBUFFERPERIOD | 在无法连接到服务器或 proxy 时,数据应保存的时间段。 |
| SERVER | Zabbix 服务器或 Zabbix proxy 的以逗号分隔的 IP 地址列表,可选使用 CIDR 表示法,或 DNS 名称。此参数为必填,除非将 STARTAGENTS 设置为 0。 |
| SERVERACTIVE | 用于获取主动检查的 Zabbix 服务器/proxy 地址或集群配置。 |
| SKIP | 使用 SKIP=fw 可阻止 MSI 安装程序为 Zabbix agent 添加 Windows 防火墙例外规则。 |
| SOURCEIP | 发往 Zabbix 服务器或 Zabbix proxy 的出站连接所使用的源 IP 地址,或在执行某些监控项(web.page.get、net.tcp.port 等)时建立连接所使用的源 IP 地址。 自 Zabbix 7.4.6 起在 MSI 安装包中支持。 |
| STARTAGENTS | 处理被动检查的 zabbix_agentd 预先 fork 的实例数量。 如果设置为 0,则会禁用被动检查,且 agent 不会监听任何 TCP 端口。 自 Zabbix 7.4.6 起在 MSI 安装包中支持。 |
| STARTUPTYPE | Zabbix agent 服务的启动类型。可用值: automatic - 在 Windows 启动时自动启动服务; delayed - (默认) 在自动启动的服务完成启动后延迟启动服务(适用于 Windows Vista/Server 2008 及更高版本); manual - 手动启动服务(由用户或应用程序启动); disabled - 禁用服务,使用户或应用程序无法启动它。 示例: STARTUPTYPE=disabled |
| STATUSPORT | 仅适用于 Zabbix agent 2。如果设置,agent 将在此端口上监听 HTTP 状态请求(http://localhost:<port>/status)。 |
| TIMEOUT | 指定与 Zabbix proxy 或服务器建立连接并交换数据时的等待时间(秒)。 |
| TLSACCEPT | 接受的入站连接(用于被动检查)。如果设置为 psk,则 TLSCONNECT 也将设置为 psk(除非另有指定)。 |
| TLSCAFILE | 包含用于对等证书验证的顶级 CA 证书的文件完整路径名。 |
| TLSCERTFILE | 包含 agent 证书或证书链的文件完整路径名。 |
| TLSCONNECT | agent 应如何连接到 Zabbix 服务器或 proxy(用于主动检查)。如果设置为 psk,则 TLSACCEPT 也将设置为 psk(除非另有指定)。 |
| TLSCRLFILE | 包含已吊销证书的文件完整路径名。 |
| TLSKEYFILE | 包含 Zabbix agent 私钥的文件完整路径名。 |
| TLSPSKFILE | 包含 Zabbix agent 预共享密钥的文件完整路径名。如果同时设置了 TLSPSKFILE 和 TLSPSKVALUE,则 TLSPSKVALUE 的值将写入 TLSPSKFILE 指定的文件中。建议通过调整文件的安全设置来限制对预共享密钥文件的访问,使只有 Zabbix agent(或运行 agent 的用户)可以读取它。 |
| TLSPSKIDENTITY | 预共享密钥标识字符串。 |
| TLSPSKVALUE | 预共享密钥字符串值。如果同时设置了 TLSPSKFILE 和 TLSPSKVALUE,则 TLSPSKVALUE 的值将写入 TLSPSKFILE 指定的文件中。 示例: TLSPSKVALUE=1f87b595725ac58dd977beef14b97461a7c1045b9a1c963065002c5473194952 |
| TLSSERVERCERTISSUER | 允许的服务器(proxy)证书颁发者。 |
| TLSSERVERCERTSUBJECT | 允许的服务器(proxy)证书主题。 |
| UNSAFEUSERPARAMETERS | 允许将所有字符作为参数传递给用户自定义参数。 自 Zabbix 7.4.6 起在 MSI 安装包中支持。 |
示例
以下示例安装带有自定义配置的 Zabbix agent。 它还通过使用预共享密钥启用了 TLS 支持。
mkdir "C:\Program Files\Zabbix Agent" 2>nul
msiexec.exe /l*v "C:\package.log" /i "C:\zabbix_agent-7.4.0-windows-amd64-openssl.msi" /qn+^
 SERVER=192.0.2.1^
 INSTALLFOLDER="C:\Program Files\Zabbix Agent"^
 HOSTNAME=LAPTOP-IKP7S51S^
 TLSACCEPT=psk^
 TLSCONNECT=psk^
 TLSPSKIDENTITY="PSK 001"^
 TLSPSKFILE="C:\Program Files\Zabbix Agent\psk.key"^
 TLSPSKVALUE=1f87b595725ac58dd977beef14b97461a7c1045b9a1c963065002c5473194952^
 ENABLEPATH=1^
 ALLOWDENYKEY="AllowKey=system.run[type C:\Windows\System32\drivers\etc\hosts];DenyKey=system.run[*]"
下一个示例安装较新版本的 Zabbix agent,并使用一个 模板配置文件(CONF="C:\agent-template.conf")。
在安装过程中,此文件将成为 agent 配置文件。
要从旧配置文件继承参数,请使用参数占位符(例如,[AllowDenyKey])。
msiexec.exe /l*v "C:\package.log" /i "C:\zabbix_agent-7.4.1-windows-amd64-openssl.msi" /qn+ NONMSICONFNAME="C:\agent.conf"

# agent-template.conf 示例:
LogFile=[LogFile]
[AllowDenyKey]
Server=192.0.2.8
Hostname=DESKTOP-X9F4A2B
[Include]
[TLSConnect]
[TLSAccept]
[TLSPSKIdentity]
[TLSPSKFile]
或者,您也可以使用 自定义配置文件(NONMSICONFNAME="C:\agent-custom.conf")。
在安装过程中,此文件中存在的任何有效 agent 配置参数(仅限于上表中列出的参数)都将写入新创建的 agent 配置文件中。
要保留现有的 agent 配置,请定义需要保留的参数。
msiexec.exe /l*v "C:\package.log" /i "C:\zabbix_agent-7.4.1-windows-amd64-openssl.msi" /qn+ NONMSICONFNAME="C:\agent-custom.conf"

# agent-custom.conf 示例:
Server=192.0.2.8
Hostname=DESKTOP-X9F4A2B
Zabbix agent 2 可加载插件
Zabbix agent 2 可加载插件 可在 Windows 上使用 64 位 MSI 安装包进行安装,可从 下载 页面获取。
MSI 安装的最低操作系统要求为 Windows 10(64 位)或 Windows Server 2016。
与 Zabbix agent/agent2 类似,可加载插件可以使用安装向导或命令行进行安装。
在安装插件之前,请先查看其 README 文件。 其中可能包含特定要求和安装说明。
通过安装向导安装
1. 双击已下载的 MSI 文件以开始安装。
2. 接受最终用户许可协议。
3. 选择要安装的 Zabbix agent 2 可加载插件。
建议使用安装程序提供的默认安装位置。 如果在缺少必要权限的情况下使用自定义位置,可能会影响安装的安全性。
4. 单击 Install 开始安装。
所有选定的 Zabbix agent 2 可加载插件都将安装到您指定的位置(默认:C:\Program Files\Zabbix Agent 2),其配置文件将安装在 zabbix_agent2.d 子文件夹中。
5. 单击 Finish 按钮退出安装向导。
从命令行安装
可以通过命令行运行 MSI 安装程序,并使用 msiexec 来安装 Zabbix agent 2 可加载插件。例如:
msiexec.exe /l*v "C:\package.log" /i "C:\zabbix_agent2_plugins-7.4.0-windows-amd64.msi" /qn+Zabbix agent 2 可加载插件的 MSI 安装程序包支持以下参数。
| Parameter | Description |
|---|---|
| ADDDEFAULT | 要按默认配置安装的、以逗号分隔的组件列表。更多信息请参见 ADDDEFAULT property。 可能的值: ALL、EmberplusPlugin、MongodbPlugin、MssqlPlugin、NvidiagpuPlugin、PostgresqlPlugin示例: ADDDEFAULT=MongodbPlugin,PostgresqlPlugin |
| ADDLOCAL | 要本地安装的、以逗号分隔的组件列表。更多信息请参见 ADDLOCAL property。 可能的值: ALL、EmberplusPlugin、MongodbPlugin、MssqlPlugin、NvidiagpuPlugin、PostgresqlPlugin示例: ADDLOCAL=MongodbPlugin,MssqlPlugin |
| INSTALLFOLDER | Zabbix 组件将安装到的文件夹完整路径名,其配置文件将安装在 zabbix_agent2.d 子文件夹中。示例: INSTALLFOLDER="C:\Program Files\Zabbix Agent 2" |