
5 Отримання повідомлення про проблему
Огляд
У цьому розділі ви дізнаєтесь, як налаштувати оповіщення у вигляді повідомлень у Zabbix.
З елементами, які збирають дані, і тригерами, розробленими для "спрацьовування" проблемних ситуацій, також було б корисно мати певний механізм сповіщення, який сповіщав би нас про важливі події, навіть якщо ми безпосередньо не дивимось на інтерфейс Zabbix.
Це те, що роблять сповіщення. Електронна пошта є найпопулярнішим способом доставки сповіщень про проблеми, тому ми дізнаємося, як налаштувати сповіщення електронною поштою.
E-mail settings
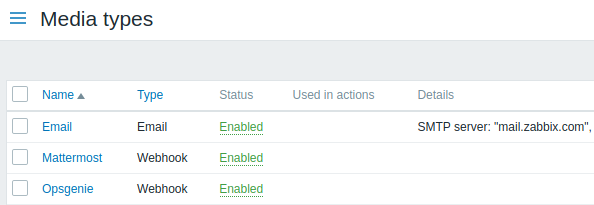
Initially there are several predefined notification delivery methods in Zabbix. E-mail is one of those.
To configure e-mail settings, go to Administration → Media types and click on Email in the list of pre-defined media types.
This will present us with the e-mail settings definition form.
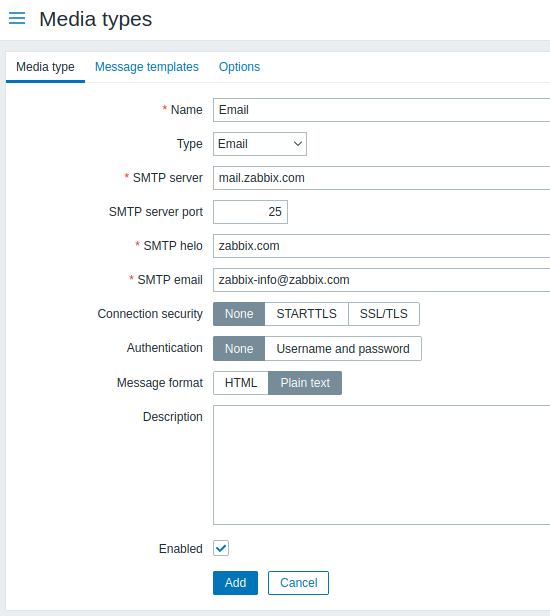
All mandatory input fields are marked with a red asterisk.
Set the values of SMTP server, SMTP helo and SMTP e-mail to the appropriate for your environment.
'SMTP email' will be used as the 'From' address for the notifications sent from Zabbix.
Press Update when ready.
Now you have configured 'Email' as a working media type. A media type must be linked to users by defining specific delivery addresses (like we did when configuring a new user), otherwise it will not be used.
New action
Delivering notifications is one of the things
actions do in Zabbix. Therefore,
to set up a notification, go to Configuration → Actions and click on
Create action.
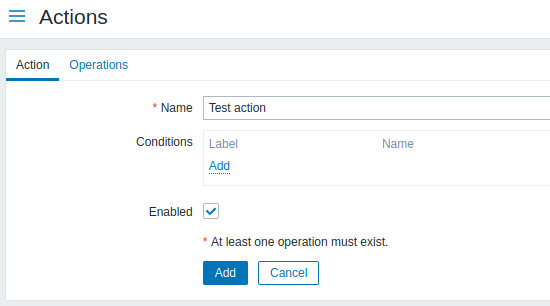
All mandatory input fields are marked with a red asterisk.
In this form, enter a name for the action.
In the most simple case, if we do not add any more specific conditions, the action will be taken upon any trigger change from 'Ok' to 'Problem'.
We still should define what the action should do - and that is done in the Operations tab. Click on Add in the Operations block, which opens a new operation form.
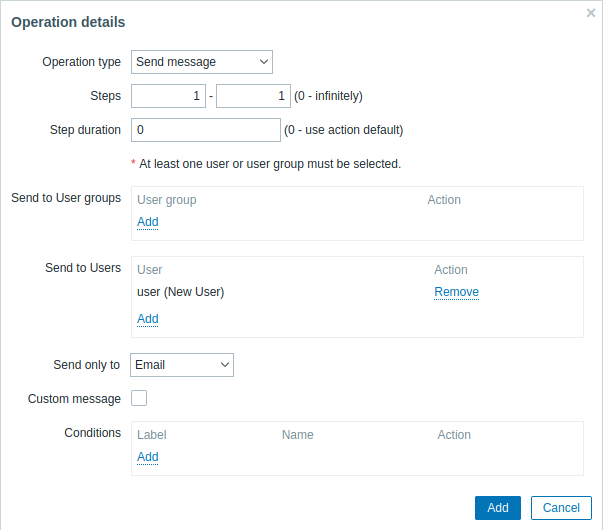
All mandatory input fields are marked with a red asterisk.
Here, click on Add in the Send to Users block and select the user ('user') we have defined. Select 'Email' as the value of Send only to. When done with this, click on Add, and the operation should be added:
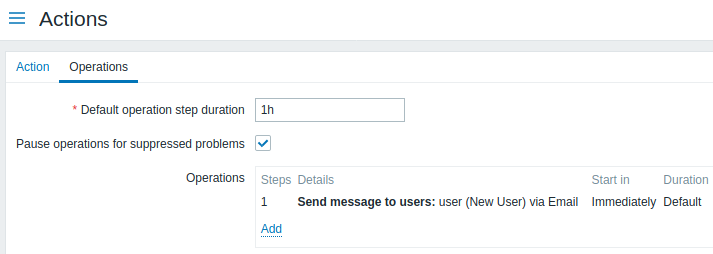
That is all for a simple action configuration, so click Add in the action form.
Receiving notification
Now, with delivering notifications configured it would be fun to actually receive one. To help with that, we might on purpose increase the load on our host - so that our trigger "fires" and we receive a problem notification.
Open the console on your host and run:
cat /dev/urandom | md5sumYou may run one or several of these processes.
Now go to Monitoring → Latest data and see how the values of 'CPU Load' have increased. Remember, for our trigger to fire, the 'CPU Load' value has to go over '2' for 3 minutes running. Once it does:
- in Monitoring → Problems you should see the trigger with a flashing 'Problem' status
- you should receive a problem notification in your e-mail
If notifications do not work:
- verify once again that both the e-mail settings and the action have been configured properly
- make sure the user you created has at least read permissions on the host which generated the event, as noted in the Adding user step. The user, being part of the 'Zabbix administrators' user group must have at least read access to 'Linux servers' host group that our host belongs to.
- Additionally, you can check out the action log by going to Reports → Action log.