
1 Configuring a template
Overview
Configuring a template requires that you first create a template by defining its general parameters and then you add entities (items, triggers, graphs etc.) to it.
Creating a template
To create a template, do the following:
- Go to Configuration → Templates
- Click on Create template
- Edit template attributes
The Template tab contains general template attributes.
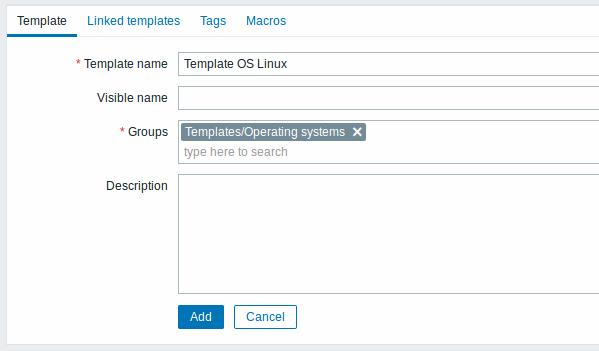
All mandatory input fields are marked with a red asterisk.
Template attributes:
| Parameter | Description |
|---|---|
| Template name | Unique template name. Alphanumerics, spaces, dots, dashes and underscores are allowed. However, leading and trailing spaces are disallowed. |
| Visible name | If you set this name, it will be the one visible in lists, maps, etc. |
| Groups | Host/template groups the template belongs to. |
| Description | Enter the template description. |
The Linked templates tab allows you to link one or more "nested" templates to this template. All entities (items, triggers, graphs etc.) will be inherited from the linked templates.
To link a new template, start typing the template name in the Link new templates field. A list of matching templates will appear; scroll down to select. Alternatively, you may click on Select next to the field and select templates from the list in a popup window. The templates that are selected in the Link new templates field will be linked to the template when the template configuration form is saved or updated.
Note that before Zabbix 4.4.5, to link a new template, you have to click on Add and then select templates in the popup window.
To unlink a template, use one of the two options in the Linked templates block:
- Unlink - unlink the template, but preserve its items, triggers and graphs
- Unlink and clear - unlink the template and remove all its items, triggers and graphs
The Tags tab allows you to define template-level tags. All problems of hosts linked to this template will be tagged with the values entered here.
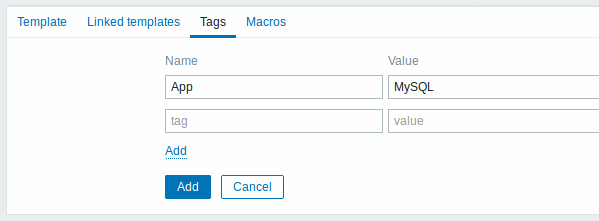
User macros, {INVENTORY.*} macros, {HOST.HOST}, {HOST.NAME}, {HOST.CONN}, {HOST.DNS}, {HOST.IP}, {HOST.PORT} and {HOST.ID} macros are supported in tags.
The Macros tab allows you to define template-level user macros as a macro-value pairs. Adding a description is also supported.
You may also view here macros from linked templates and global macros if you select the Inherited and template macros option. That is where all defined user macros for the template are displayed with the value they resolve to as well as their origin.
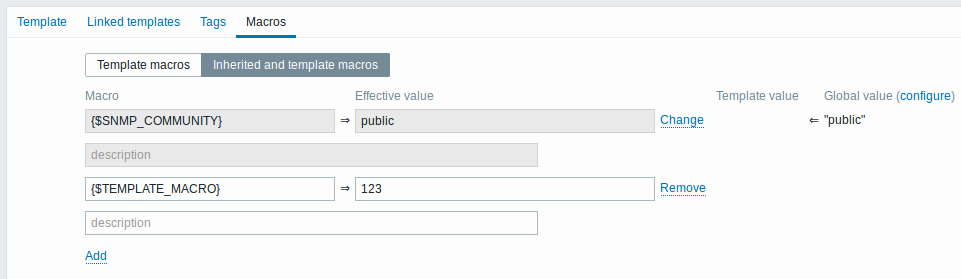
For convenience, links to respective templates and global macro configuration are provided. It is also possible to edit a nested template/global macro on the template level, effectively creating a copy of the macro on the template.
Buttons:
 |
Add the template. The added template should appear in the list. |
 |
Update the properties of an existing template. |
 |
Create another template based on the properties of the current template, including the entities (items, triggers, etc) inherited from linked templates. |
 |
Create another template based on the properties of the current template, including the entities (items, triggers, etc) both inherited from linked templates and directly attached to the current template. |
 |
Delete the template; entities of the template (items, triggers, etc) remain with the linked hosts. |
| Delete the template and all its entities from linked hosts. | |
 |
Cancel the editing of template properties. |
With a template created, it is time to add some entities to it.
Items have to be added to a template first. Triggers and graphs cannot be added without the corresponding item.
Adding items, triggers, graphs
To add items to the template, do the following:
- Go to Configuration → Hosts (or Templates)
- Click on Items in the row of the required host/template
- Mark the checkboxes of items you want add to the template
- Click on Copy below the item list
- Select the template (or group of templates) the items should be copied to and click on Copy
All the selected items should be copied to the template.
Adding triggers and graphs is done in similar fashion (from the list of triggers and graphs respectively), again, keeping in mind that they can only be added if the required items are added first.
Adding screens
To add screens to a template in Configuration → Templates, do the following:
- Click on Screens in the row of the template
- Configure a screen following the usual method of configuring screens
The elements that can be included in a template screen are: simple graph, custom graph, clock, plain text, URL.
For details on accessing host screens that are created from template screens, see the host screen section.
Configuring low-level discovery rules
See the low-level discovery section of the manual.
Adding web scenarios
To add web scenarios to a template in Configuration → Templates, do the following:
- Click on Web in the row of the template
- Configure a web scenario following the usual method of configuring web scenarios