
7 Screens
Overview
In the Monitoring → Screens section you can configure, manage and view Zabbix global screens and slide shows.
When you open this section, you will either see the last screen/slide show you accessed or a listing of all entities you have access to. Screen/slide show listing can be filtered by name.
Since Zabbix 3.0 all screens/slide shows can be either public or private. The public ones are available to all users, while private ones are accessible only to their owner and the users the entity is shared with.
Use the dropdown in the title bar to switch between screens and slide shows.
Screen listing
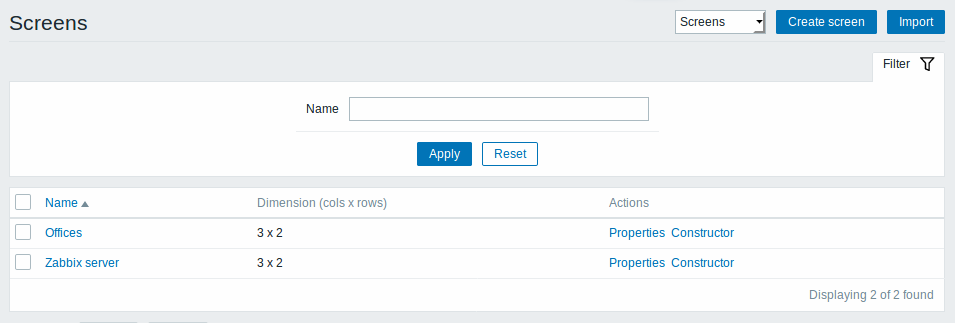
Displayed data:
| Column | Description |
|---|---|
| Name | Name of the screen. Click on the name to view the screen. |
| Dimensions | The number of columns and rows of the screen. |
| Actions | Two actions are available: Properties - edit general screen properties (name and dimensions) Constructor - access the grid of screen elements for editing |
To create a new screen, click on the Create screen button in the top right-hand corner. To import a screen from an XML file, click on the Import button in the top right-hand corner. The user who imports the screen will be set as its owner.
Mass editing options
Buttons below the list offer some mass-editing options:
- Export - export the screens to an XML file
- Delete - delete the screens
To use these options, mark the checkboxes before the respective screens, then click on the required button.
Viewing screens
To view a screen, click on its name in the list of all screens.
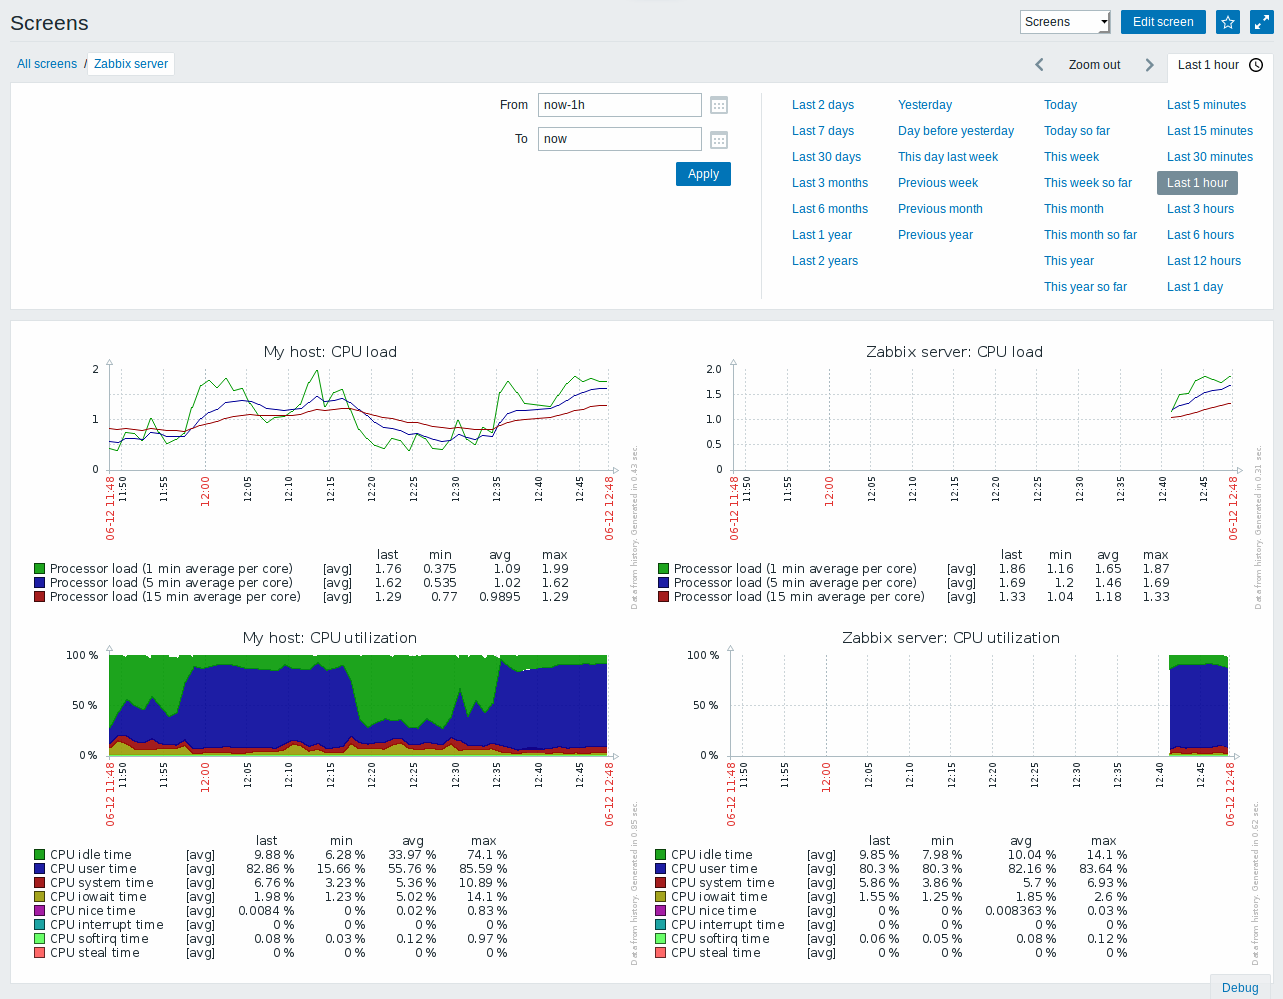
Time period selector
Take note of the time period selector above the screen. It allows to select often required periods with one mouse click, affecting the data displayed in graphs etc.
See also: Time period selector
Buttons
Buttons to the right offer the following options:
 |
Go to the screen constructor to edit the screen. |
 |
Add screen to the favourites widget in the Dashboard. |
 |
The screen is in the favourites widget in the Dashboard. Click to remove screen from the favourites widget. |
 |
Display page in fullscreen mode. |
 |
Display page in kiosk mode. In this mode only page content displayed. The kiosk mode button appears when the fullscreen mode is activated. To exit kiosk mode, move the mouse cursor until the  exit button appears and click on it. Note that you will be taken back to normal mode (not fullscreen mode). exit button appears and click on it. Note that you will be taken back to normal mode (not fullscreen mode). |
Slide show listing
Use the dropdown in the title bar to switch from screens to slide shows.
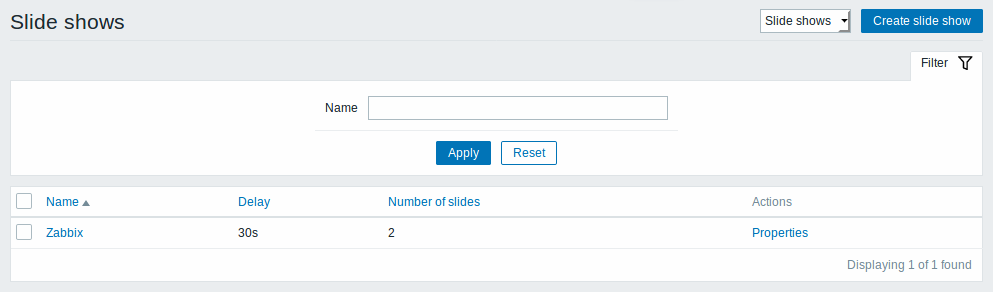
Displayed data:
| Column | Description |
|---|---|
| Name | Name of the slide show. Click on the name to view the slide show. |
| Delay | The default duration of showing one slide is displayed. |
| Number of slides | The number of slides in the slide show is displayed. |
| Actions | One action is available: Properties - edit slide show properties |
To create a new slide show, click on the Create slide show button in the top right-hand corner.
Mass editing options
A button below the list offers one mass-editing option:
- Delete - delete the slide shows
To use this option, mark the checkboxes before the respective slide shows and click on Delete.
Viewing slide shows
To view a slide show, click on its name in the list of all slide shows.
Buttons
Buttons to the right offer the following options:
 |
Go to the slide show properties. |
|
Add slide show to the favourites widget in the Dashboard. |
|
The slide show is in the favourites widget in the Dashboard. Click to remove slide show from the favourites widget. |
 |
Slow down or speed up a slide show. |
|
Display page in fullscreen mode. |
|
Display page in kiosk mode. In this mode only page content displayed. The kiosk mode button appears when the fullscreen mode is activated. To exit kiosk mode, move the mouse cursor until the exit button appears and click on it. Note that you will be taken back to normal mode (not fullscreen mode). |
Referencing a screen
Screens can be referenced by both elementid and screenname GET
parameters. For example,
http://zabbix/zabbix/screens.php?screenname=Zabbix%20serverwill open the screen with that name (Zabbix server).
If both elementid (screen ID) and screenname (screen name) are
specified, screenname has higher priority.