
在云中部署 Zabbix
要在云中启动 Zabbix,请按以下流程操作:
- 在 cloud.zabbix.com 登录或注册。
- 创建一个云节点。
- 开始在云中使用 Zabbix。
登录或注册
您可以使用现有的 Google、GitHub 或 Microsoft 账户在 cloud.zabbix.com 登录。
或者,前往 注册 页面进行注册。
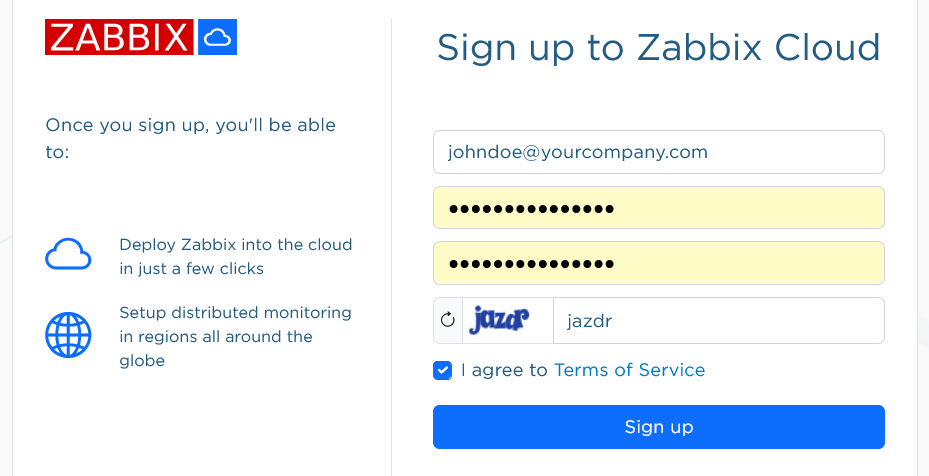
注册后,您会通过电子邮件收到新账户的确认信息。
前往 cloud.zabbix.com 登录。登录时系统会要求您输入一次性密码。该密码将通过电子邮件发送给您。
创建云节点
云节点是基于云的 Zabbix 实例。它包含 Zabbix 服务器、数据库和前端。
登录后,您会看到您的账户默认已经存在一个 Private organization。您之后可以重命名默认组织。
点击 Create New Node。系统将打开节点配置表单。
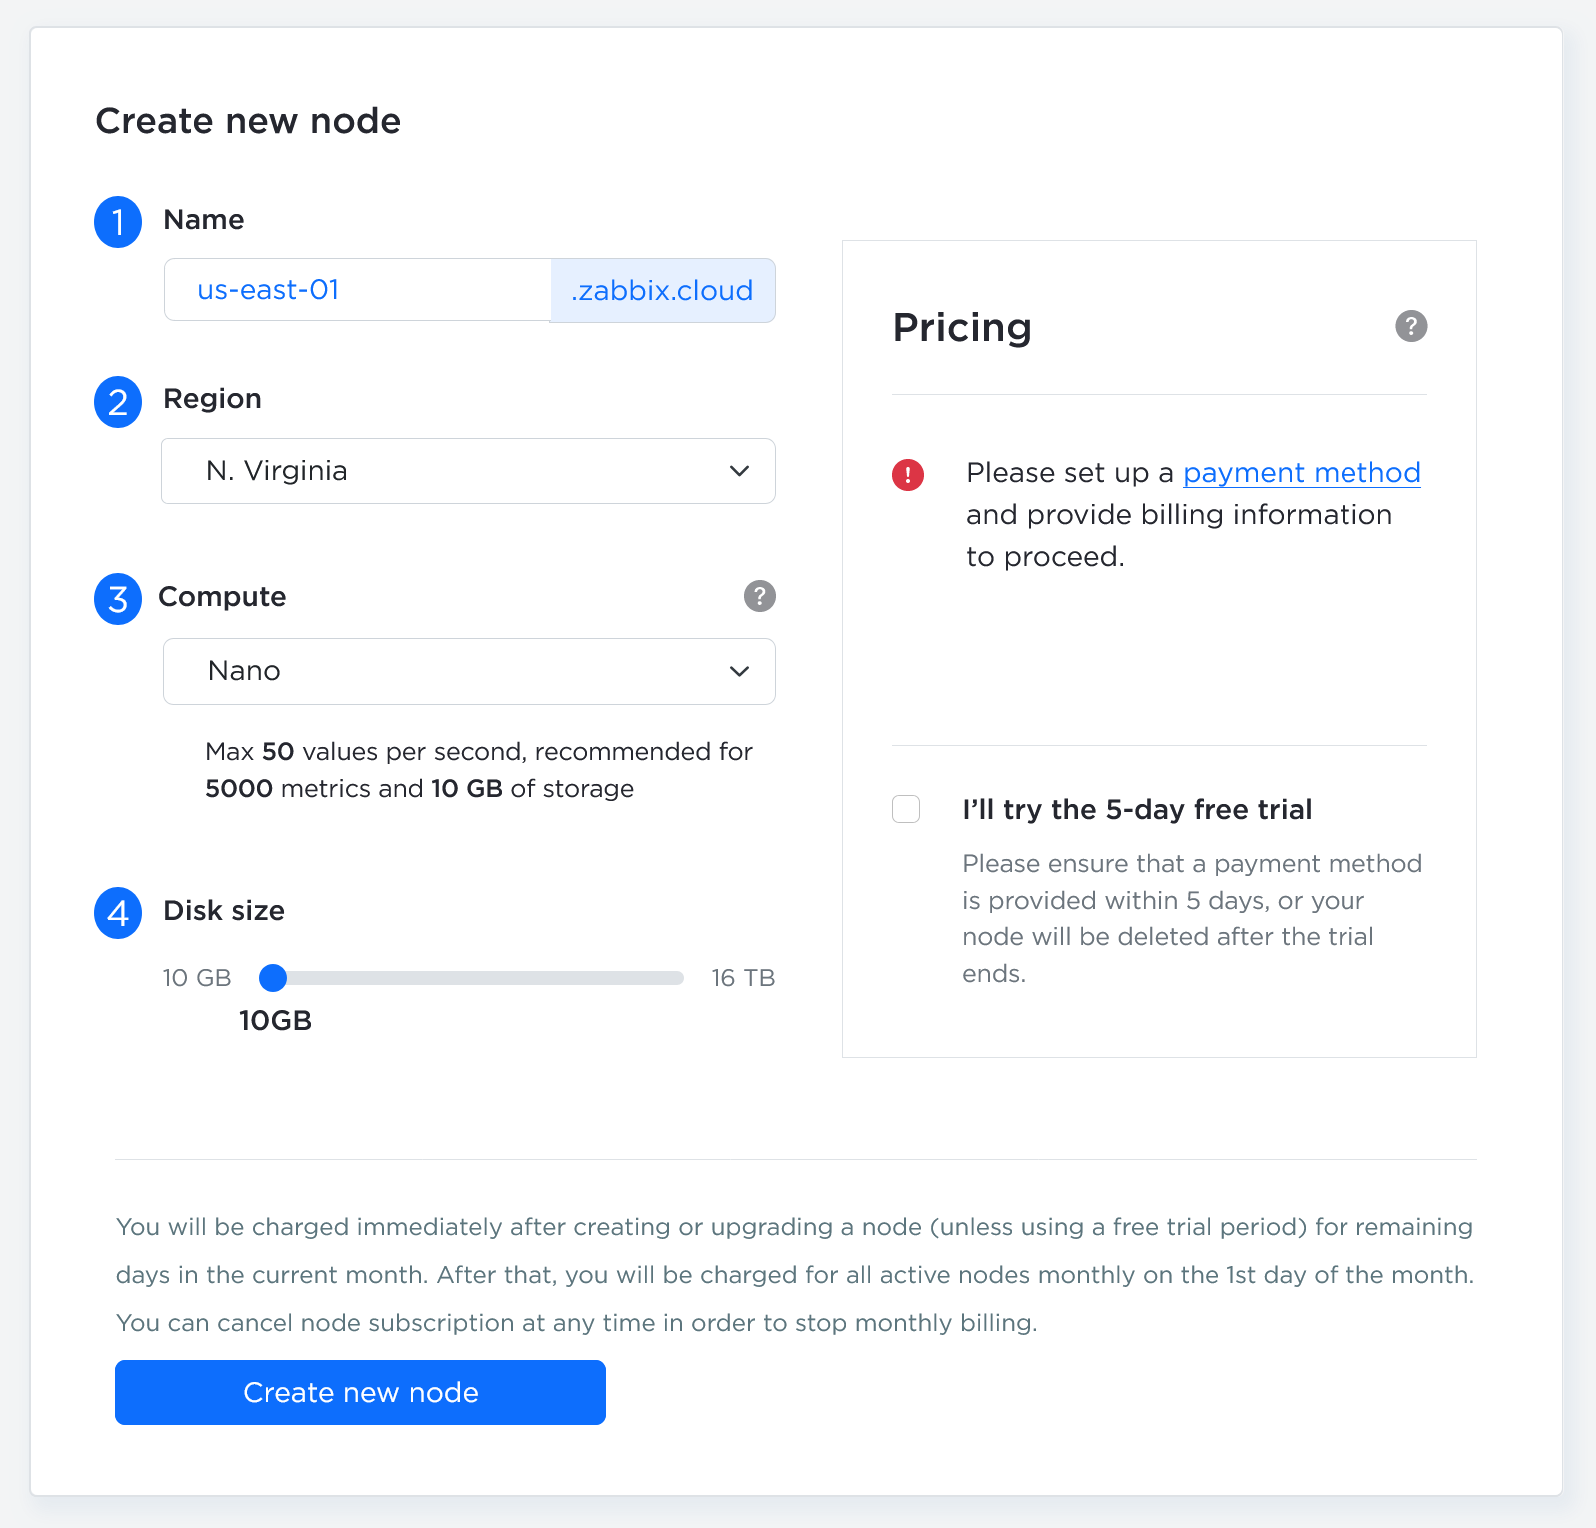
| Parameter | Description |
|---|---|
| Name | 选择一个唯一的节点名称。 节点名称会为云服务器/前端生成一个唯一 URL,格式为 <your-name>.zabbix.cloud。 |
| Region | 选择最近的数据中心位置,以获得最低的网络延迟。 |
| Compute | 选择该节点的计算能力。 要确定所需资源级别,请参见 pricing details。如果以后需要更强性能,您始终可以升级。在创建非试用节点之前,需要先提供计费方式。可通过 Billing 菜单添加账单信息。 可使用为期 5 天的 free trial 试用 Nano 等级节点。试用期间不会收费,但试用结束后,如果未转换为付费节点,您的节点将被删除。 |
| Disk size | 滑块默认值为基于等级推荐的最小值。 如果您存储大量历史数据或趋势数据,请增大该值。请注意,更大的磁盘会带来更高的月度成本,而且您无法自行缩小磁盘大小——如需减小磁盘,请联系支持。 |
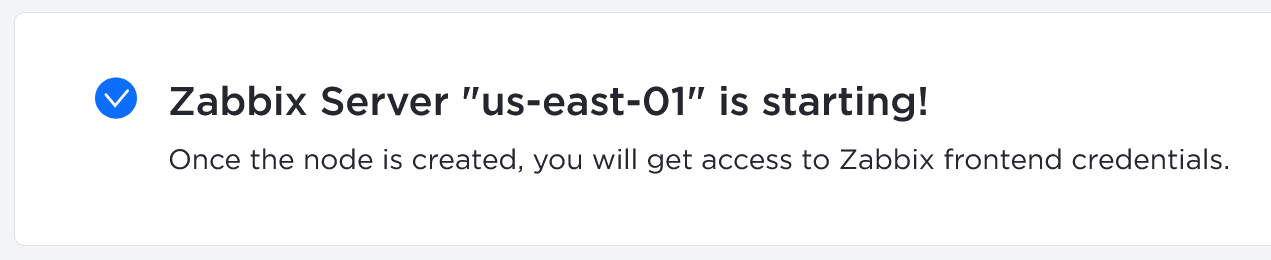
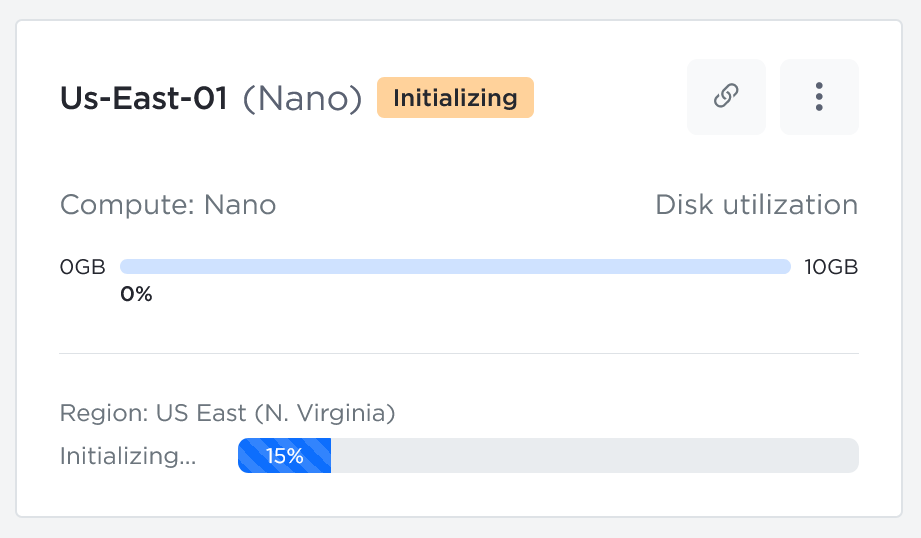
填写完表单后,点击 Create New Node。节点初始化时会显示相应消息,并且该节点已经会出现在 Organizations 下。
开始使用 Zabbix
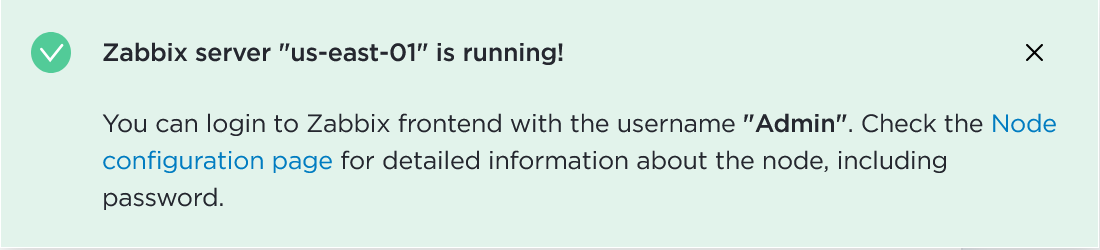
当节点状态从 Initializing 变为 Running 时,您就可以登录 Zabbix 前端。
要获取初始前端密码,请点击已创建的节点。
系统将带您进入节点 settings(概览、访问过滤器、加密、备份等)。在 Connection info 中,点击 Password settings,然后从下拉菜单中选择 Copy initial password。
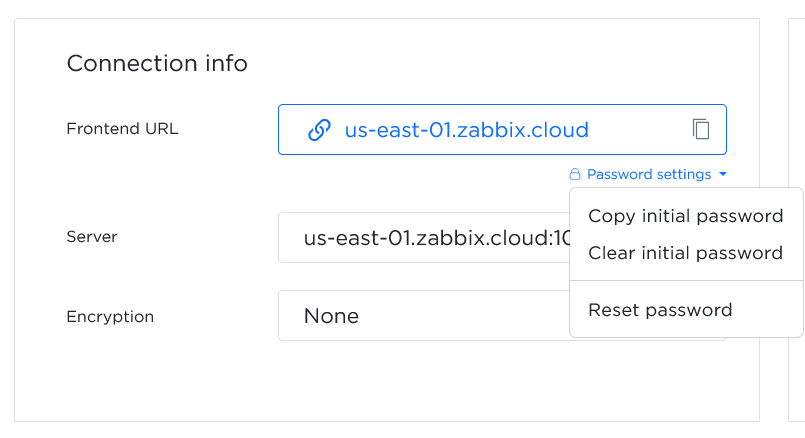
点击前端 URL 以打开 Zabbix 前端(us-east-01.zabbix.cloud)。
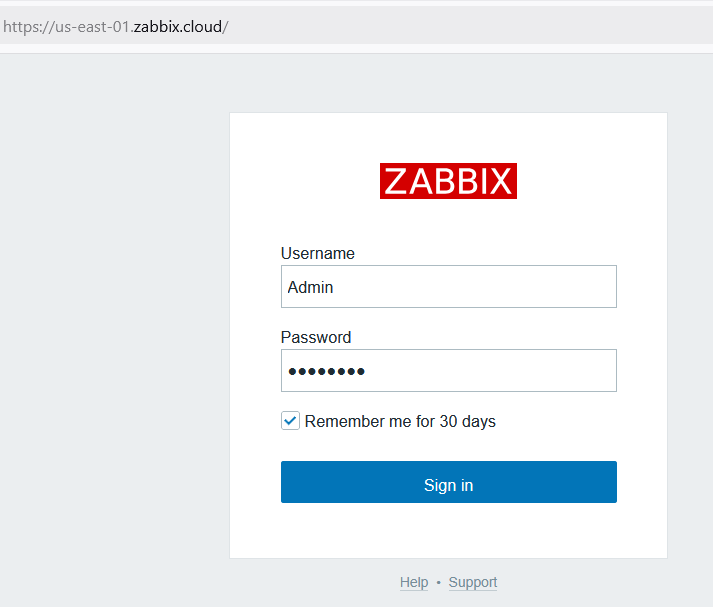
使用以下凭据登录:
- Username -
Admin - Password - 提供初始密码(例如,HzTG9t7Y)
要开始监控,您需要定义 access filters - 允许连接到 Zabbix 云服务器的 IP 地址或多个地址。至少必须定义一个。
组织管理
组织是一个包含一个或多个节点的容器。
组织还可帮助您构建资源结构并委派职责,例如:
- 节点管理
- 计费
当您登录 Zabbix Cloud 时,将显示 所有组织 页面。
默认情况下,会为您的账户创建一个私有组织。
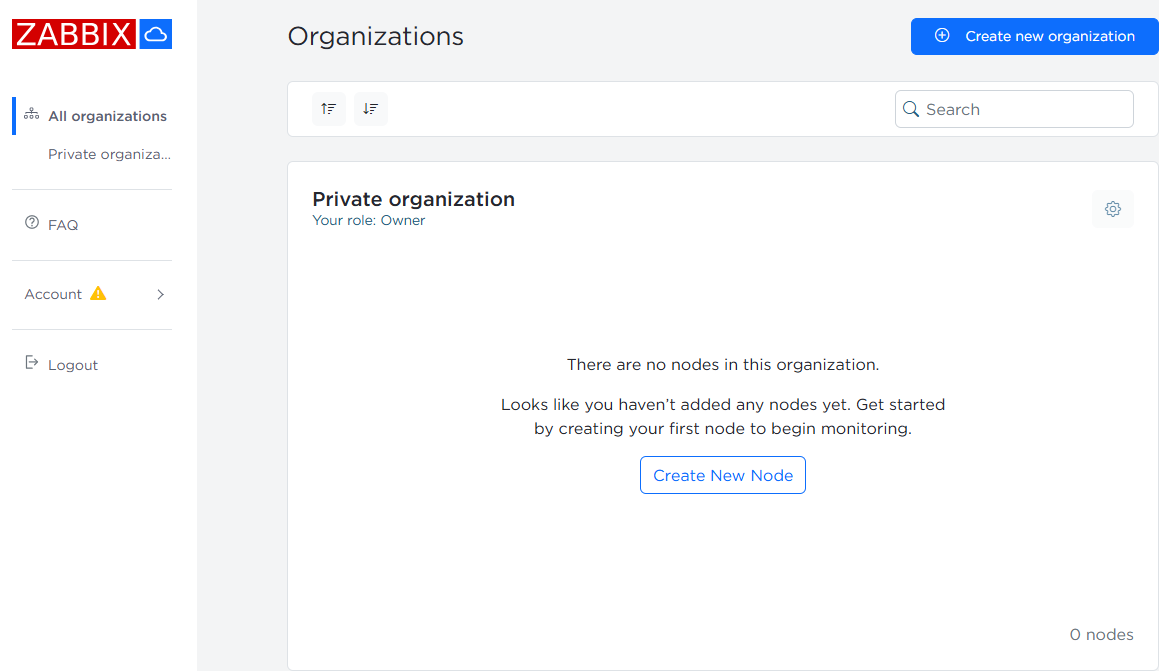
作为该组织的所有者,您可以管理用户、管理员、节点以及组织名称。
单击 ![]() 设置按钮以访问管理选项。
设置按钮以访问管理选项。