
11 SAML setup with Microsoft Entra ID
Overview
This section provides guidelines for configuring single sign-on into Zabbix from Microsoft Entra ID (formerly Microsoft Azure Active Directory) using SAML 2.0 authentication.
Note that for single sign-on to work its username must exist in Zabbix, however, its Zabbix password will not be used. If authentication is successful, then Zabbix will match a local username with the username attribute returned by SAML.
Microsoft Entra ID configuration
Creating application
1. Log into Microsoft Entra admin center at Microsoft Entra ID. For testing purposes, you may create a free trial account in Microsoft Entra ID.
2. In Microsoft Entra admin center select Applications -> Enterprise applications -> New application -> Create your own application.
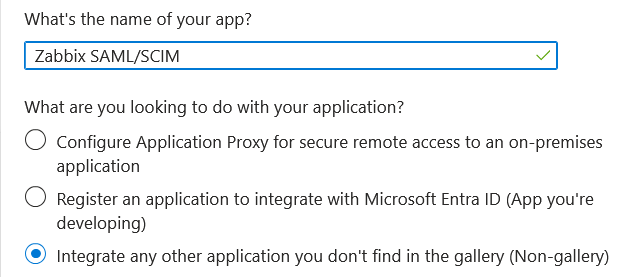
3. Add the name of your app and select the Integrate any other application... option. After that, click on Create.
Setting up single sign-on
1. In your application page, go to Set up single sign on and click on Get started. Then select SAML.
2. Edit Basic SAML Configuration:
- In Identifier (Entity ID) set a unique name to identify your app to Microsoft Entra ID, for example,
zabbix; - In Reply URL (Assertion Consumer Service URL) set the Zabbix single sign-on endpoint:
https://<path-to-zabbix-ui>/index_sso.php?acs:

Note that "https" is required. To make that work with Zabbix, it is necessary to add to conf/zabbix.conf.php the following line:
$SSO['SETTINGS'] = ['use_proxy_headers' => true];3. Edit Attributes & Claims. You must add the username attribute that you want to pass to Zabbix (user_email, in this case).
The attribute names are arbitrary. Different attribute names may be used, however, it is required that they match the respective field value in Zabbix SAML settings.
- Click on Add new claim to add an attribute:

4. In SAML Certificates download the Base64 certificate provided by Entra ID and place it into conf/certs of the Zabbix frontend installation.
Set 644 permissions to it by running:
chmod 644 entra.cerMake sure that conf/zabbix.conf.php contains the line:
$SSO['IDP_CERT'] = 'conf/certs/entra.cer';5. Use the values from Set up <your app name> in Entra ID to configure Zabbix SAML authentication (see next section):

Zabbix configuration
1. In Zabbix, go to the SAML settings and fill the configuration options based on the Entra ID configuration:
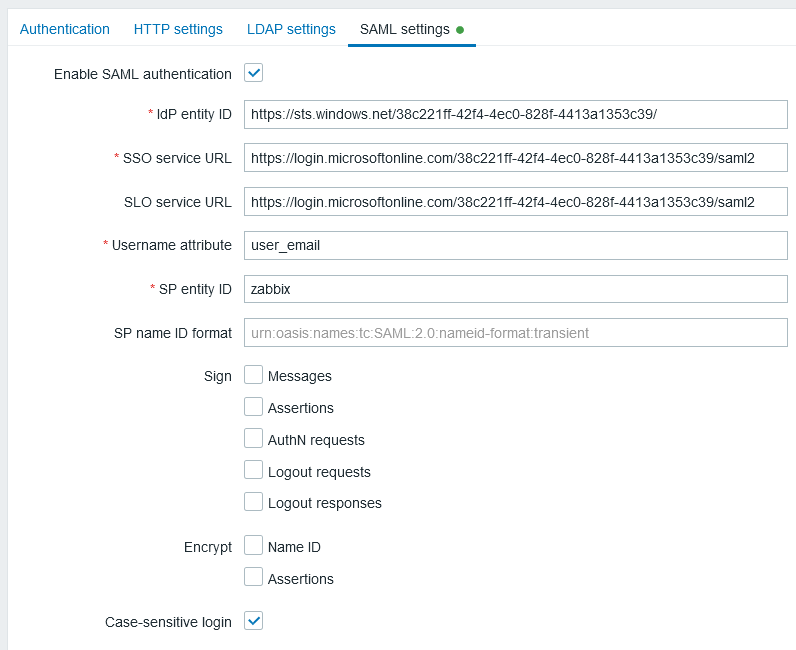
| Zabbix field | Setup field in Entra ID | Sample value |
|---|---|---|
| IdP entity ID | Microsoft Entra identifier | |
| SSO service URL | Login URL | |
| SLO service URL | Logout URL | |
| SP entity ID | Identifier (Entity ID) | |
| Username attribute | Custom attribute (claim) | user_email |
Click on Update to save these settings.
Authentication request signing
It is possible to configure Entra ID to validate the signature of signed authentication requests.
To make this work, create public/private keys:
openssl req -x509 -newkey rsa:4096 -keyout /usr/share/zabbix/conf/certs/request-sign.key -out /usr/share/zabbix/conf/certs/request-sign.pem -sha256 -days 1825 -nodesAssign permissions:
chown apache /usr/share/zabbix/conf/certs/request-sign.key
chmod 400 /usr/share/zabbix/conf/certs/request-sign.key
Update Zabbix frontend configuration by adding:
$SSO['SP_KEY'] = 'conf/certs/request-sign.key';
$SSO['SP_CERT'] = 'conf/certs/request-sign.crt';
Troubleshooting
Authentication issues may occur with MicroSoft Edge browsers when a user, trying to login to Zabbix via SAML, is already logged in with the MicroSoft Edge profile. As a sign of such issue the user may be able to log in to Zabbix using MicroSoft Edge in private mode.
To avoid authentication issues in this case it may be necessary to set requestedAuthnContext to "false" in the Zabbix frontend configuration file (zabbix.conf.php).
$SSO['SETTINGS'] = [
    'security' => [
        'requestedAuthnContext' => false
    ]
];