
Node configuration
Overview
A cloud node is a Zabbix component deployed in the cloud. Server nodes include the Zabbix server, database, and web frontend, while proxy nodes include the Zabbix proxy and database. A cloud node has dedicated computing resources (CPU, memory) and disk storage.
Users may create one or more cloud nodes. Cloud nodes can be grouped into organizations (structural, regional, etc), creating a distributed monitoring setup.
Cloud nodes and organizations are created using the Zabbix Cloud user interface. To access the node configuration page, click the node from All organizations, your organization menu, or the Node configuration page link shown after the node is launched.
In the node configuration view, each tab lets you manage a specific aspect of your node:
- Overview - view node details, open its frontend, and manage node users.
- Access filters - control access by IP address or subnet.
- Encryption - configure TLS by uploading certificates, keys, and optional CRLs.
- Backups - create, restore, and delete node snapshots; view the next scheduled backup.
- History - set retention periods for audit logs, history, and trends, with preset units and a 3x/day update limit.
- Maintenance - define weekly maintenance windows by time zone, day, and hour.
- Upgrade - scale compute/storage resources or manage your trial/payment status.
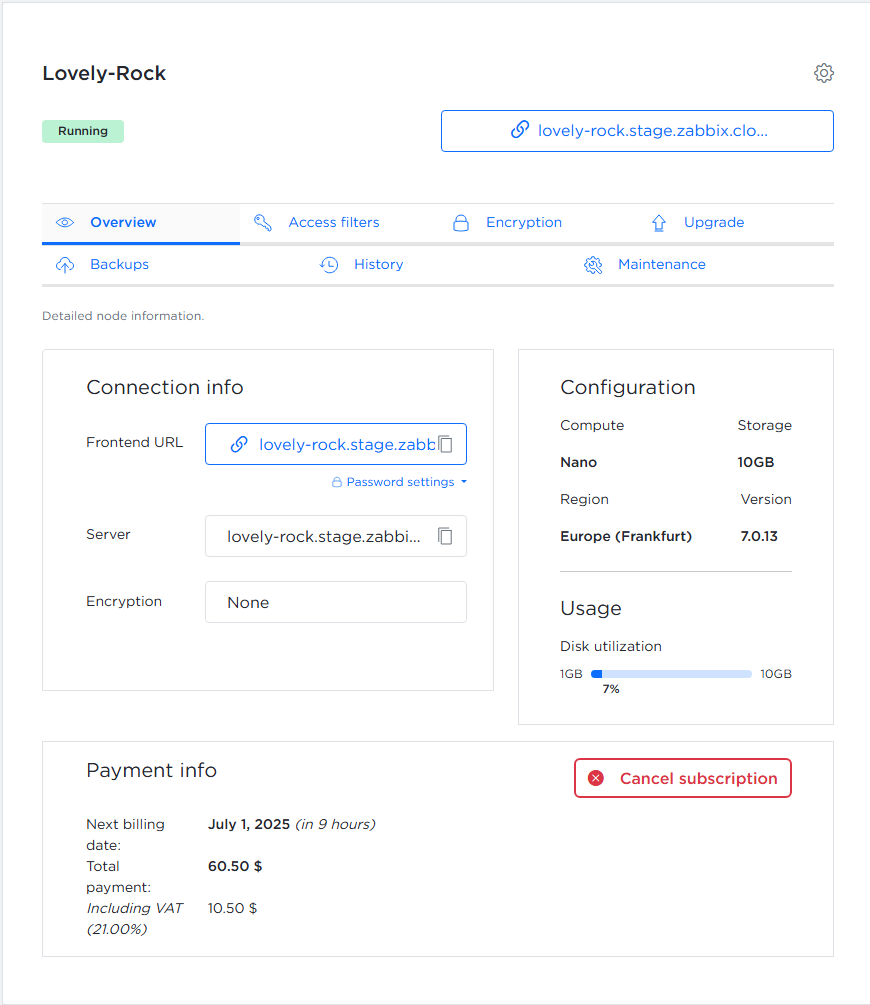
Some tabs may be unavailable depending on the node type (server or proxy), type of user who views the page and node status (trial/non-trial).
Overview tab
The Overview tab provides detailed information about the node. The information displayed depends on whether the node is a server or proxy.
Server node
The Overview tab for the server node contains the following sections:
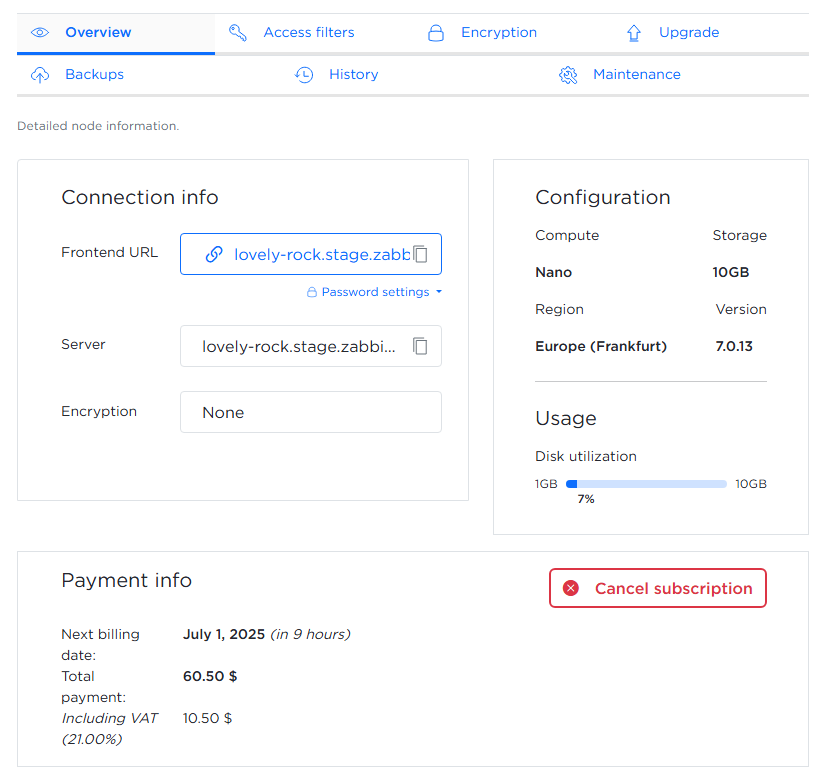
Connection info:
- Clickable frontend URL with a copy-to-clipboard option
- Username
- Node password and its settings
- Server hostname with a copy-to-clipboard option
- IPv4 address with a copy-to-clipboard option
- IPv6 address with a copy-to-clipboard option
- Current encryption method
Configuration and usage:
- Compute tier, maximum storage, region
- Zabbix components version
- Disk utilization
Node info/Payment Info:
- Expiration date (for trial and prepaid nodes)
- A context-specific button is shown depending on the node type after the node completes initialization:
- Upgrade to paid - available for nodes on a free trial
- Cancel subscription - available for paid nodes with an active subscription
- Resubscribe to paid - shown if a subscription has been canceled
- No action button is displayed for prepaid nodes, which have long validity and cannot be canceled
Proxy node
The Overview tab for the proxy node contains the following sections:
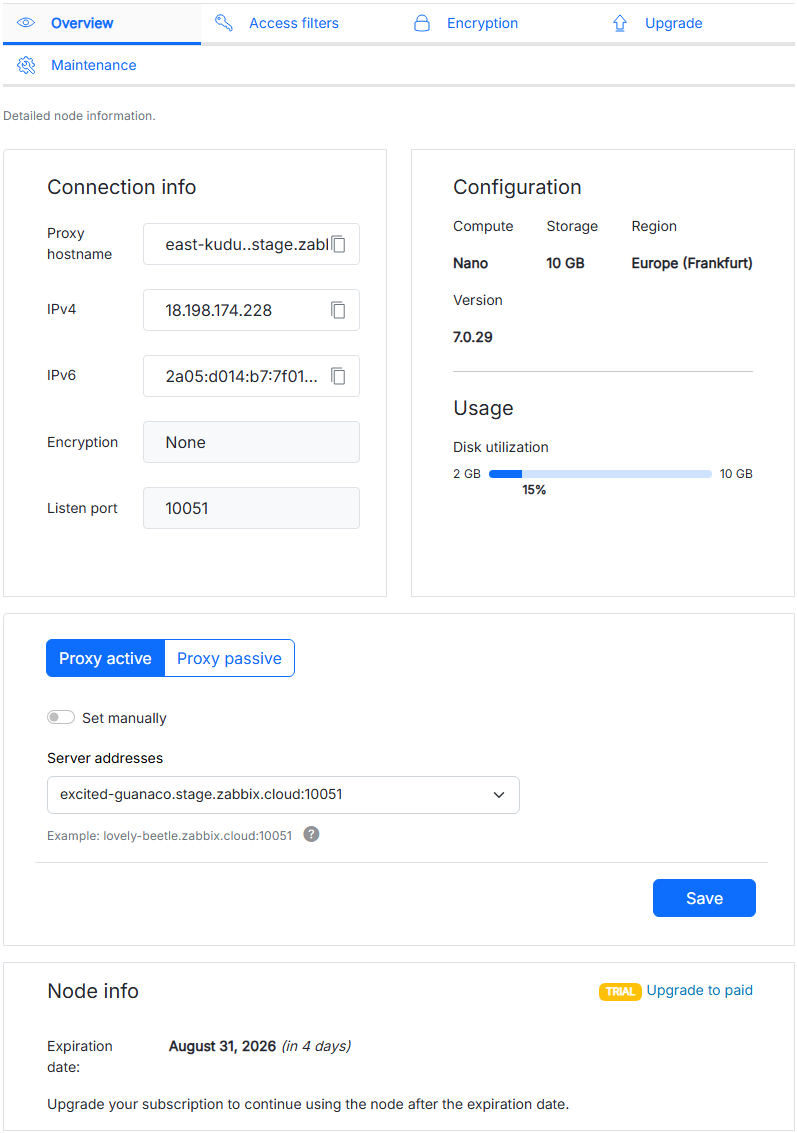
Connection info:
- Proxy hostname with a copy-to-clipboard option
- IPv4 address with a copy-to-clipboard option
- IPv6 address with a copy-to-clipboard option
- Current encryption method
- Current listen port
Configuration and usage:
- Compute tier, maximum storage, region
- Zabbix components version
- Disk utilization
Proxy mode:
- Switch between active and passive proxy modes
- Select the server address from the Server addresses dropdown, or enable Set manually to enter the server address manually
Node info/Payment Info:
- Expiration date (for trial and prepaid nodes)
- A context-specific button is shown depending on the node type after the node completes initialization:
- Upgrade to paid - available for nodes on a free trial
- Cancel subscription - available for paid nodes with an active subscription
- Resubscribe to paid - shown if a subscription has been canceled
- No action button is displayed for prepaid nodes, which have long validity and cannot be canceled
Access filters tab
The Access filters tab lets you restrict access to your Zabbix node by IP address or subnet.
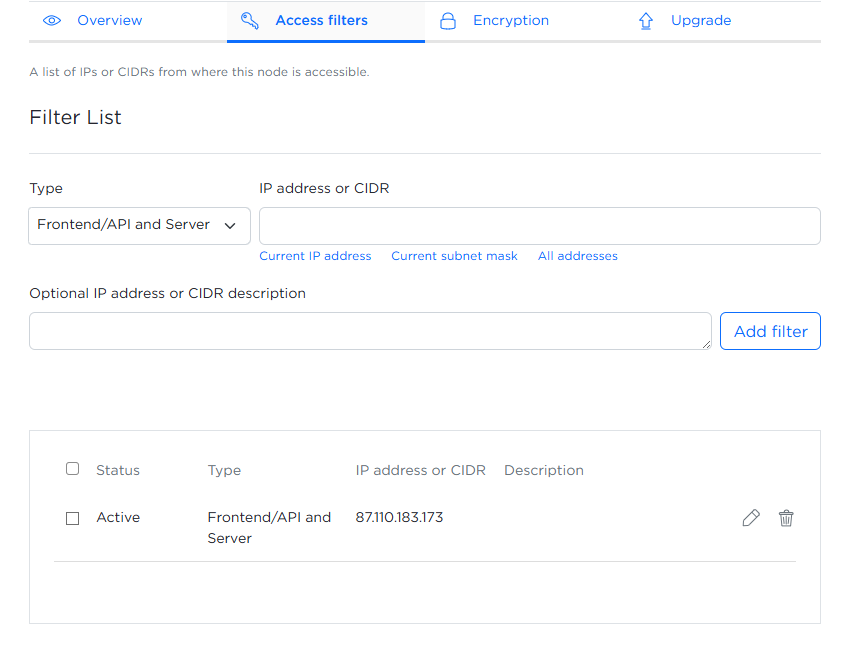
To configure an access filter, complete the following fields:
- Type - for server nodes, use the dropdown to choose which Zabbix component to limit: frontend/API only, server only, or both. For proxy nodes, only Inbound IP is available. It defines which incoming network requests are allowed to reach the proxy.
- IP address or CIDR - enter the IP address or CIDR manually, or complete the field automatically by selecting the relevant option.
- Optional IP address or CIDR description - add an optional description for each IP or subnet.
After completing the fields, click Add filter. Added filters appear in the table below, showing status, type, IP address or subnet, and description.
During node initialization, an access filter is automatically created for the IP address you used. If you later connect from a different IP or network, you must add that address here or you will be blocked.
You can:
 - edit a filter.
 - delete a filter or multiple filters using the checkboxes.
Encryption tab
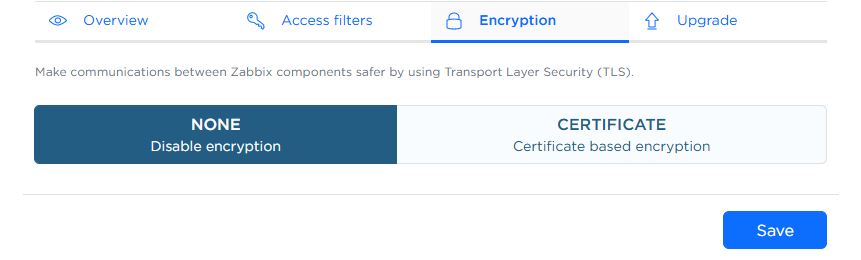
The Encryption tab lets you configure TLS encryption for communication between Zabbix components by uploading the required certificate files.
To enable secure communication using certificates, select CERTIFICATE and upload the following files from your computer:
- Root CA certificates - trusted CA certificates used to verify peer certificates.
Click Choose file and select the file containing trusted Root CA certificates (typically a
.crtor.pemfile, PEM-encoded). - Certificate chain - represents the chain of trust for your own certificate.
Click Choose file and select the PEM-encoded file (e.g.,
.crtor.pem) that includes your certificate and any intermediate CA certificates. - Private key - the private key corresponding to your certificate.
Click Choose file and select the PEM-encoded
.keyfile. - Revoked certificates (optional) - if you maintain a Certificate Revocation List (CRL), click Choose file and select the CRL file to specify certificates that should no longer be trusted.
After selecting the files, click Save. The files will be uploaded, validated, and applied to configure TLS encryption between Zabbix components.
Backups tab
The Backups tab lets you view, create, restore, and delete backups of your Zabbix node.
You can restore your instance from any saved backup or create a new manual backup at any time. The tab also shows the date of the next scheduled backup.
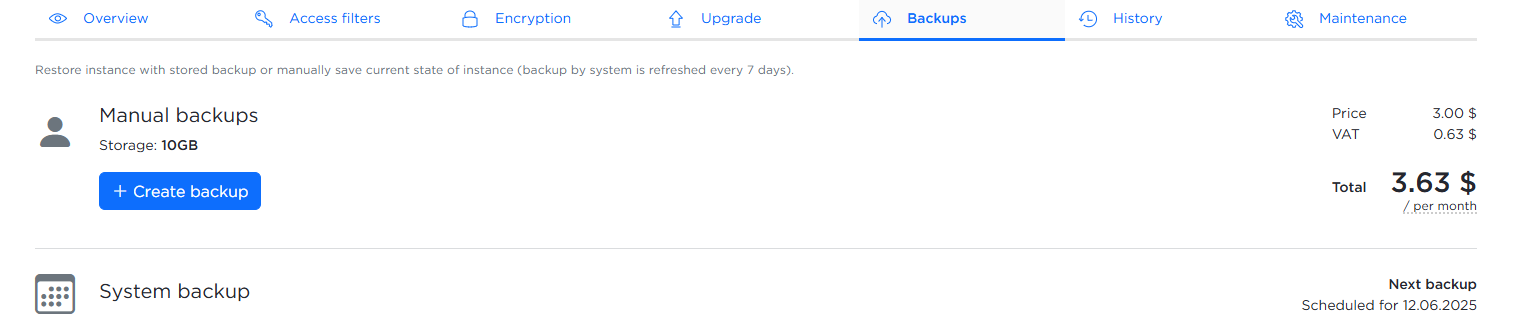
To create a backup:
- Click Create backup button.
- Enter an optional description in the popup window.
- Click Create to confirm.
Additional backups are charged monthly based on storage usage.
History tab
The History tab lets you configure how long different types of historical data are stored.
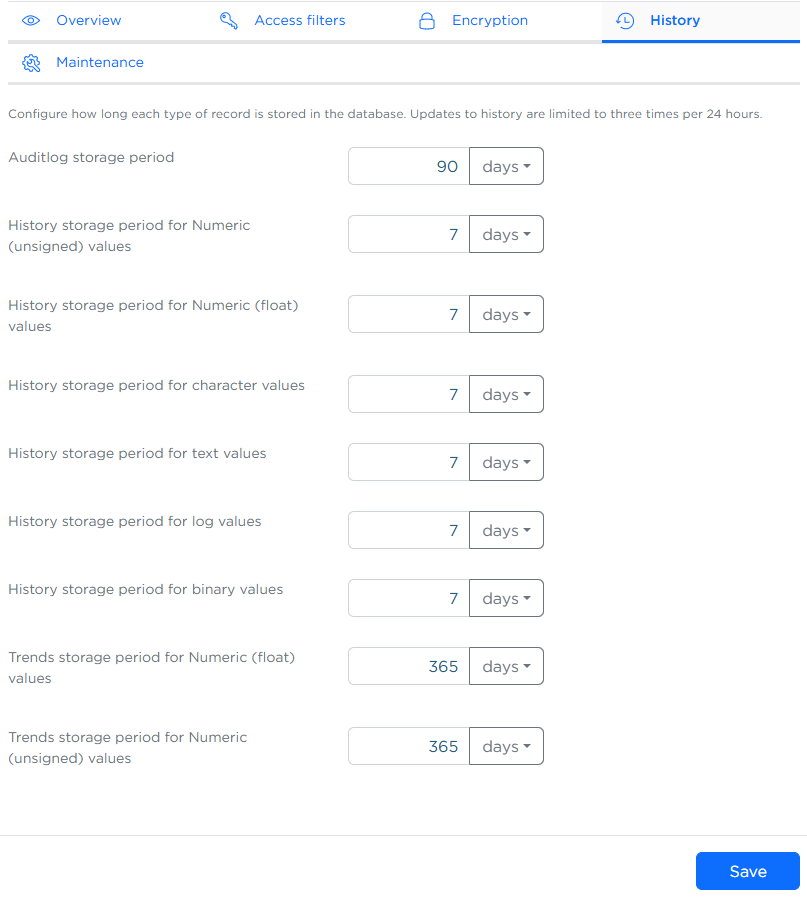
You can set the storage period for each data type (e.g., numeric, text, logs) and choose the unit (days, months, years). Changes can be made up to three times every 24 hours.
After updating the values, click Save to apply the changes.
Longer retention periods can increase disk usage and may impact performance.
It is recommended to configure retention periods based on your actual data and analysis needs.
Zabbix Cloud uses database partitioning to manage data storage instead of traditional Zabbix housekeeping.
This enables faster performance and more predictable retention handling.
Maintenance tab
The Maintenance tab lets you define acceptable maintenance windows when updates or adjustments can be performed on your node.
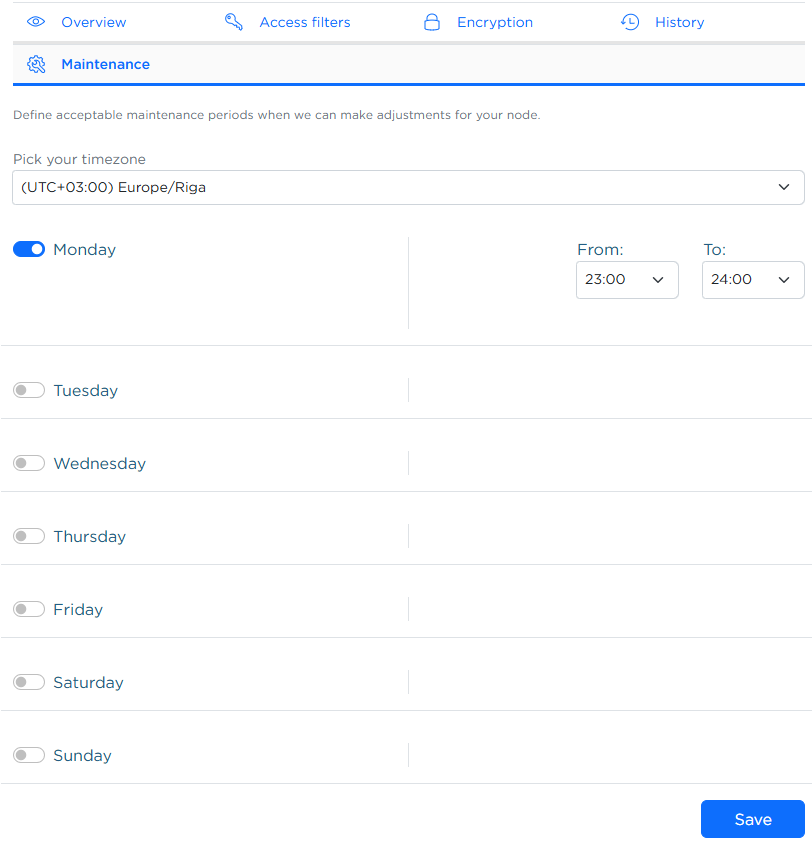
You must:
- Select your time zone from the dropdown.
- Choose at least one day and one hourly window for maintenance.
Click Save to apply changes.
If no day or time window is selected, an error will be displayed.

Upgrade tab
The Upgrade tab lets you scale your node's resources or manage its subscription.
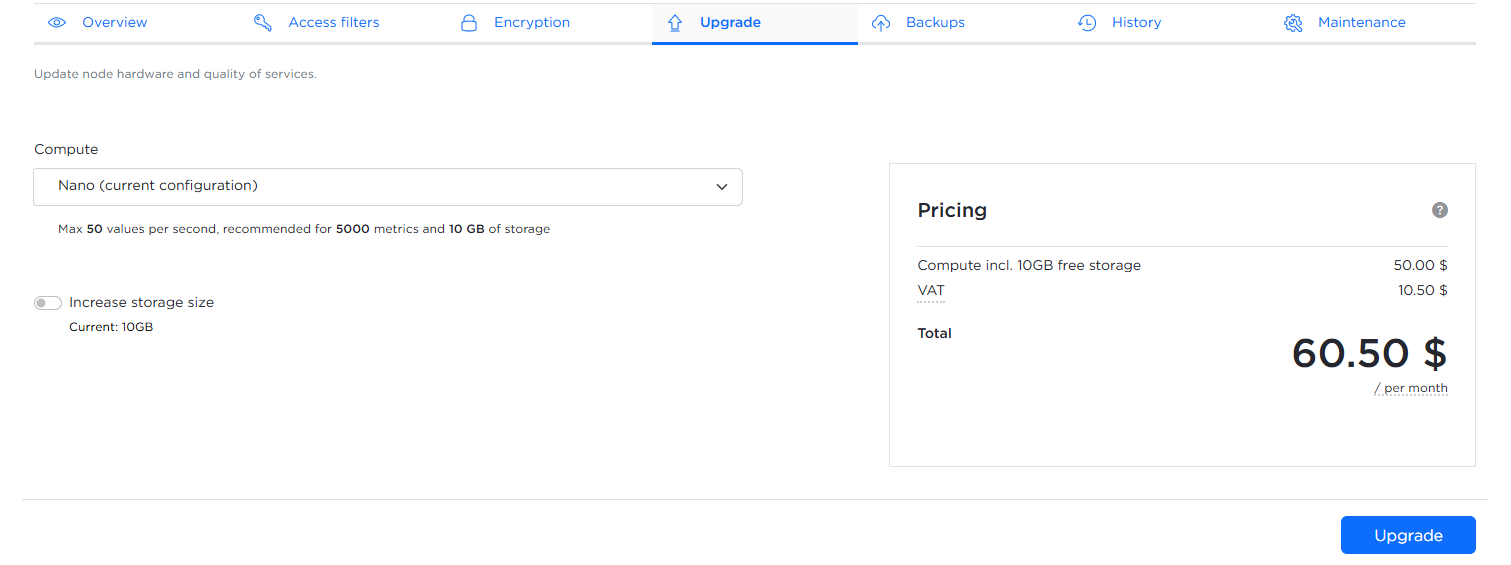
You may increase the compute tier or disk size. Note that disk size can only be increased once every 24 hours and cannot be reduced via the UI (contact Zabbix support for any shrink requests). Free-trial nodes can be converted to paid subscriptions.
To increase compute tier:
1. Click the Compute dropdown.
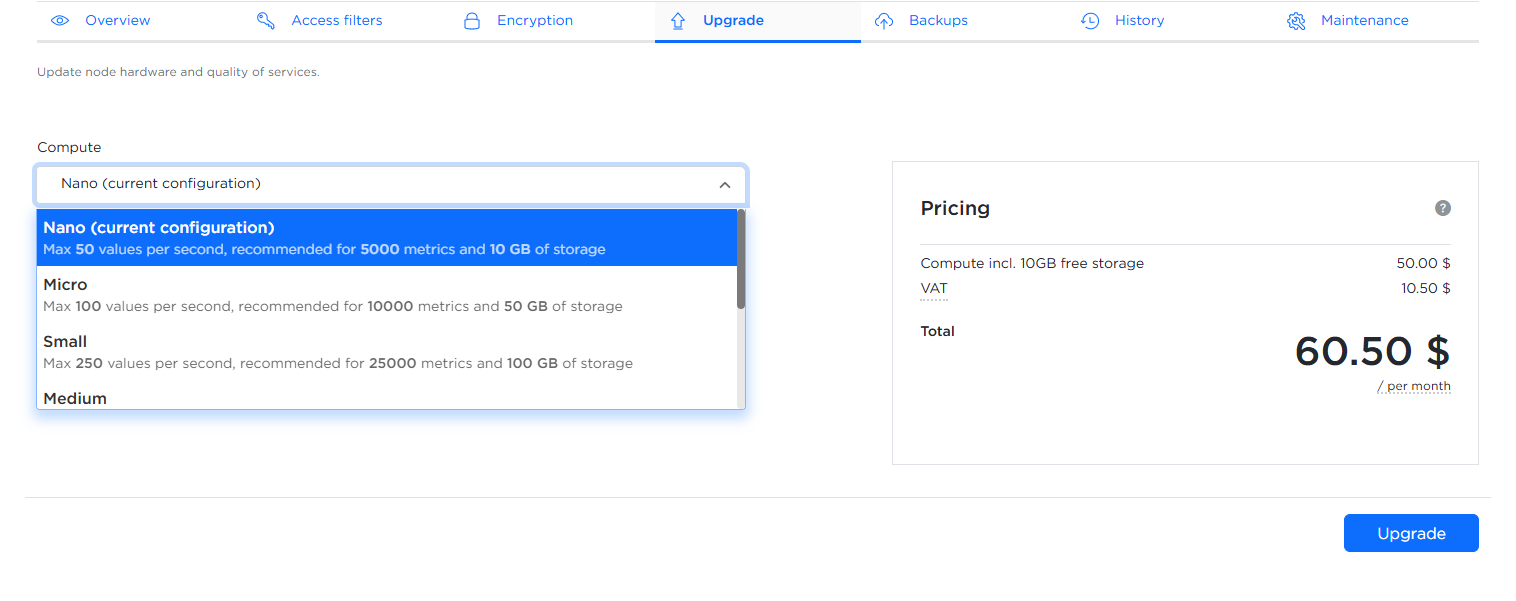
2. Select desired configuration tier.
3. Click Upgrade button.
To increase disk size:
1. Click Increase storage size radiobutton.
2. Adjust the Disk size slider to the desired value.
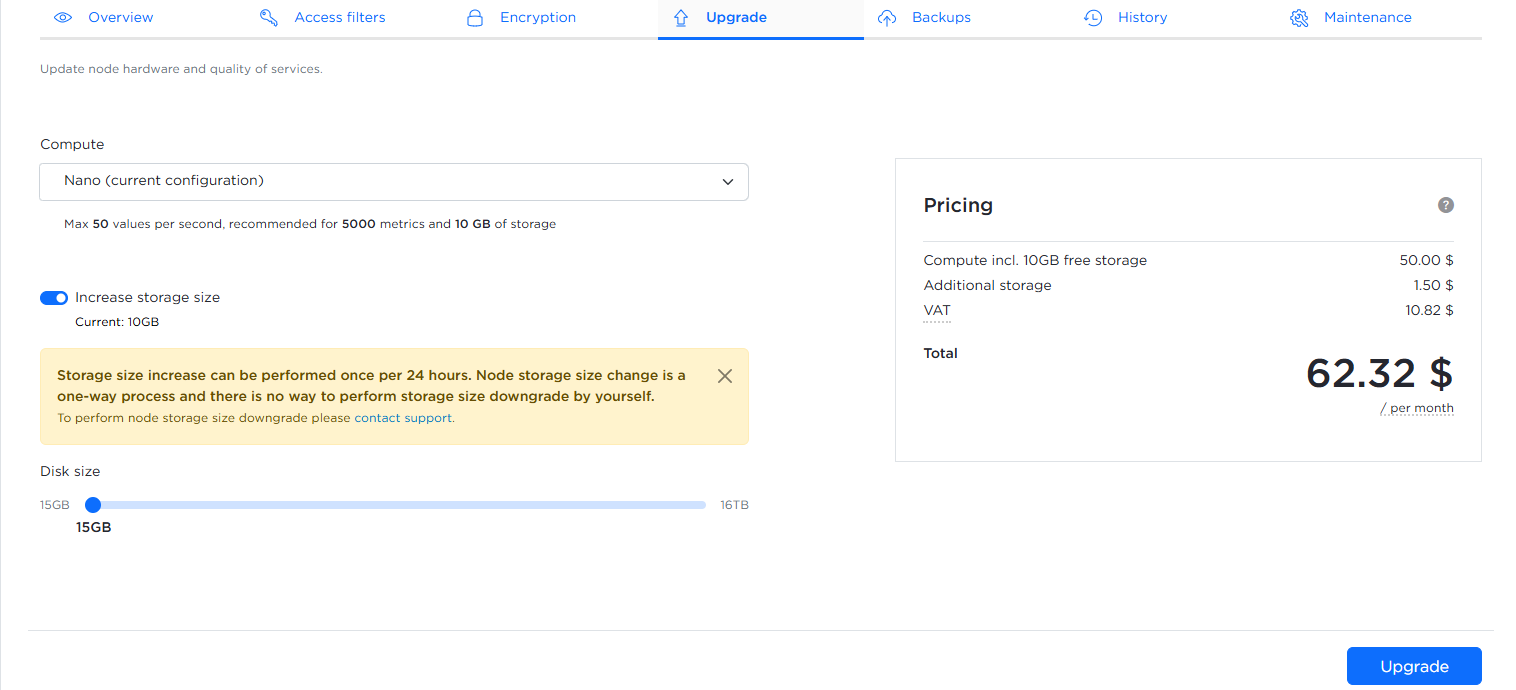
3. Click Upgrade.
The updated total monthly price is shown in the Pricing table before confirming changes.