
Configuração de SAML com OneLogin
Visão geral
Esta seção fornece diretrizes para configurar o login único e o provisionamento de usuários no Zabbix a partir do OneLogin usando autenticação SAML 2.0.
Configuração do OneLogin
Criando application
1. Faça login na sua conta no OneLogin. Para fins de teste, você pode criar uma conta gratuita de desenvolvedor no OneLogin.
2. Na interface web do OneLogin, navegue até Applications > Applications.
3. Clique em "Add App" e pesquise o app apropriado. As diretrizes nesta página são baseadas no exemplo de app SCIM Provisioner with SAML (SCIM v2 Enterprise, full SAML).
4. Para começar, talvez você queira personalizar o nome de exibição do seu app. Você também pode querer adicionar o ícone e os detalhes do app. Depois disso, clique em Save.
Configurando o provisionamento SSO/SCIM
1. Em Configuration > Application details, defina o endpoint de single sign-on do Zabbix http://<zabbix-instance-url>/zabbix/index_sso.php?acs como valor destes campos:
- ACS (Consumer) URL Validator
- ACS (Consumer) URL
Observe o uso de "http", e não "https", para que o parâmetro acs não seja removido na requisição.

Também é possível usar "https".
Para que isso funcione com o Zabbix, é necessário adicionar a conf/zabbix.conf.php a seguinte linha:
$SSO['SETTINGS'] = ['use_proxy_headers' => true];Deixe as demais opções com seus valores padrão.
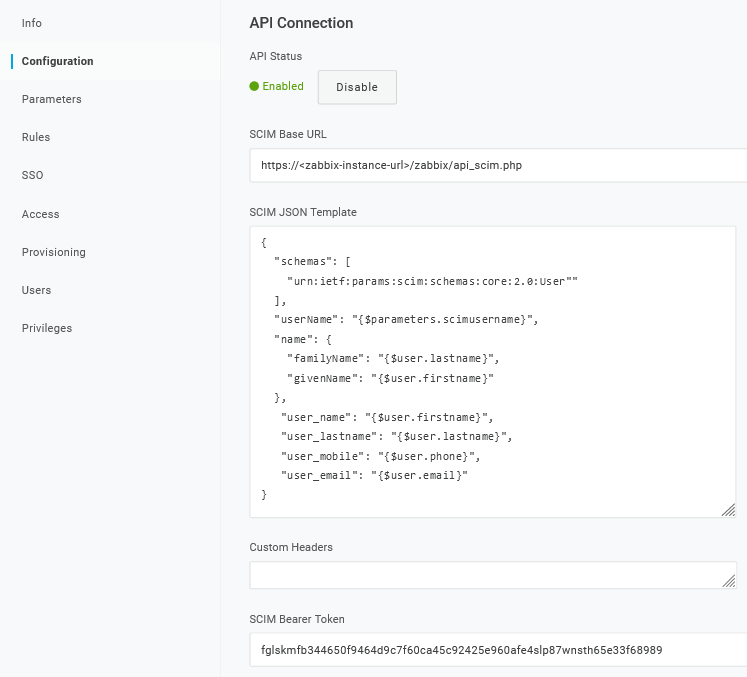
2. Em Configuration > API connection, defina os seguintes valores:
- SCIM Base URL:
https://<zabbix-instance-url>/zabbix/api_scim.php - SCIM JSON Template: deve conter todos os atributos personalizados que você deseja enviar ao Zabbix via SCIM, como
user_name,user_lastname,user_emaileuser_mobile:
{
  "schemas": [
    "urn:ietf:params:scim:schemas:core:2.0:User"
  ],
  "userName": "{$parameters.scimusername}",
  "name": {
    "familyName": "{$user.lastname}",
    "givenName": "{$user.firstname}"
  },
   "user_name": "{$user.firstname}",
   "user_lastname": "{$user.lastname}",
   "user_mobile": "{$user.phone}",
   "user_email": "{$user.email}"
}
Os nomes dos atributos são arbitrários. Podem ser usados nomes de atributos diferentes; no entanto, é necessário que eles correspondam ao respectivo valor de campo nas configurações SAML do Zabbix.
Observe que, para o provisionamento de usuários funcionar, o OneLogin precisa receber em resposta um atributo 'name' com 'givenName' e 'familyName', mesmo que isso não seja exigido pelo provedor de serviço. Portanto, é necessário especificar isso no schema na parte de configuração da aplicação.
- SCIM Bearer Token: insira um token da API do Zabbix com permissões de Super admin.
Clique em Enable para ativar a conexão.
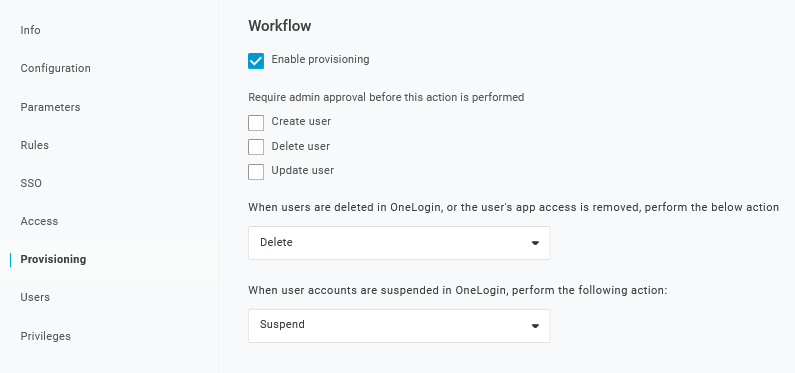
3. Na página Provisioning, habilite a opção Provisioning:
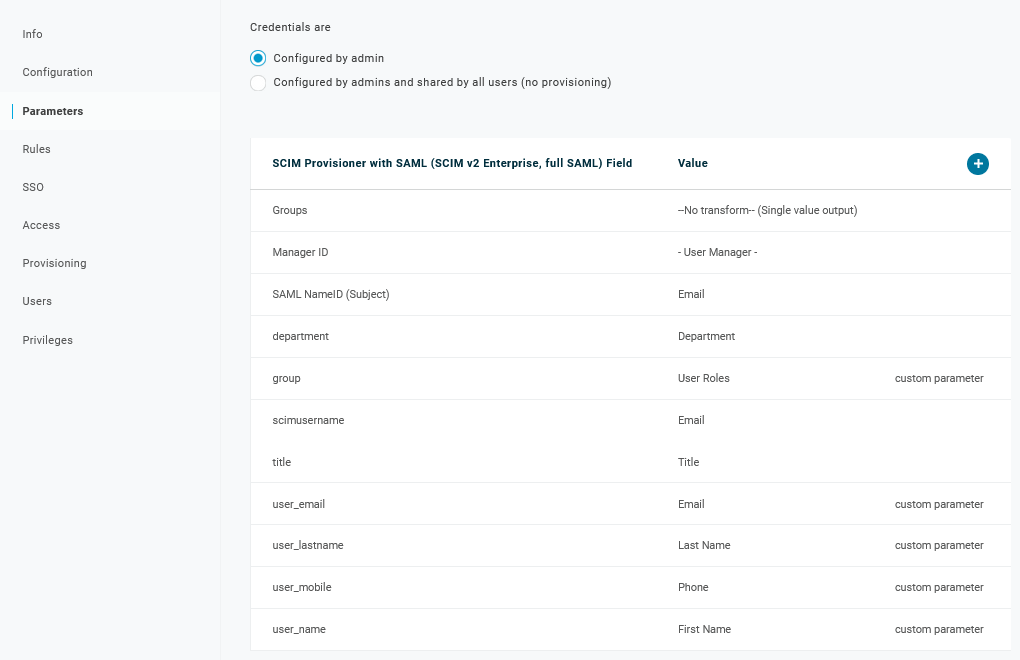
4. A página Parameters contém uma lista de parâmetros padrão:
- Certifique-se de que 'scimusername' corresponda ao valor de login do usuário no OneLogin (por exemplo, e-mail);
- Marque a opção Include in User Provisioning para o parâmetro 'Groups';
- Clique em "+" para criar os parâmetros personalizados necessários para as asserções SAML e o provisionamento de usuários, como
user_name,user_lastname,user_emaileuser_mobile:

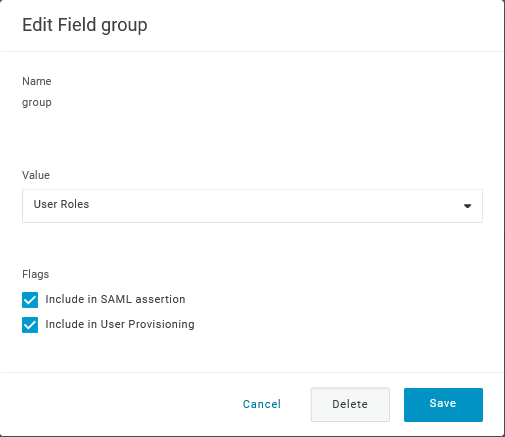
Ao adicionar um parâmetro, certifique-se de marcar as opções Include in SAML assertion e Include in User Provisioning.
- Adicione um parâmetro 'group' que corresponda às funções do usuário no OneLogin.
As funções do usuário serão enviadas como uma string, separada por ponto e vírgula
;. As funções do usuário no OneLogin serão usadas para criar grupos de usuários no Zabbix:
Verifique a lista de parâmetros:
5. Na página Rules, crie mapeamentos de funções de usuário para o parâmetro Groups padrão.
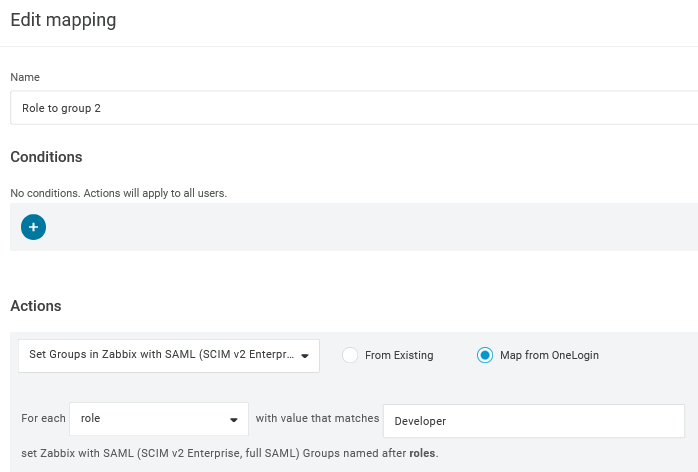
Você pode usar uma expressão regular para enviar funções específicas como grupos.
Os nomes das funções não devem conter ;, pois o OneLogin o usa como separador ao enviar um atributo com várias funções.
6. Baixe o certificado do IdP. Defina permissões 644 para ele executando:
chmod 644 idp.crtConfiguração do Zabbix
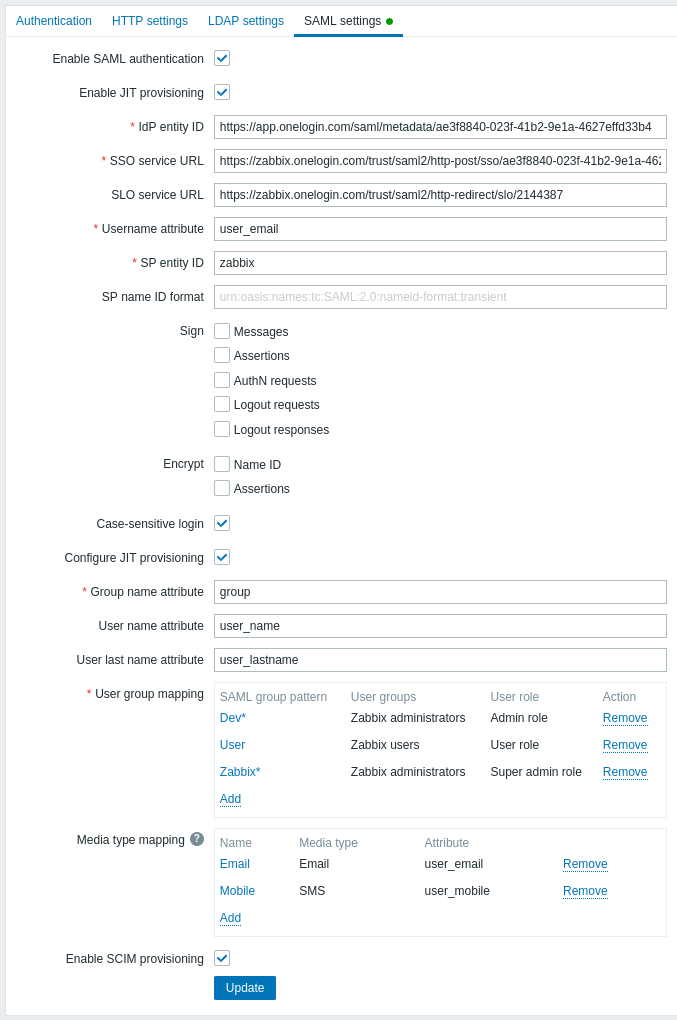
1. No Zabbix, acesse as configurações de SAML e preencha as opções de configuração com base na configuração do OneLogin:
| Campo do Zabbix | Campo de configuração no OneLogin | Valor de exemplo |
|---|---|---|
| IdP entity ID | Issuer URL (veja a aba SSO do seu aplicativo no OneLogin) |
|
| SSO service URL | SAML 2.0 Endpoint (HTTP) (veja a aba SSO do seu aplicativo no OneLogin) |
|
| SLO service URL | SLO Endpoint (HTTP) (veja a aba SSO do seu aplicativo no OneLogin) |
|
| Username attribute | Custom parameter | user_email |
| Group name attribute | Custom parameter | group |
| User name attribute | Custom parameter | user_name |
| User last name attribute | Custom parameter | user_lastname |
Também é necessário configurar o mapeamento de grupos de usuários. O mapeamento de mídia é opcional. Clique em Update para salvar essas configurações.
2. Adicione o certificado Base64 fornecido pelo OneLogin.
Se $SSO['CERT_STORAGE'] = 'database' estiver definido em zabbix.conf.php, você pode colar o texto do certificado ou enviar o arquivo do certificado no frontend durante a configuração de SAML — nenhum arquivo é necessário no sistema de arquivos.
Se $SSO['CERT_STORAGE'] = 'file' estiver definido em zabbix.conf.php, o certificado deve estar disponível no sistema de arquivos (por padrão em ui/conf/certs ou no caminho configurado em zabbix.conf.php) e o frontend não armazenará certificados no banco de dados.
Observe que, se $SSO['CERT_STORAGE'] não estiver definido ou estiver comentado, o armazenamento em arquivo será assumido e os certificados serão lidos de ui/conf/certs.
Você pode acessar o download do certificado no OneLogin em Applications > SSO > clique em View details abaixo do certificado atual.
3. Clique no botão Update para salvar essas configurações.
Provisionamento de usuários SCIM
Com o provisionamento de usuários habilitado, agora é possível adicionar/atualizar usuários e suas funções no OneLogin e tê-los provisionados imediatamente no Zabbix.
Por exemplo, você pode criar um novo usuário:
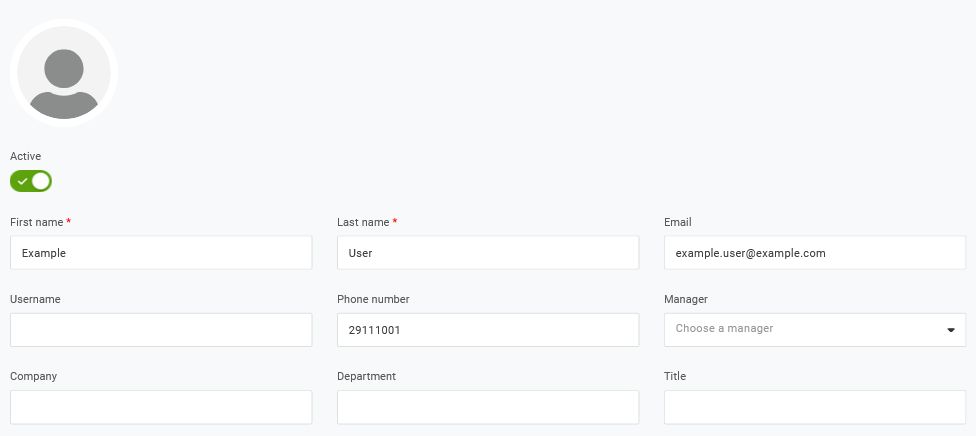
Adicione-o a uma função de usuário e à aplicação que fará o provisionamento do usuário:

Ao salvar o usuário, ele será provisionado no Zabbix. Em Application > Users, você pode verificar o status de provisionamento dos usuários atuais da aplicação:
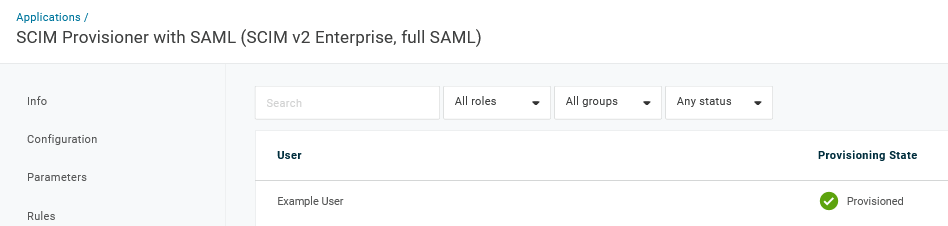
Se o provisionamento for bem-sucedido, o usuário poderá ser visto na lista de usuários do Zabbix.
