
このページで
14 マップナビゲーション
概要
このウィジェットを使用すると、既存のマップの階層を設定しながら各マップおよびマップグループの障害の統計を表示できます。
マップウィジェットをマップナビゲーションにリンクすると、さらに強力になります。 マップナビゲーションでマップ名をクリックするとマップウィジェットにマップ全体が表示されます。
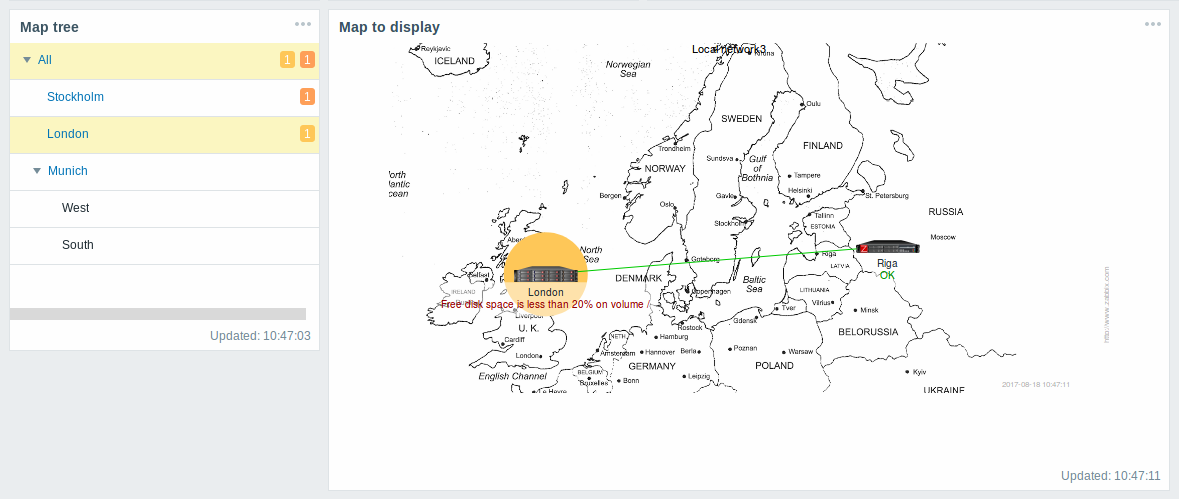
階層内の最上位マップを使用した統計では、すべてのサブマップの障害と障害の合計が表示されます。
設定
マップナビゲーションウィジェットを設定するには、タイプとしてマップナビゲーションを選択します。
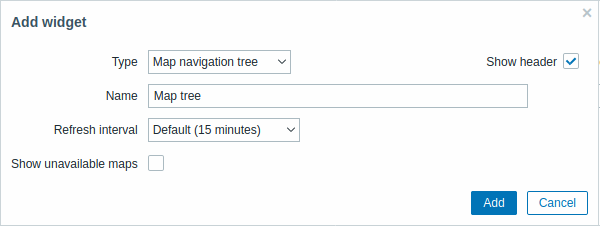
すべてのウィジェットの共通パラメーターに加えて、次のオプションを設定できます。
| 使用不可なマップの表示 | このチェックボックスをオンにすると、ユーザーが読み取り権限を持たないマップも表示されます。 ナビゲーションツリーで使用できないマップは、灰色のアイコンで表示されます。 注:このチェックボックスをオンにすると、使用可能なサブマップが表示されます。 親レベルマップが使用できない場合でも表示されます。 オフの場合、使用できない親マップへの使用可能なサブマップはまったく表示されません。 障害数は、使用可能なマップと使用可能なマップ要素に基づいて計算されます。 |
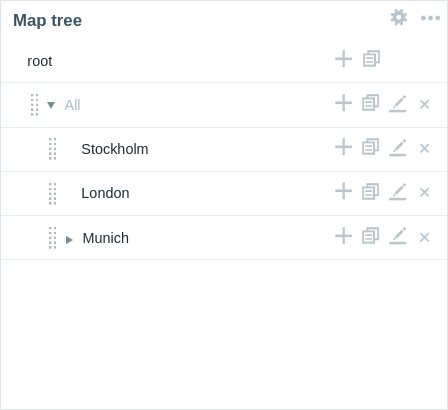
ナビゲーション ツリー要素はリストに表示されます。次の操作を実行できます:
- (子要素を含む)要素をリスト内の新しい場所にドラッグする。
- 要素を展開または折りたたんで子要素を表示または非表示にする。
- リンクマップ付き(またはリンクマップなし)の子要素を要素に追加する。
- (リンクマップを持つ)複数の子要素を要素に追加する。
- 要素を編集する。
- (子要素を含む)要素を削除する。
エレメント構成
ナビゲーション ツリー要素を構成するには、新しい要素を追加するか、既存の要素を編集します。
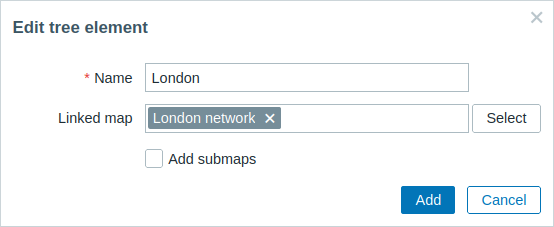
次のナビゲーション ツリー要素の構成パラメータが使用できます。
| 名前 | ナビゲーション ツリー要素名を入力します。 |
| リンクされたマップ | ナビゲーション ツリー要素にリンクするマップを選択します。 このフィールドは自動補完されるため、マップの名前を入力し始めると、一致するマップのドロップダウンが表示されます。 |
| サブマップを追加 | リンクされたマップのサブマップをナビゲーション ツリー要素の子要素として追加するには、このチェックボックスをオンにします |